If you want to update your app on the Apple App Store, you need to generate an up-to-date IPA file.
To create an IPA file for your app:
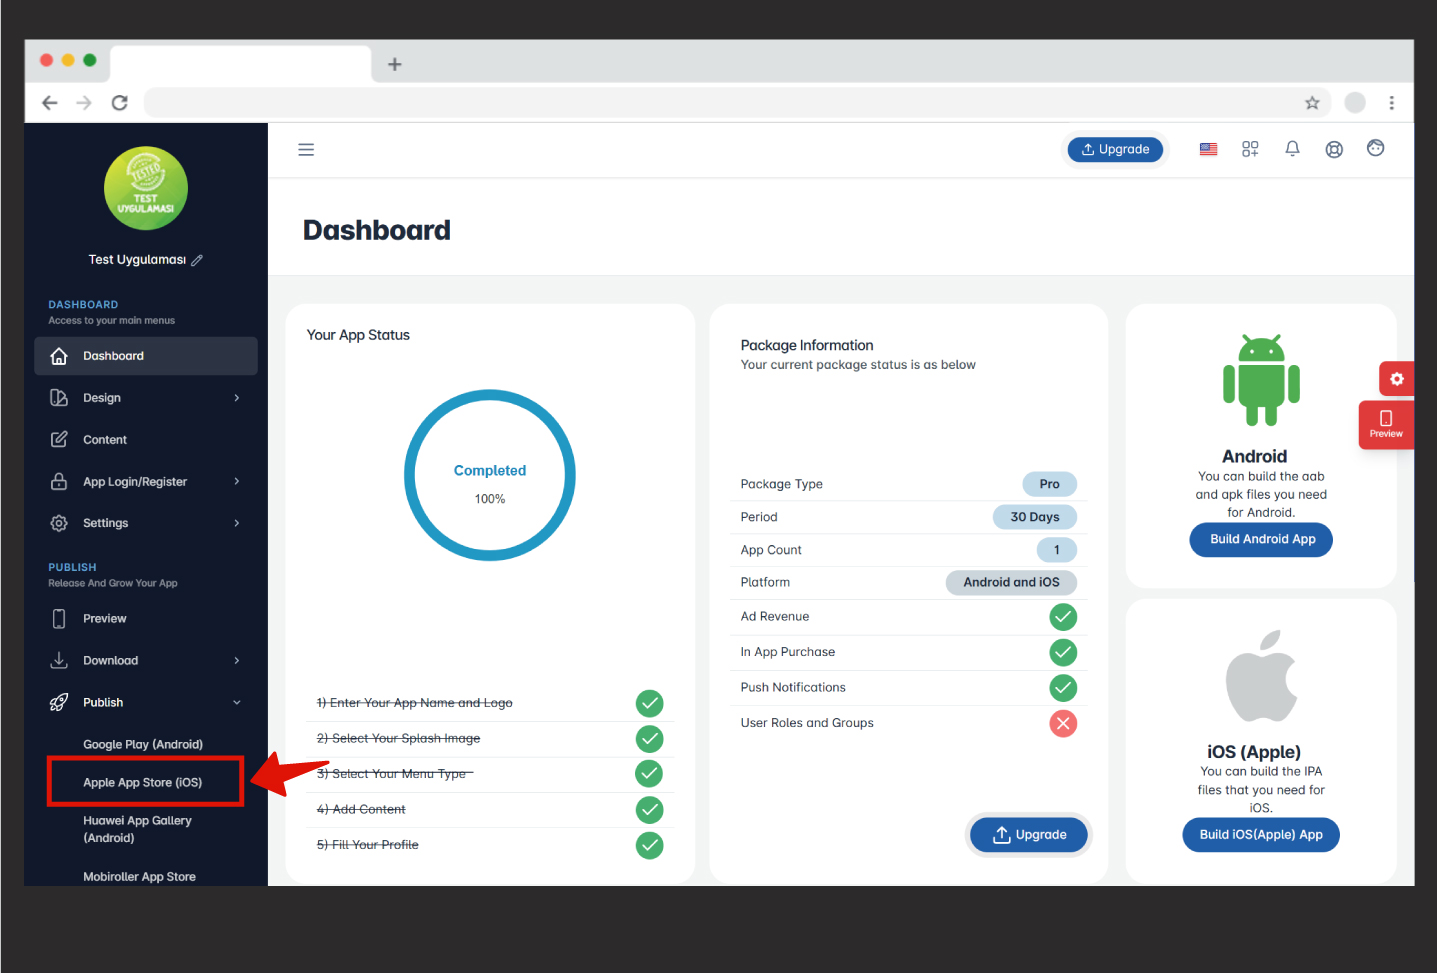
Step 1: Log in to your Mobiroller account. After logging in, select the app you want to update. Once selected, you will have access to your app panel. Click on Publish -> Apple App Store (iOS) in the left-hand menu.
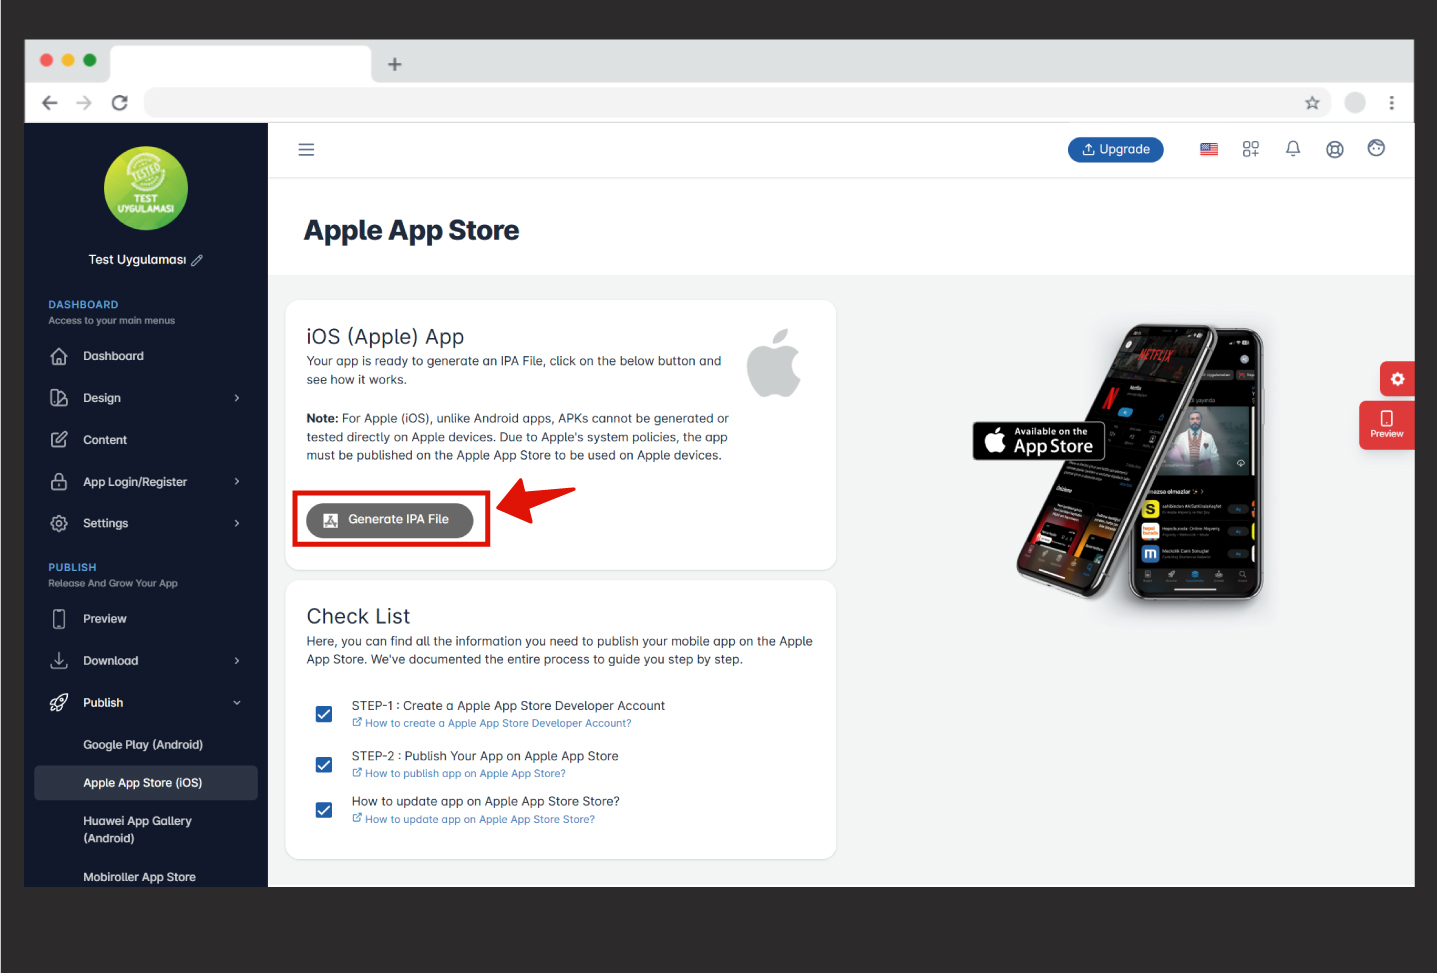
Step 2: On the screen that appears, click the “Generate IPA File” button.
Step 3: You have now accessed the IPA generation tool. Since you have previously generated an IPA, your information will be visible on this screen. You should not change any of the existing information on this screen.
On this screen, you will only regenerate and upload the following files to the IPA generation tool:
-
Distribution Certificate
-
Mobile Provisioning Profile
Do not modify any other information besides these documents.
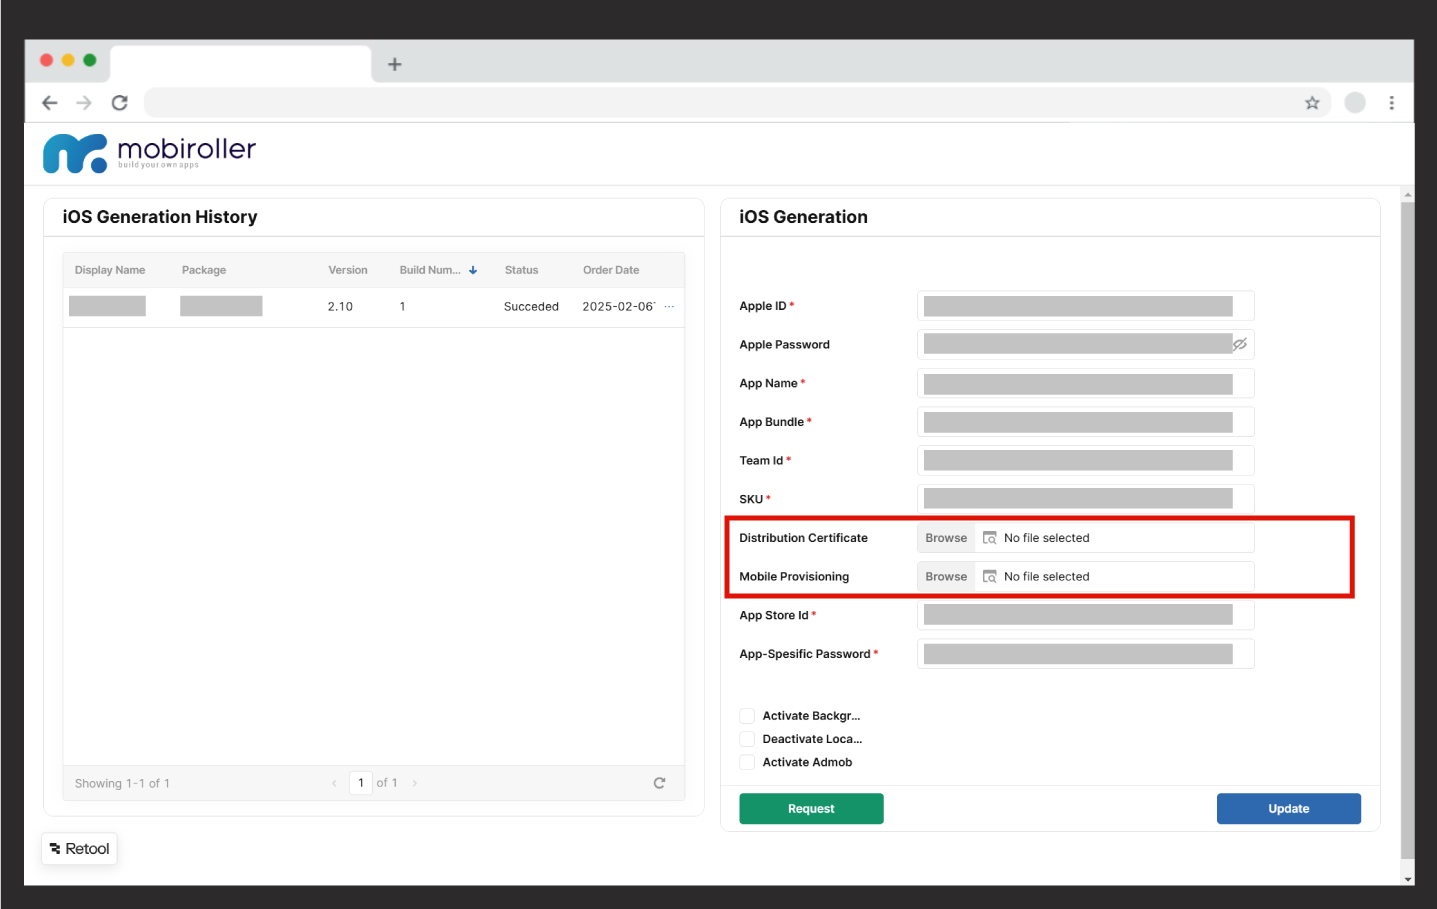
To be able to generate your IPA file, your Certificate and Provisioning Profile files must be up to date.
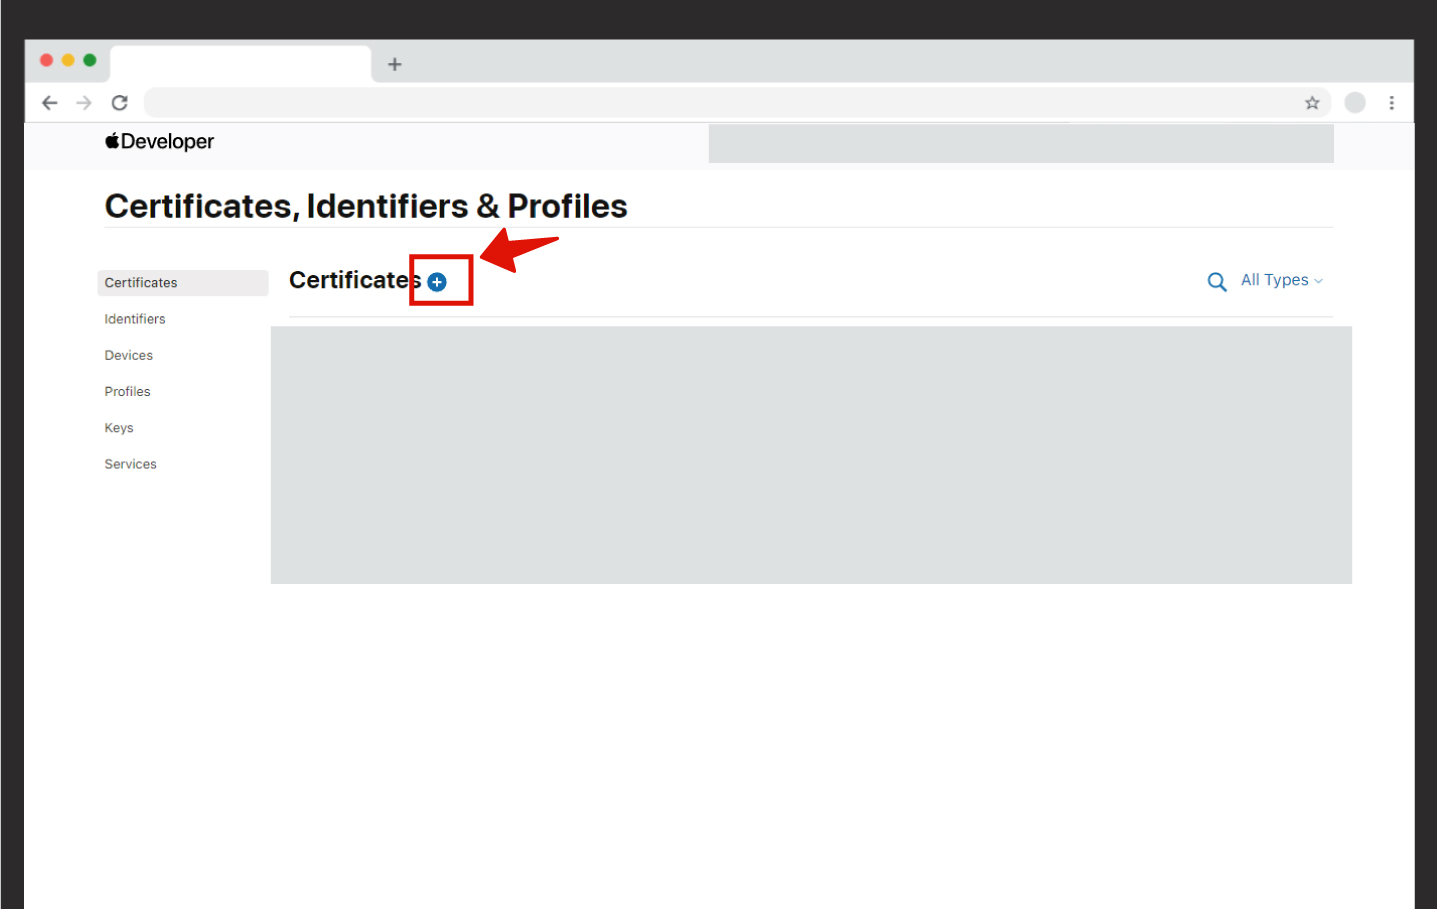
Step 4: To create a Distribution Certificate, go to https://developer.apple.com/account/ and click on “Certificates” under the “Certificates, Identifiers & Profiles” section.
.

Step 5: Click the “+” button to create your certificate file.
.
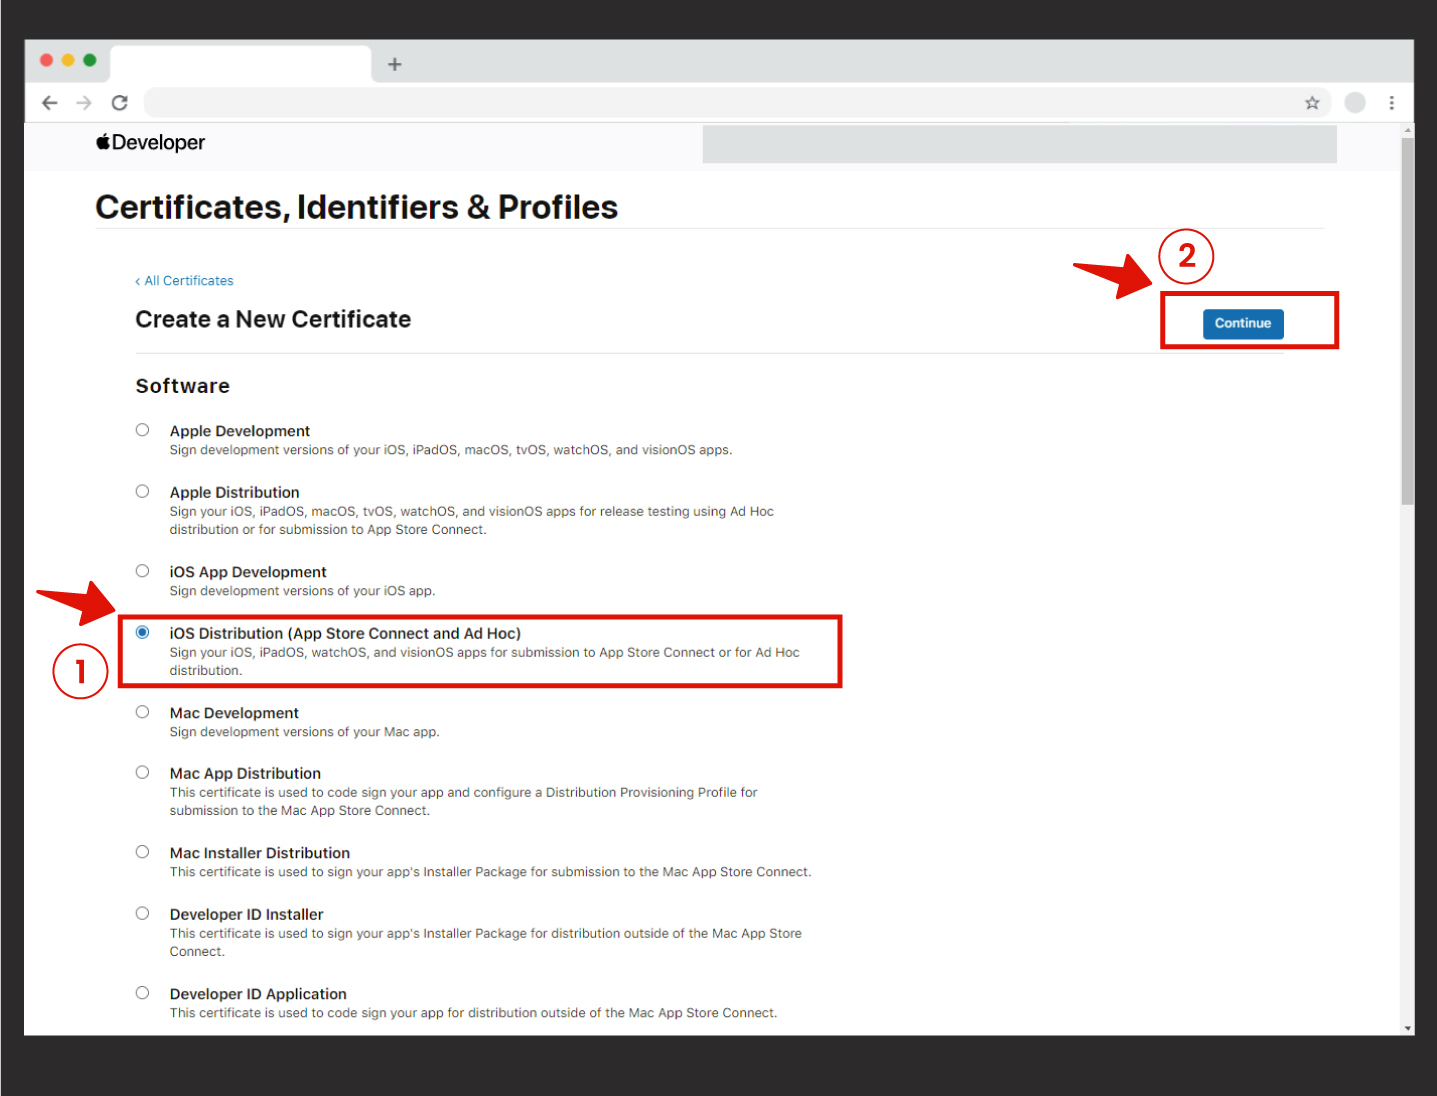
Step 6: From the options, select iOS Distribution (App Store and Ad Hoc) and click Continue.
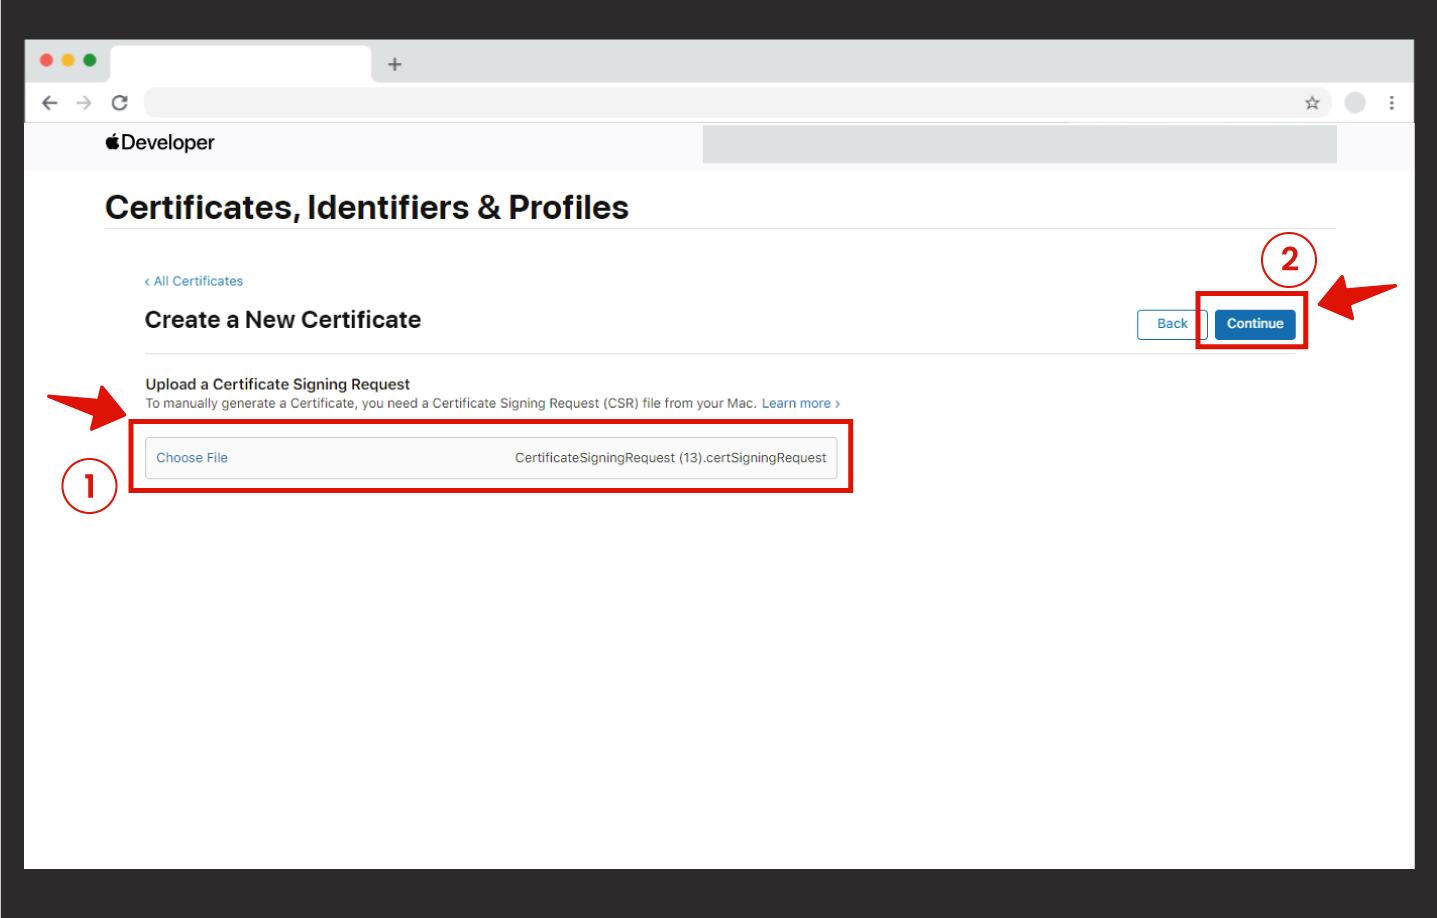
Step 7: On this screen, you need to upload a certificate signing request file. You can download this file from [here].
After downloading, click Choose File, select the CertificateSigningRequest.certSigningRequest file you just downloaded from the link, and then click Continue.
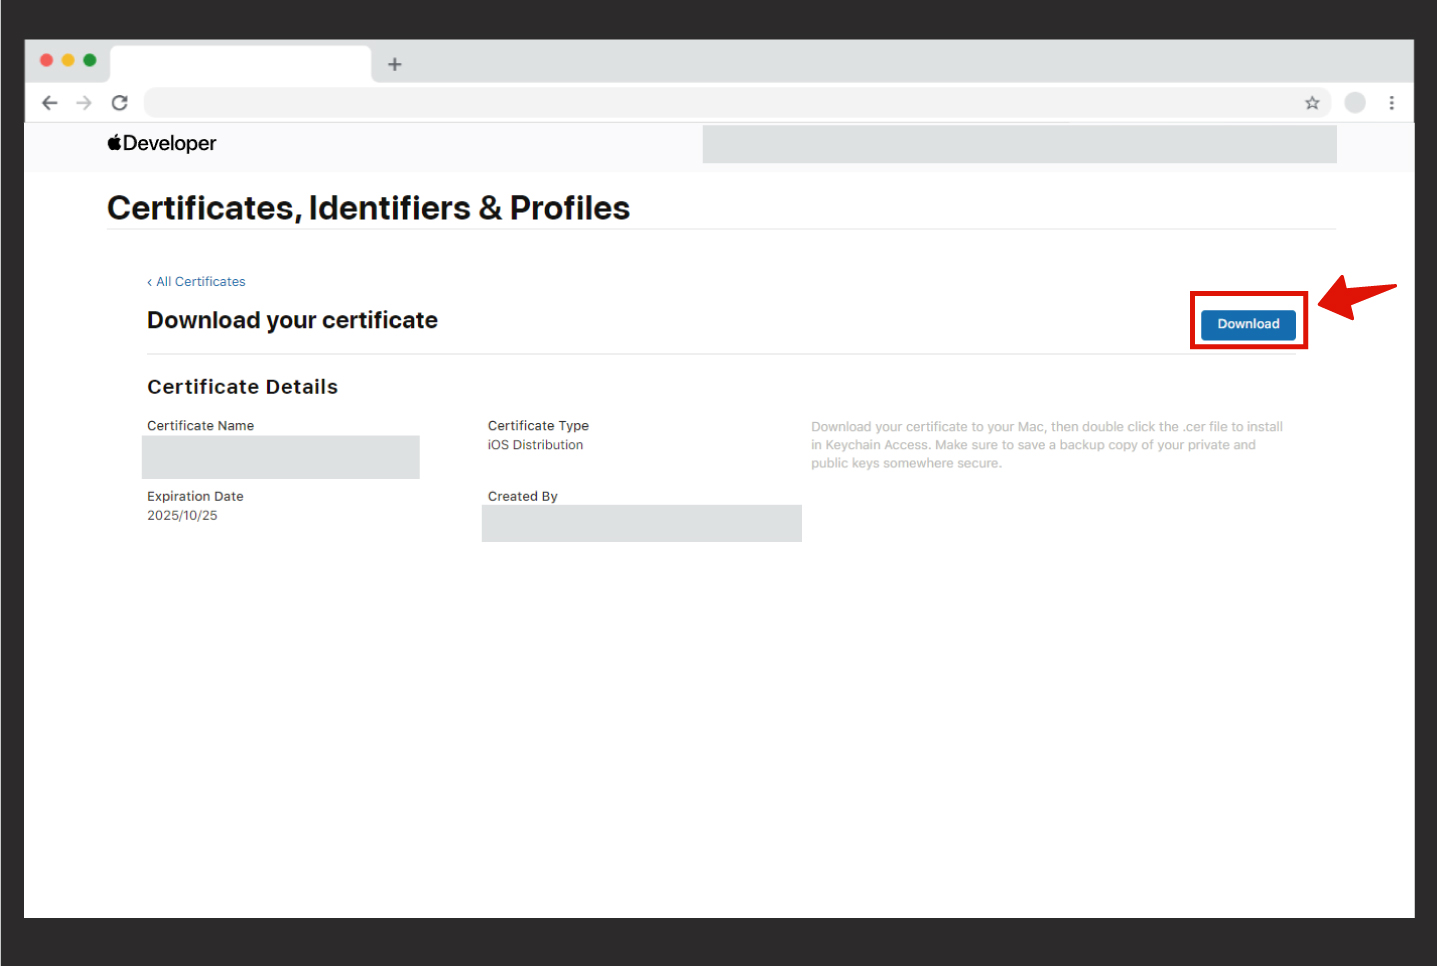
Step 8: After this step, click Download. The file named “ios_distribution.cer” will be downloaded to your computer. Now, upload this “ios_distribution.cer” file to the Distribution Certificate field on the IPA Generation screen.
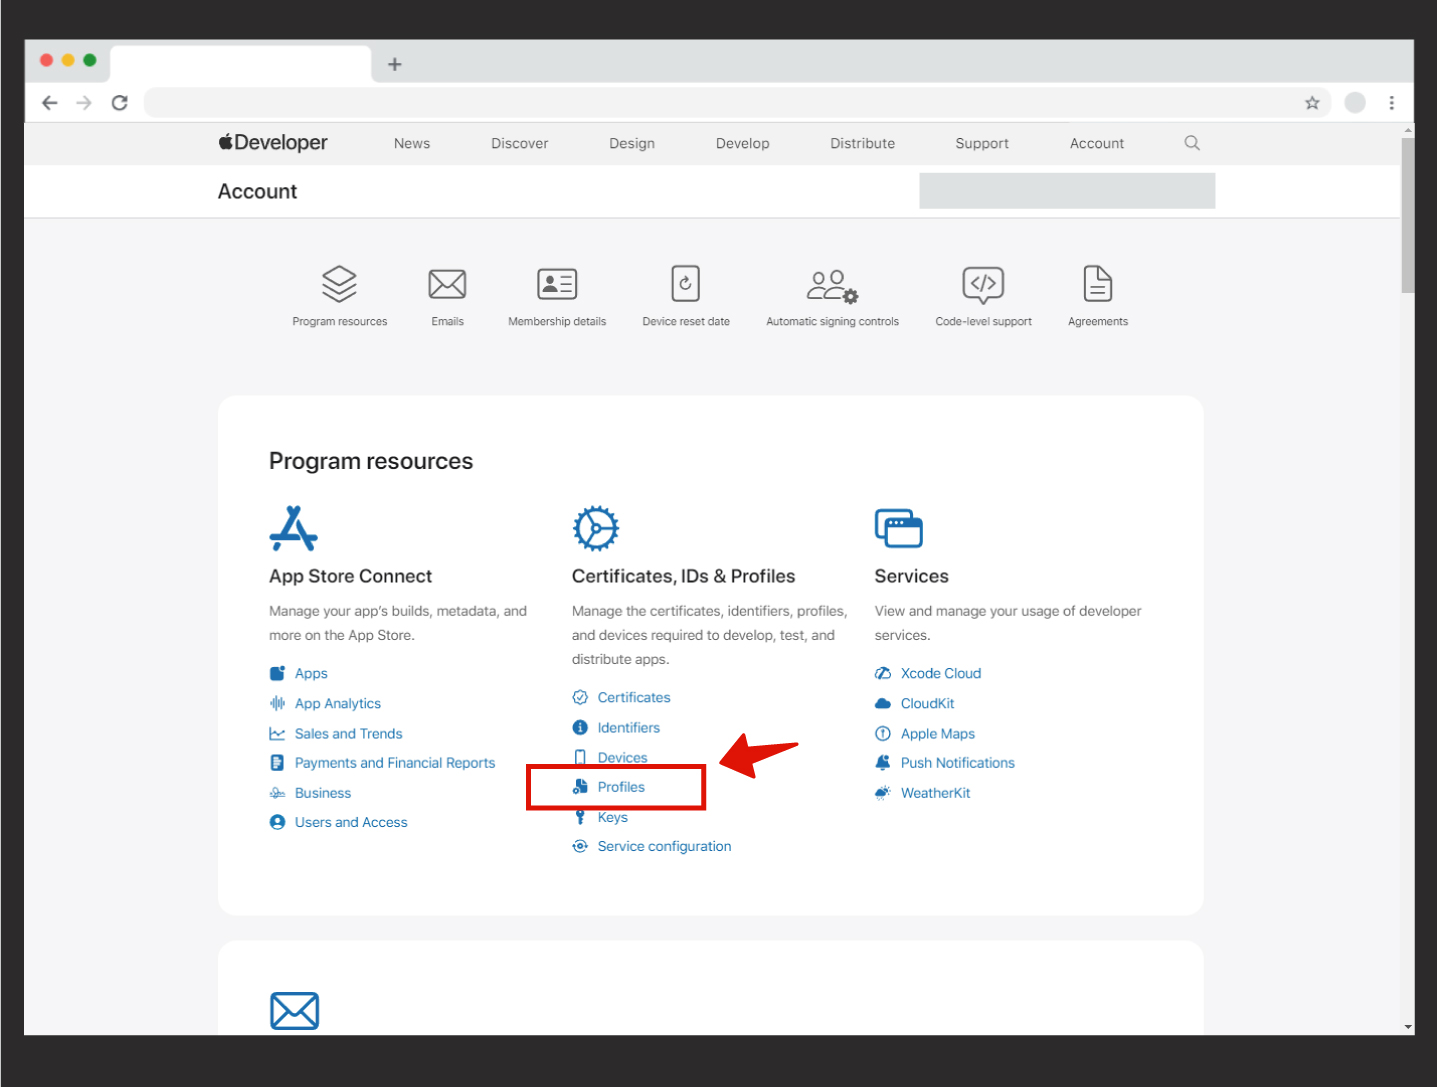
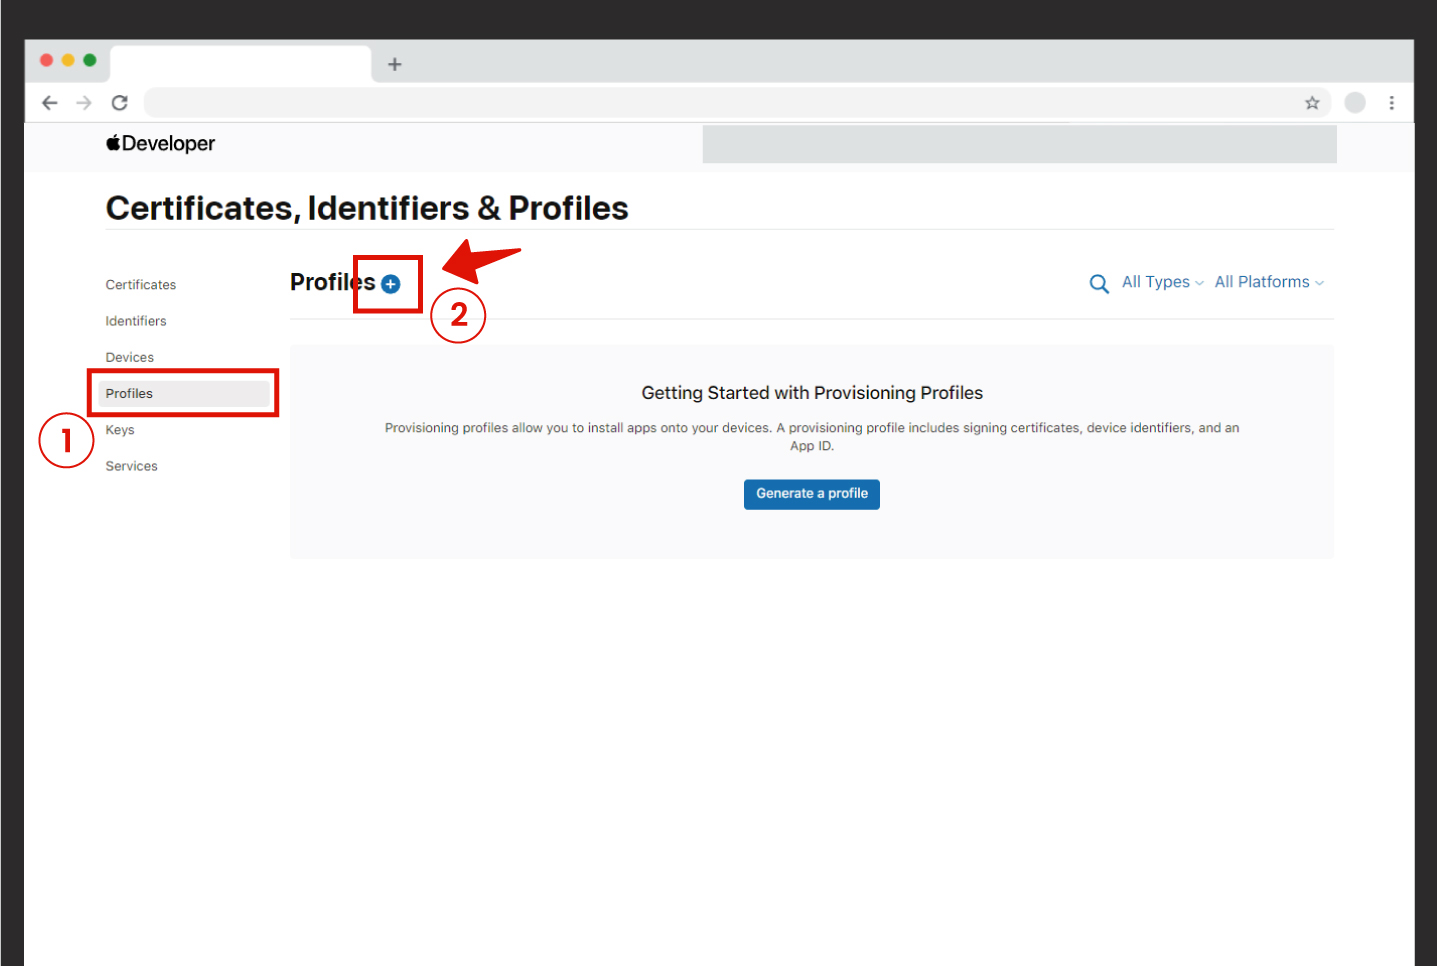
Step 9: To create a Mobile Provisioning Profile, go to https://developer.apple.com/account/ and click on the “Profiles” button under the “Certificates, Identifiers & Profiles” section.
.
Step 10: Next, click on Profiles, and then click the “+” sign that appears.
.
Step 11: Select App Store Connect and click Continue.

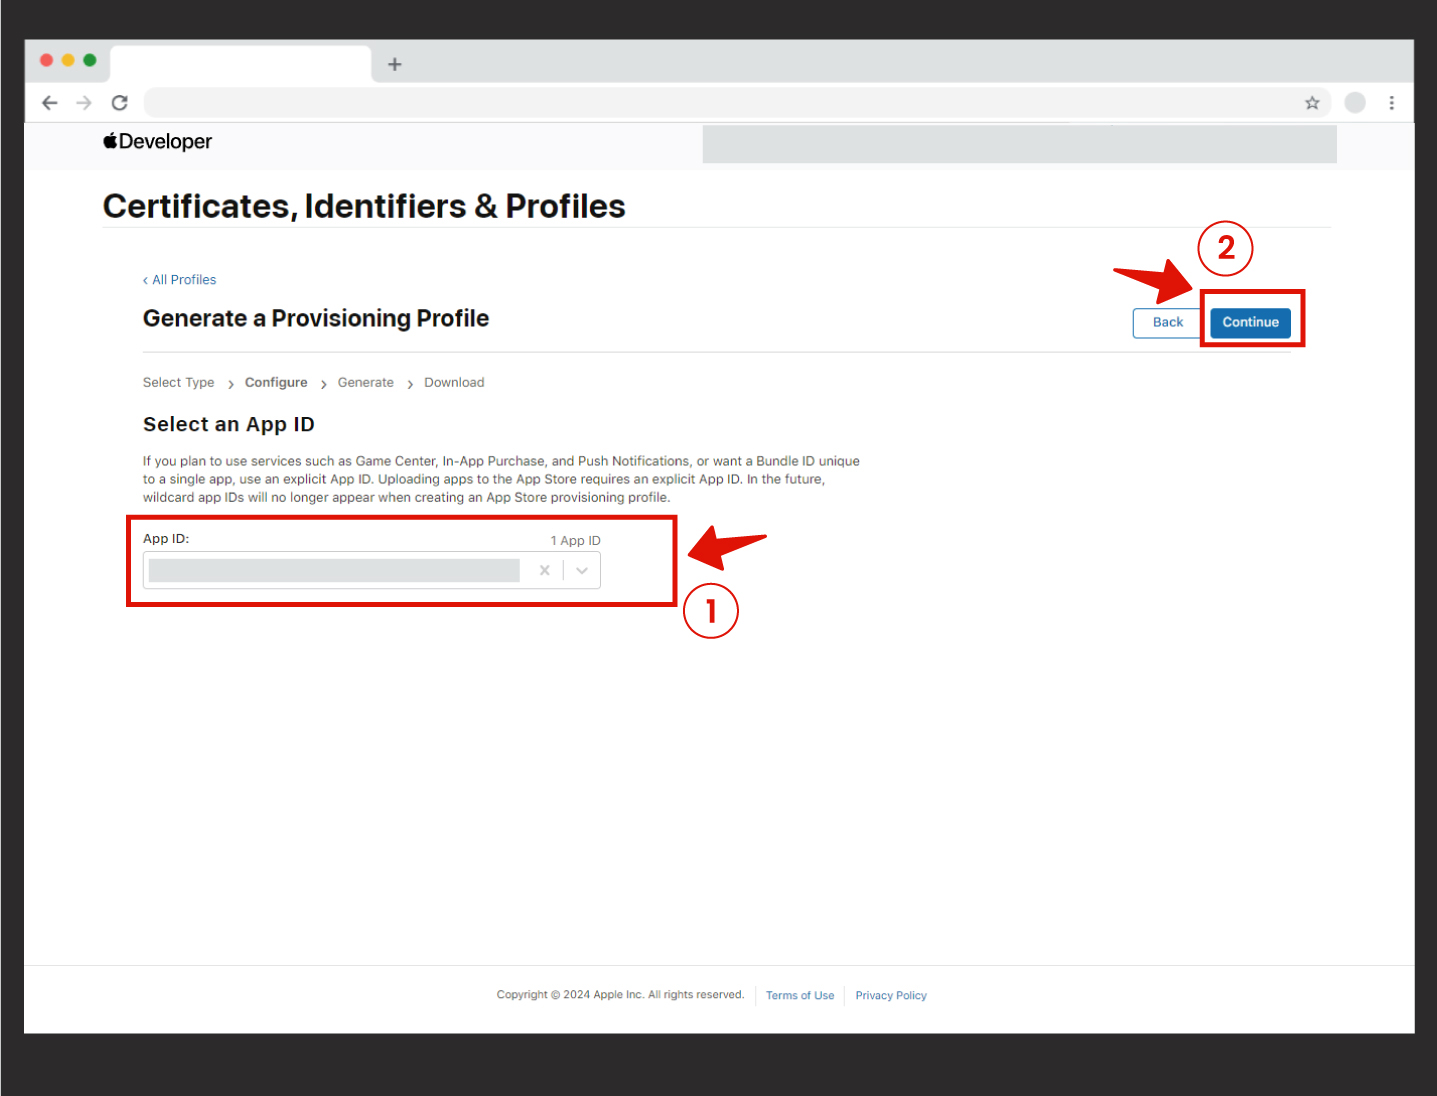
Step 12: On the next screen, you will be prompted to select an App ID. After selecting the correct App ID that shows your Bundle ID, click Continue.
Important Note: The correct ID you select here is crucial. The ID you choose will include the Bundle ID. A wrong selection here will lead to an incorrect IPA generation for your app.
*** You must select the Bundle ID shown on the IPA generation screen. A different selection will cause an error in the IPA generation process.
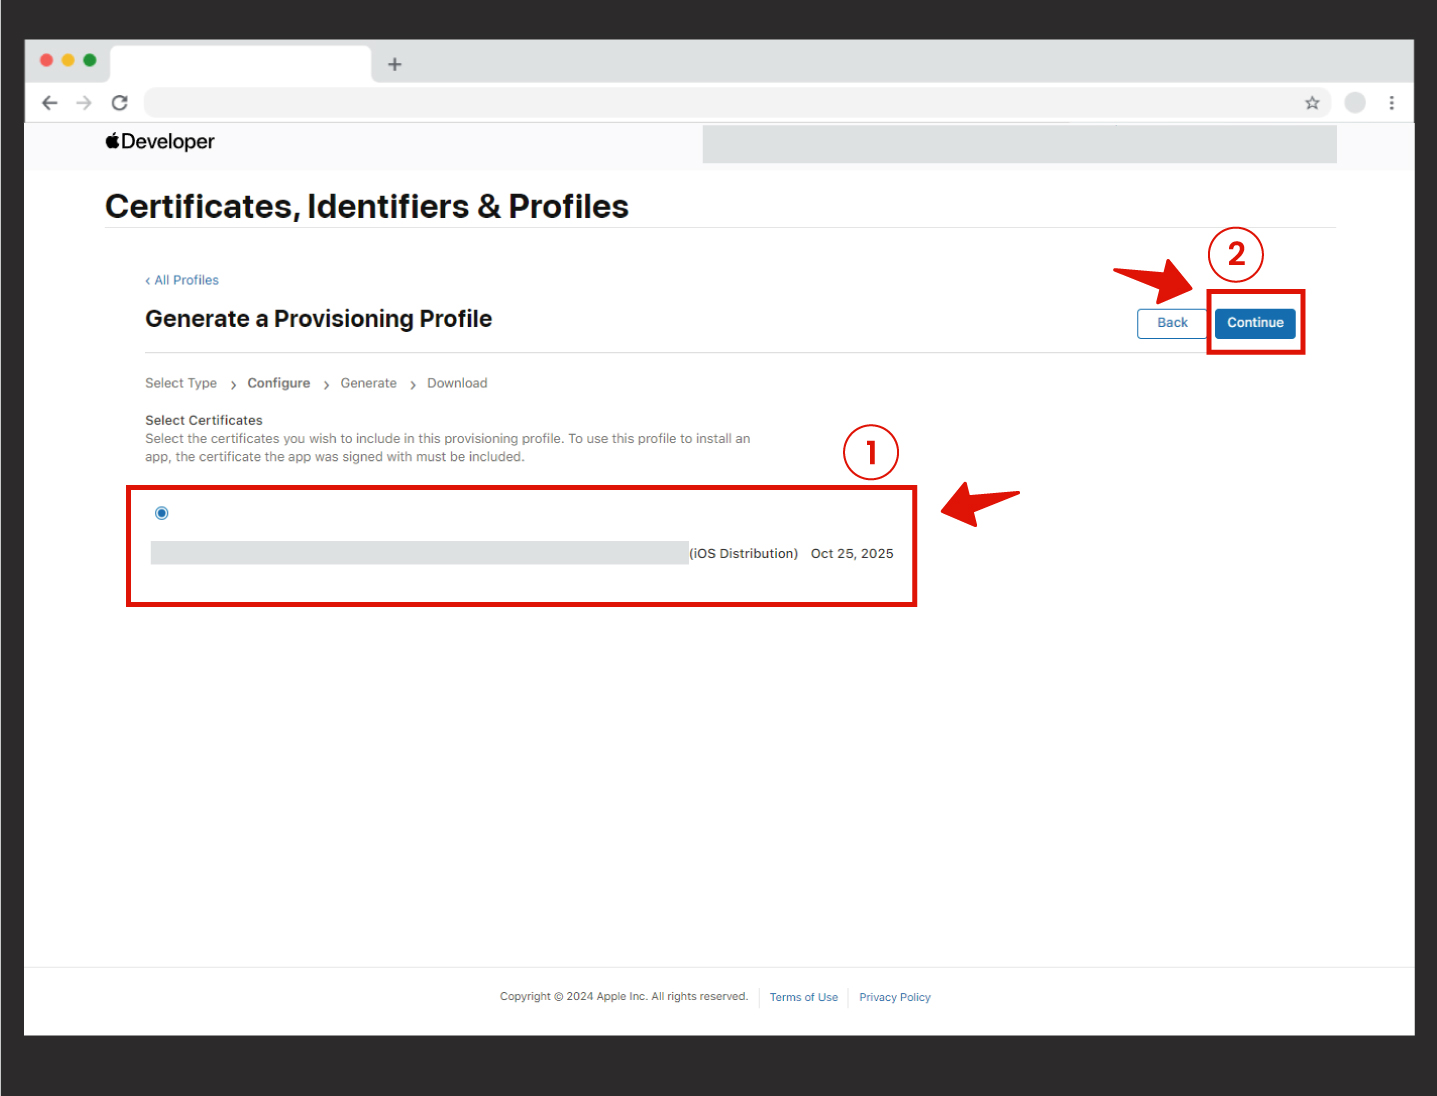
Step 13: On the screen that appears, select the certificate you created and click Continue.
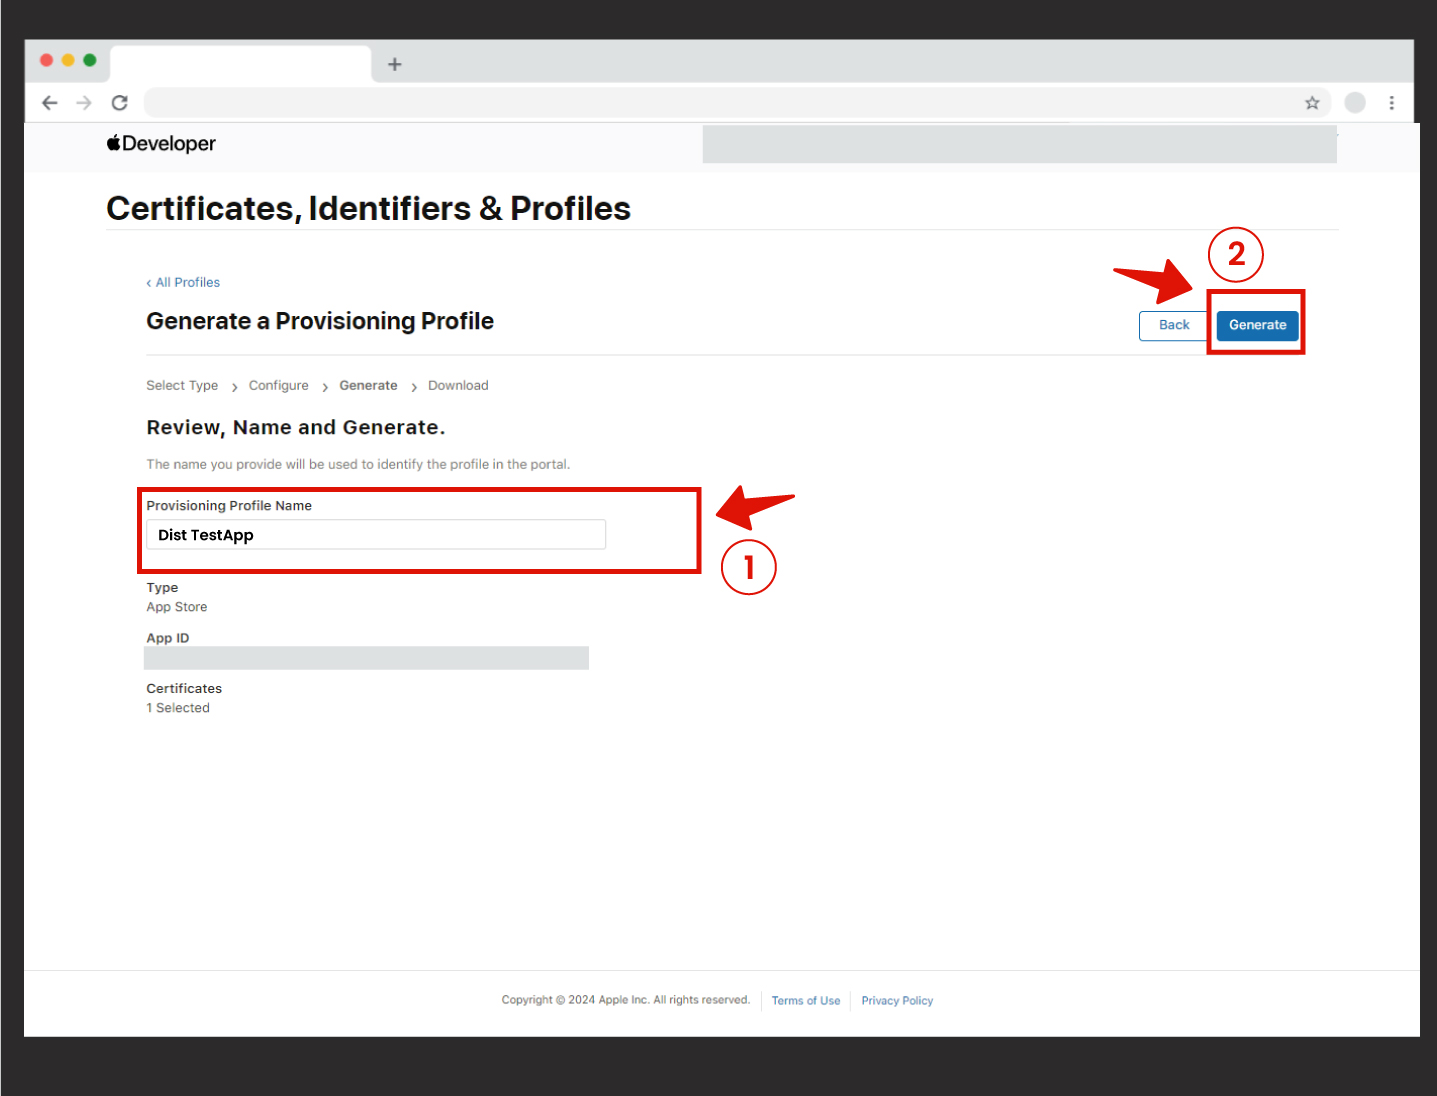
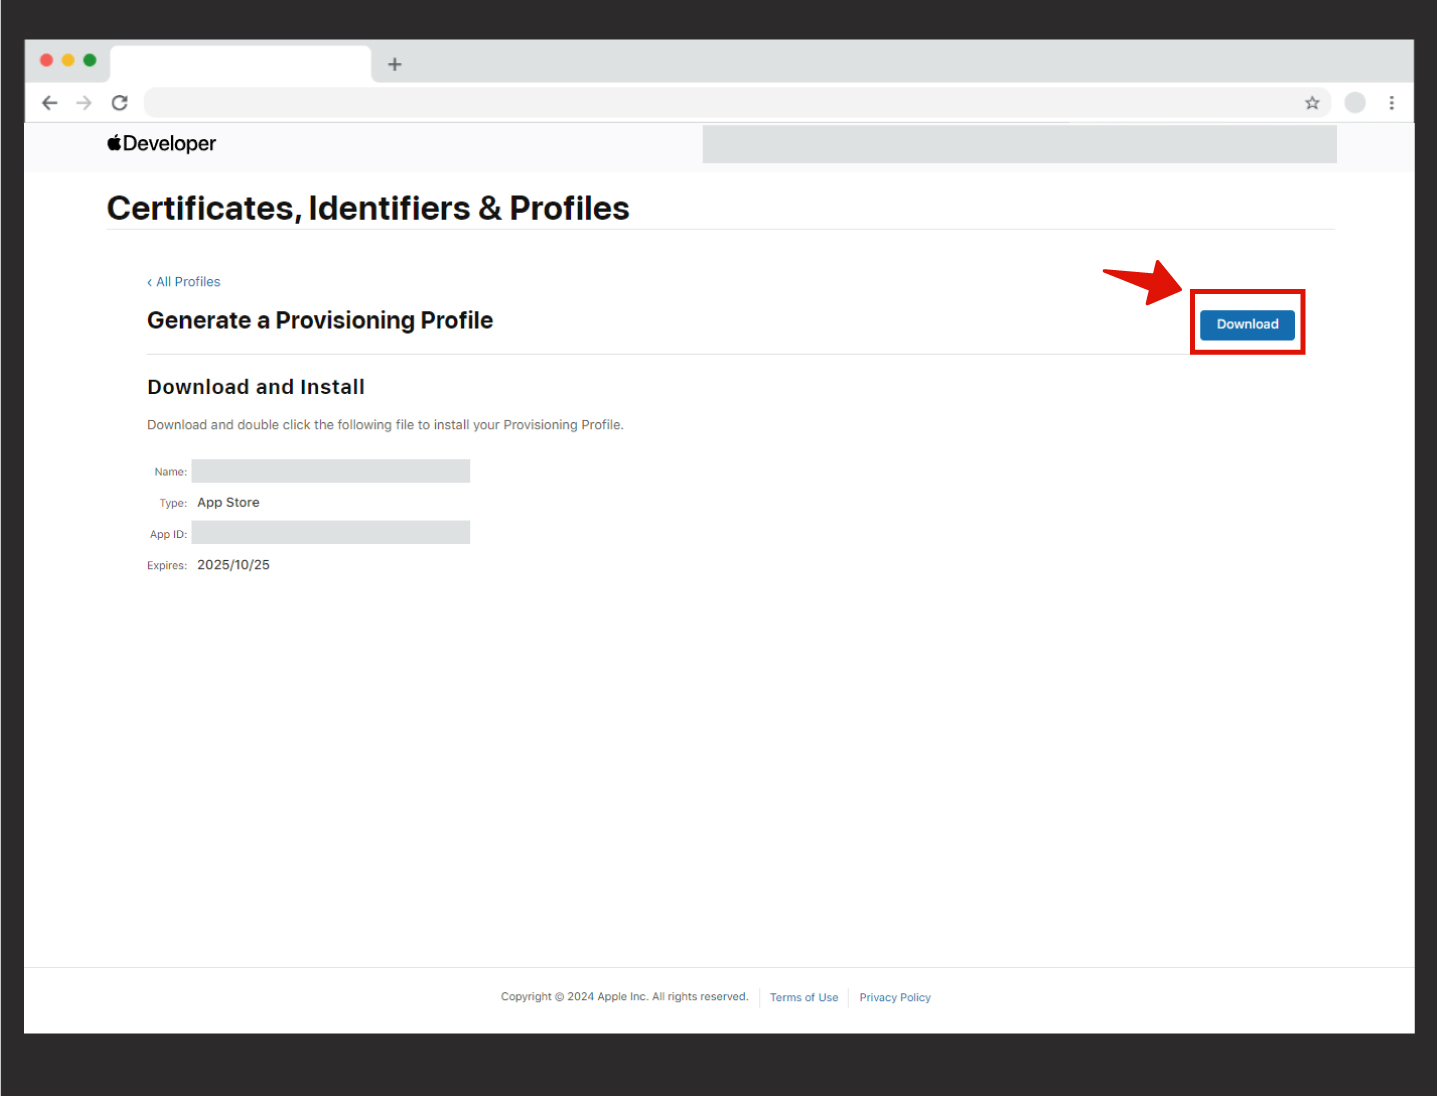
Step 14: In the Provisioning Profile Name field, write your app’s name preceded by “Dist” (e.g., Dist TestApp).
After this, click Generate.
Step 15: Click Download to download the Profile file to your computer. Then, upload this file to the Mobile Provisioning field on the IPA Generation screen.
Step 16: After downloading both files from Apple, you should open the IPA Generation screen in Mobiroller, as shown at the beginning of this article. Upload the two files you created and downloaded from Apple to the following fields:
-
Distribution Certificate
-
Mobile Provisioning
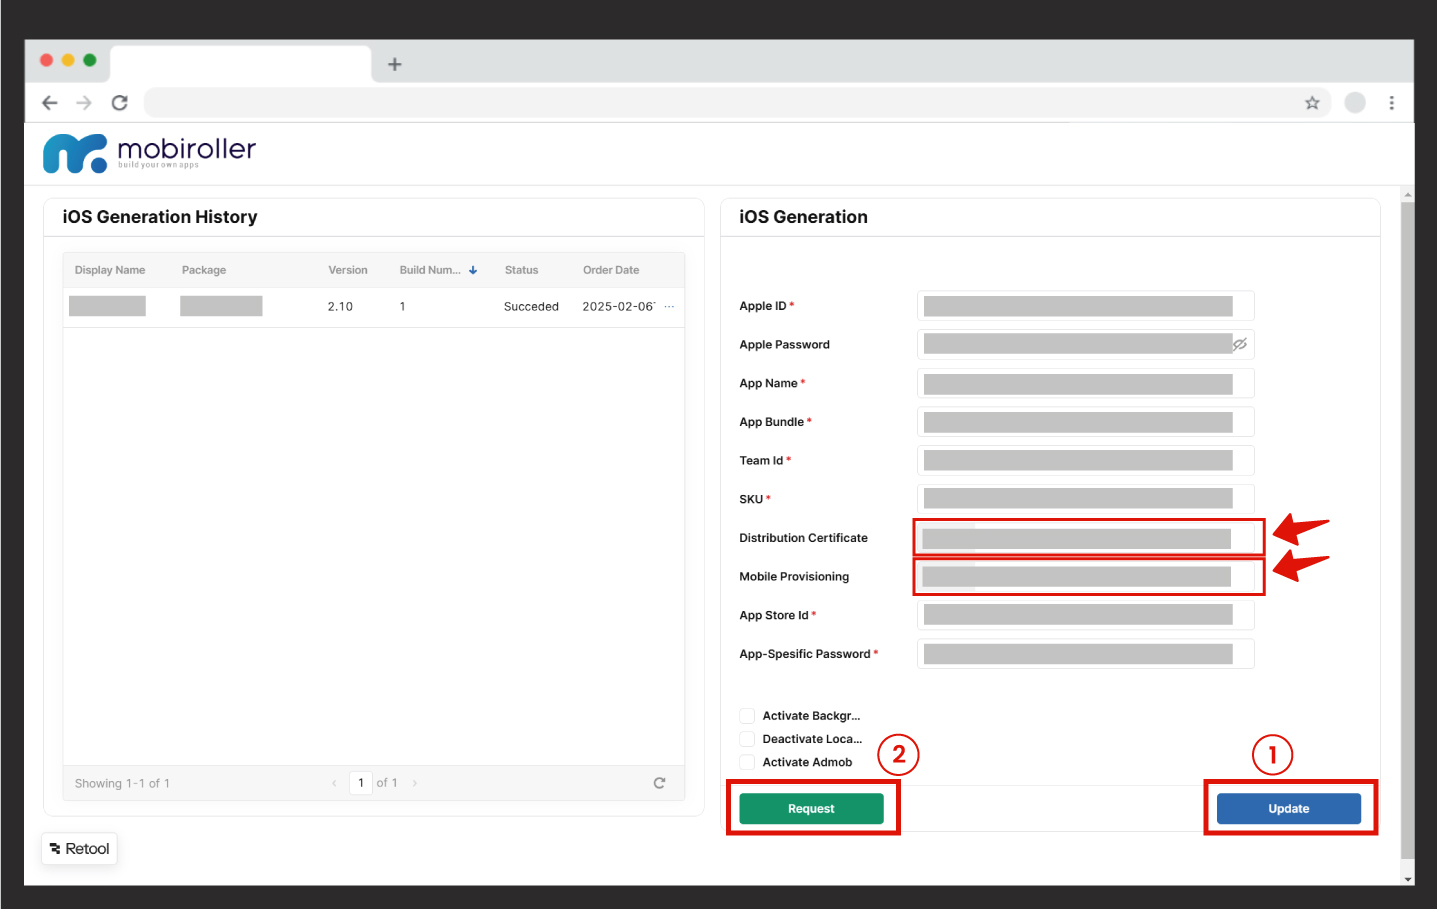
Active Background Mode: If your app plays radio or music in the background, you need to check this box.
Deactivate Location Permission: If you do not want location data to be used in your app, you need to check this box.
Activate AdMob: If your app will display AdMob ads, you must check this box and paste the AdMob App ID you obtained from AdMob into this field. Otherwise, your ads will not appear in your app.
Step 17: After uploading both files, click Update. After approximately 10 seconds, click Request (IPA Request). Your IPA file will appear in our approval screen. To have your IPA request approved, please contact us after making the request. Once we approve it, your IPA generation will begin.
The IPA generation will take approximately 15-20 minutes after our approval.
Sometimes, it may take a while for the information in the left panel to reflect on the screen. Once your IPA file is ready, you will be notified via email.
After the successful IPA generation, follow the steps below:
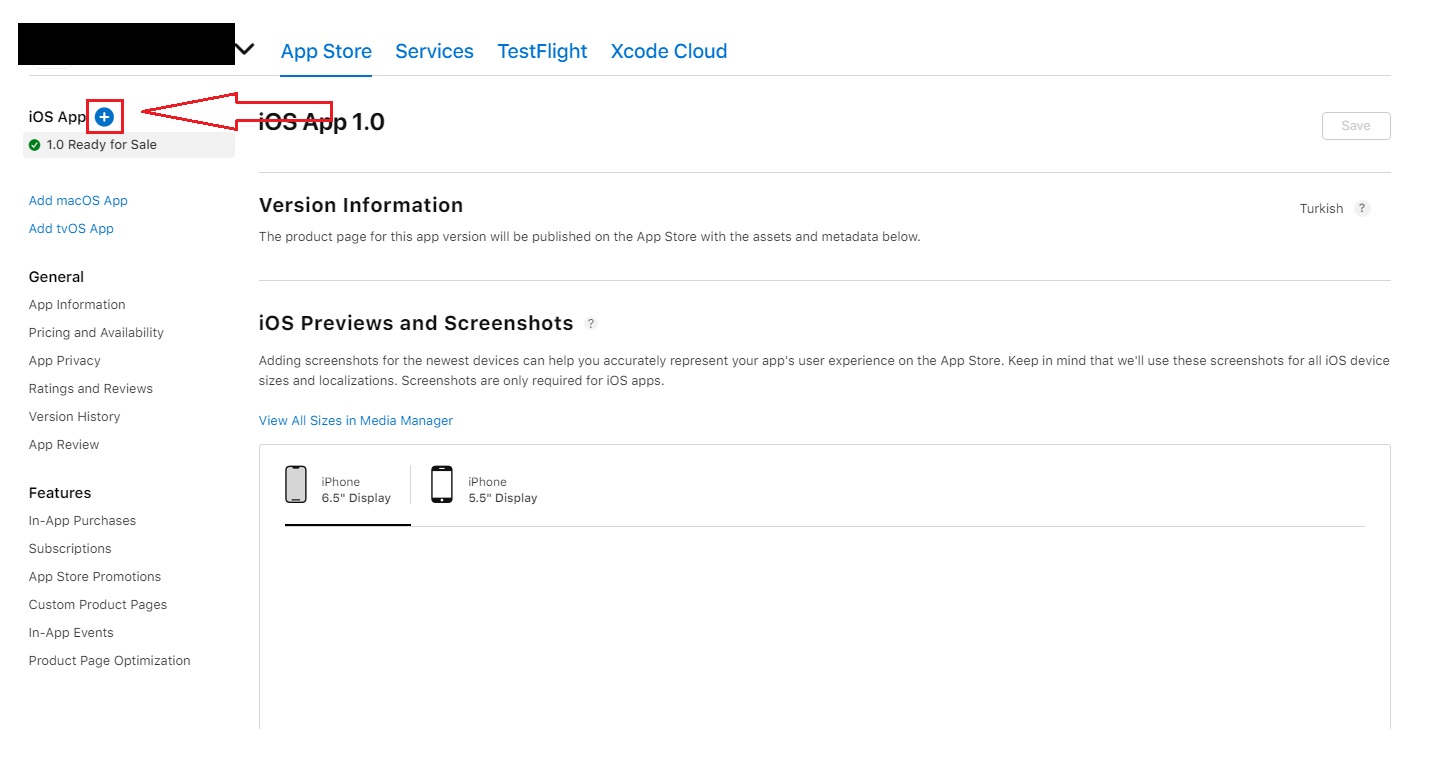
Step 18: After receiving the email, go to your Apple account at https://appstoreconnect.apple.com/apps, select your app, and click the “+” button on the left side.
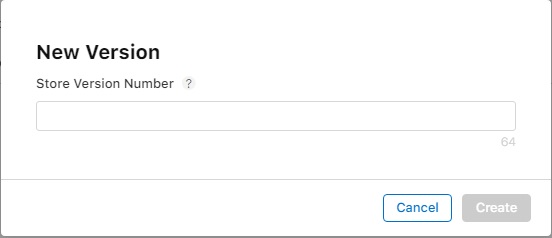
Step 19: In the email you receive, there will be a “Version Number” such as 2.19.0. Enter this information in the field below and click the Create button.
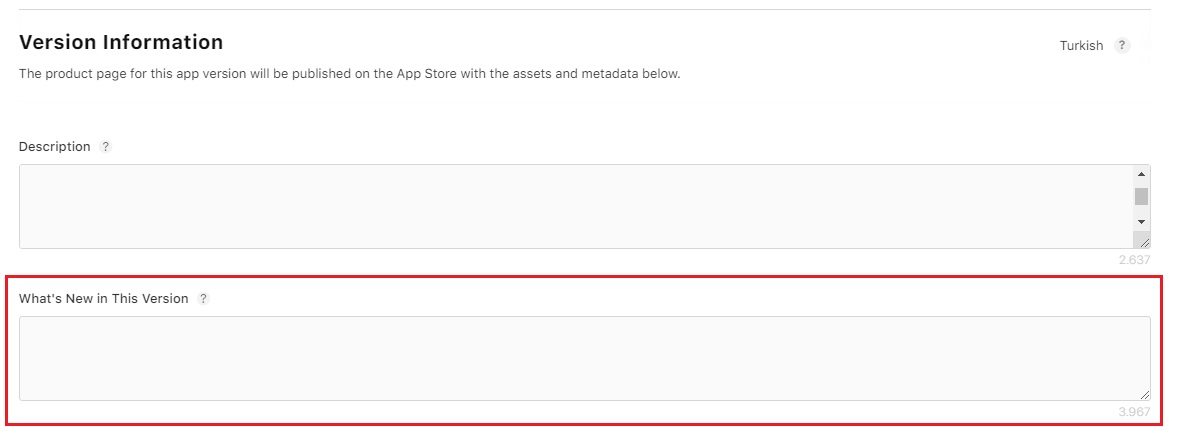
Step 20: You will be directed to the page where you can upload screenshots. A bit further down, there will be a section titled “What’s New in This Version?” You need to enter the changes you made in your app here.
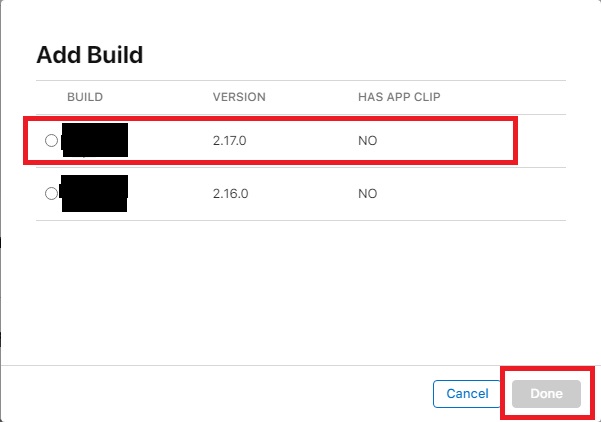
Step 21: Scroll to the bottom of the page, and in the Build section, click the “Select a build before you submit your app” button.

Step 22: Your successfully generated IPA files will appear. Select the latest version at the top and click the Done button.
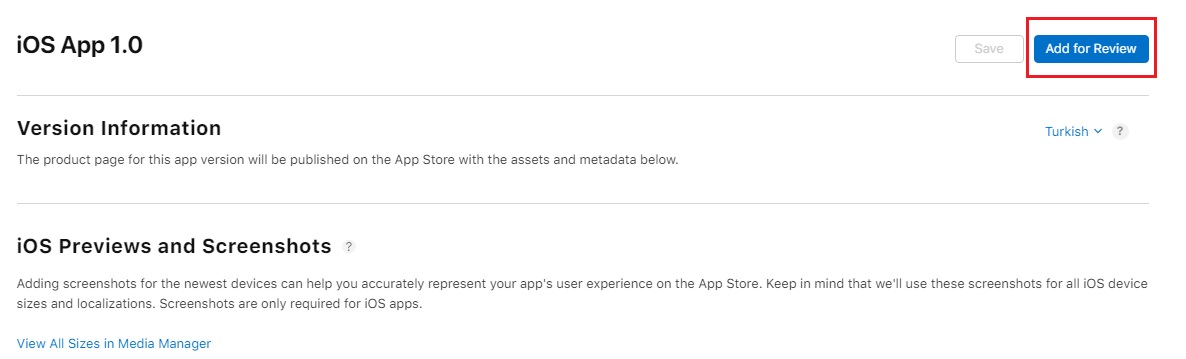
Step 23: Scroll to the top of the page and click the Add for Review button. If this button is inactive and the Save button is active, first click the Save button, then click the Add for Review button.
Step 24: The Add for Review button will redirect you to a different page. On that page, click the Submit to App Review button (it may also say Resubmit to App Review).

Your app has now been submitted for review. The Apple team will review your app within 48 hours.
For any support, you can email us at support@mobiroller.com