Before explaining how to create a Bundle ID, we need to make an important note for those who haven’t read the previous article: If you want to publish your app on the Apple App Store, you must first create an Apple Developer Account.
If you haven’t created your account yet, you can follow the steps in the article “How to Create an Apple Developer Account?” to create your account.
After creating your Apple Developer Account, the first thing you need to do is create a Bundle ID for your application. The Bundle ID is the identifier for your app within the developer system.
Now, let’s go through the steps to create a Bundle ID:
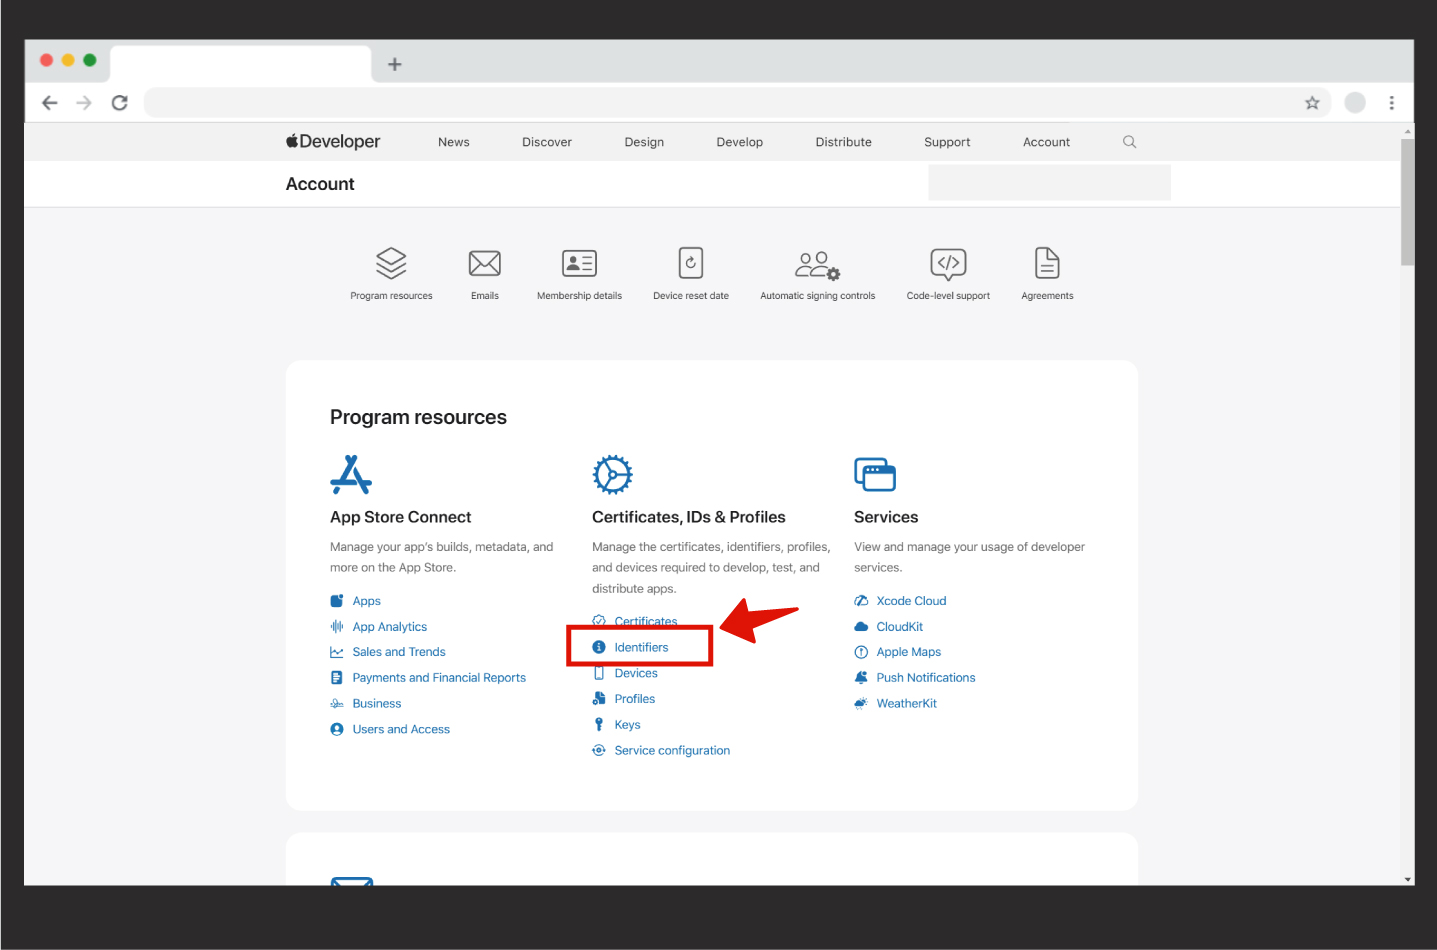
Step 1: First, go to https://developer.apple.com/account/ and log in with your Apple Account. On the screen that appears, click on the Identifiers section.
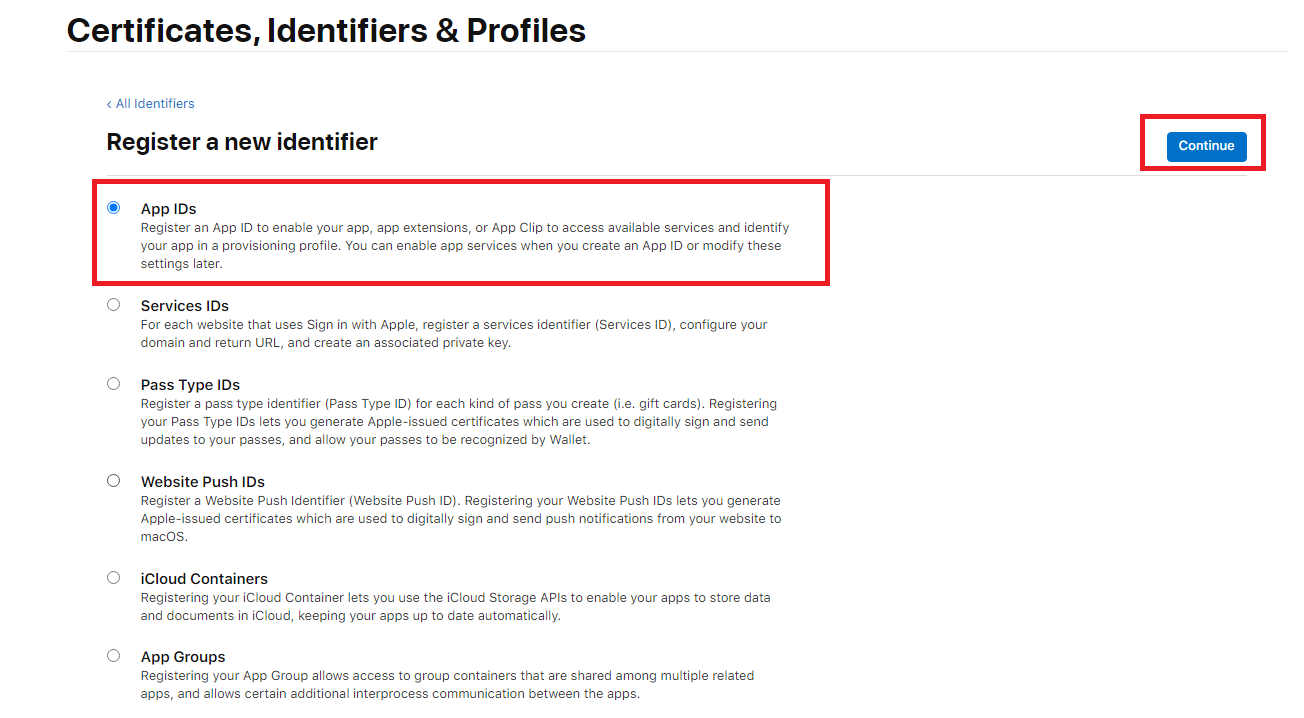
Step 2: On the homepage, click on Identifiers, and from the screen that appears, click on the Register an App ID button.

Step 3: From the screen that appears, select App IDs and then click on the Continue button.
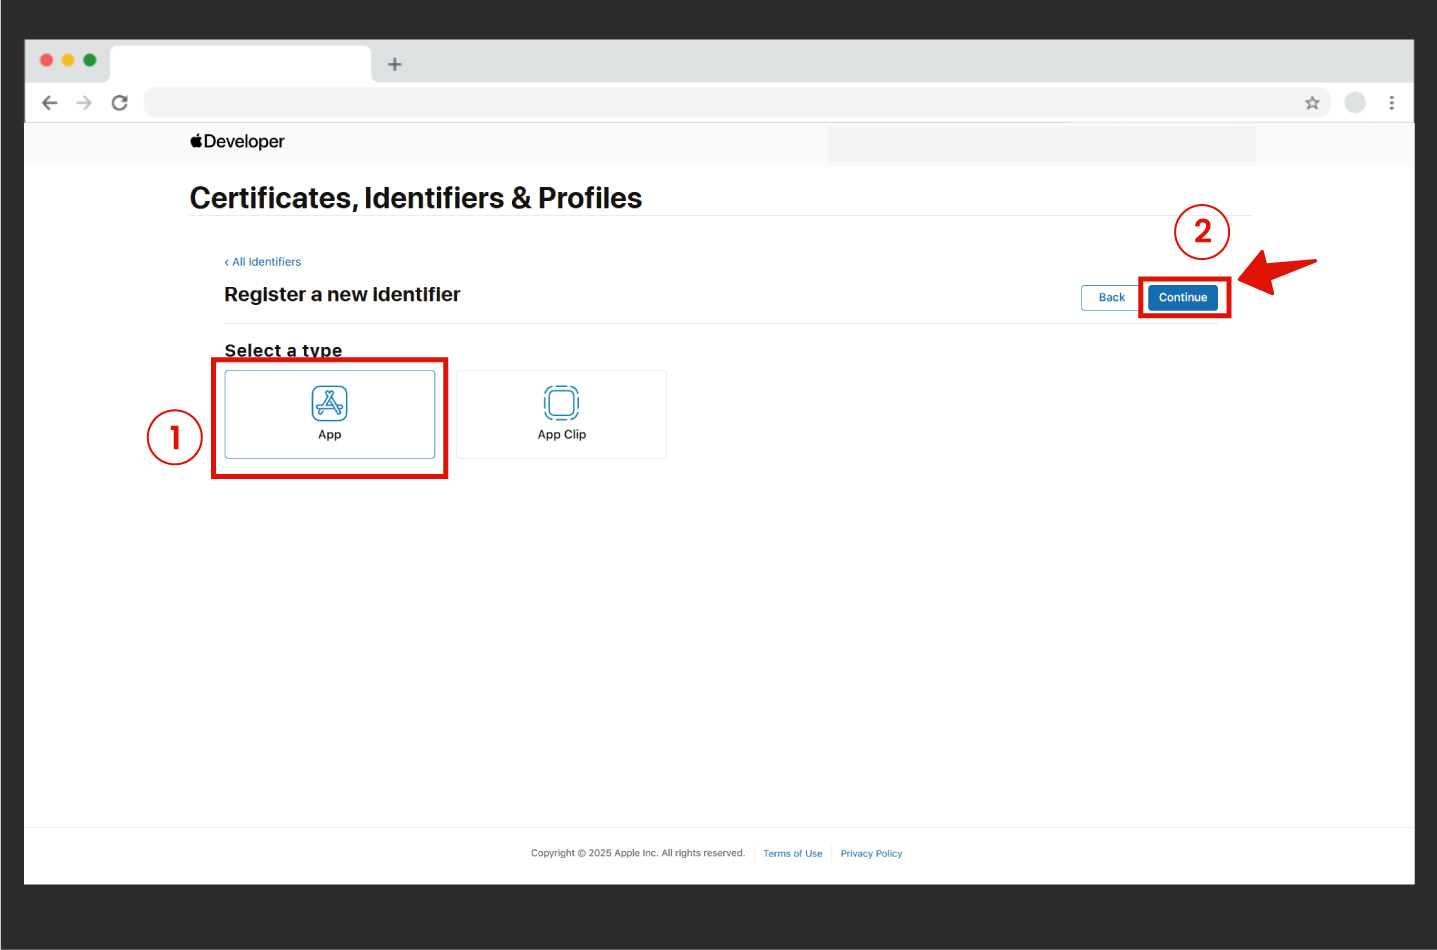
Step 4: From the screen that appears, select App and then click on the Continue button.
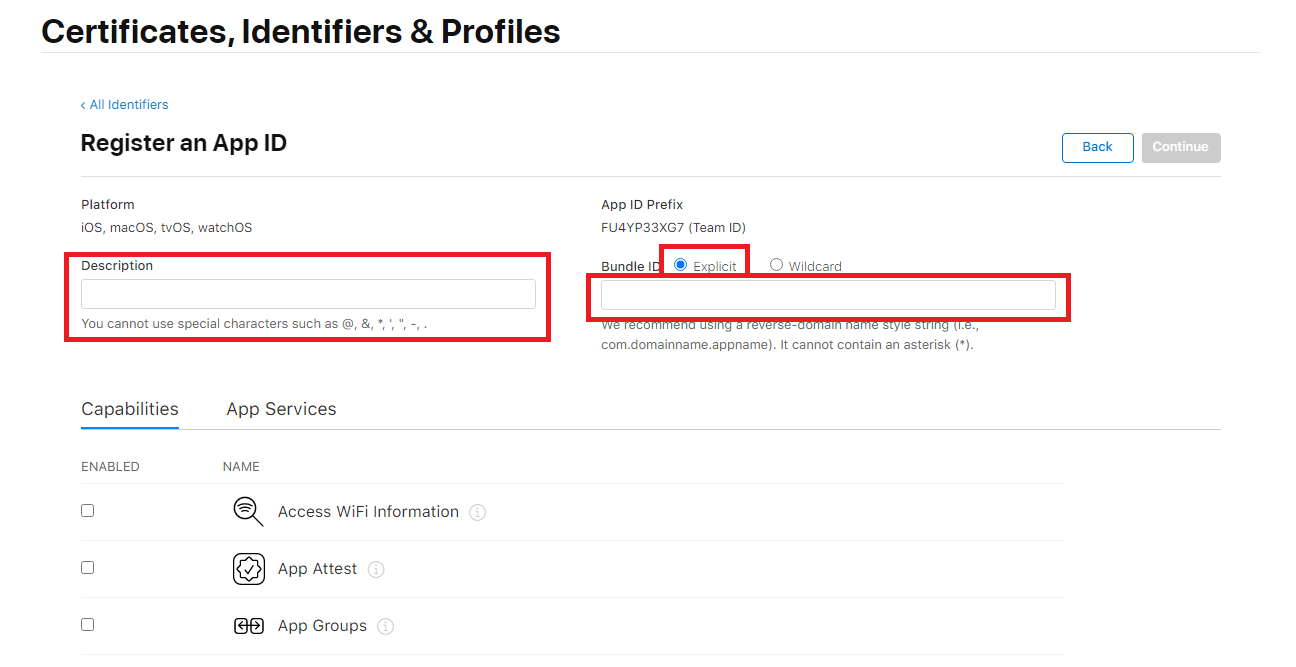
Step 5: Now, you need to fill out the Description and Bundle ID sections to create your app’s identity.
- The Description section is where you enter the app’s name. The name you choose should not contain special characters or Turkish letters as indicated in the picture.
- Next to the Bundle ID, you should select Explicit, and in the field below, you need to create your Bundle ID name. It is recommended to create your Bundle ID using a reverse domain format. For example: com.domainname.appname
If you do not have a website or company, you can create it as com.appname
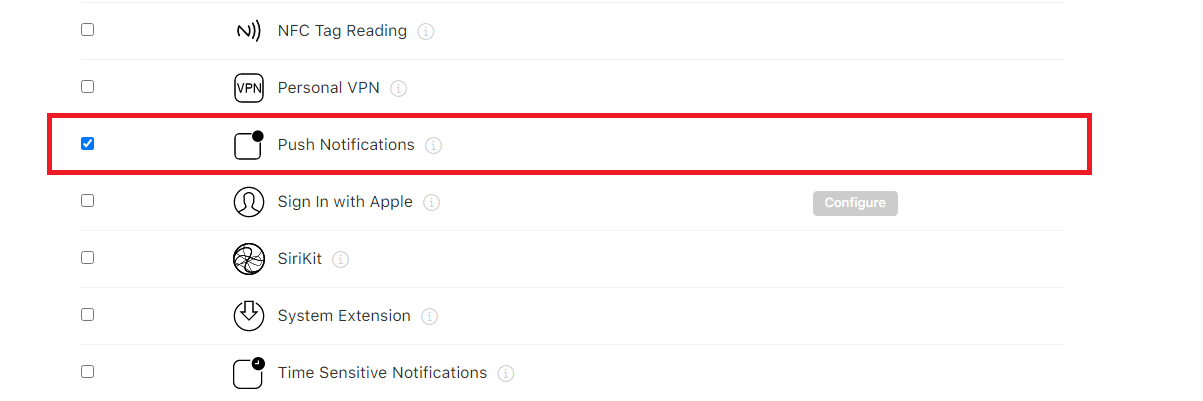
Step 7: After ensuring that Push Notifications appear as shown below on the next screen, click the Register button without making any changes.
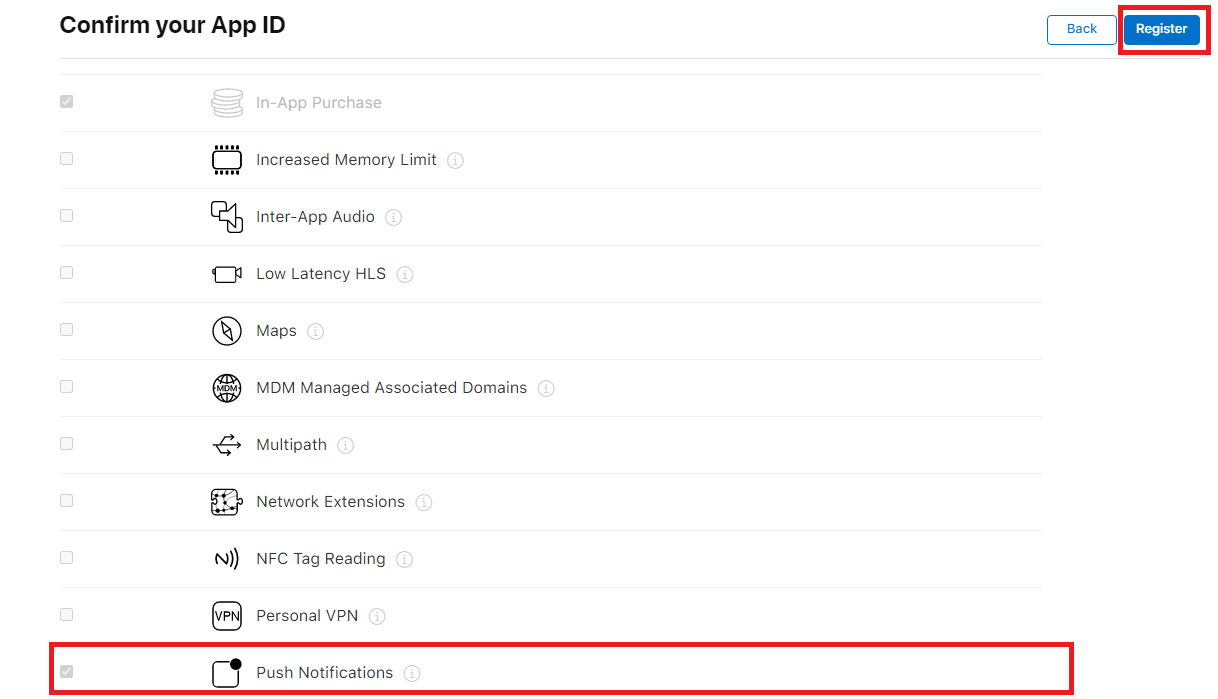
Congratulations! Your Bundle ID has now been created.
Now, let’s move on to 2.2. How to Create an App on the Apple App Store? and see how you can upload your app to the Apple App Store.