At this stage, we will create your app for the Apple App Store. However, before proceeding with the app creation step, you must first create a Bundle ID for your app.
If you’ve completed the Bundle ID creation process, you’re very close to the publishing stage. Now, let’s see how to upload your iOS app to the Apple App Store together…
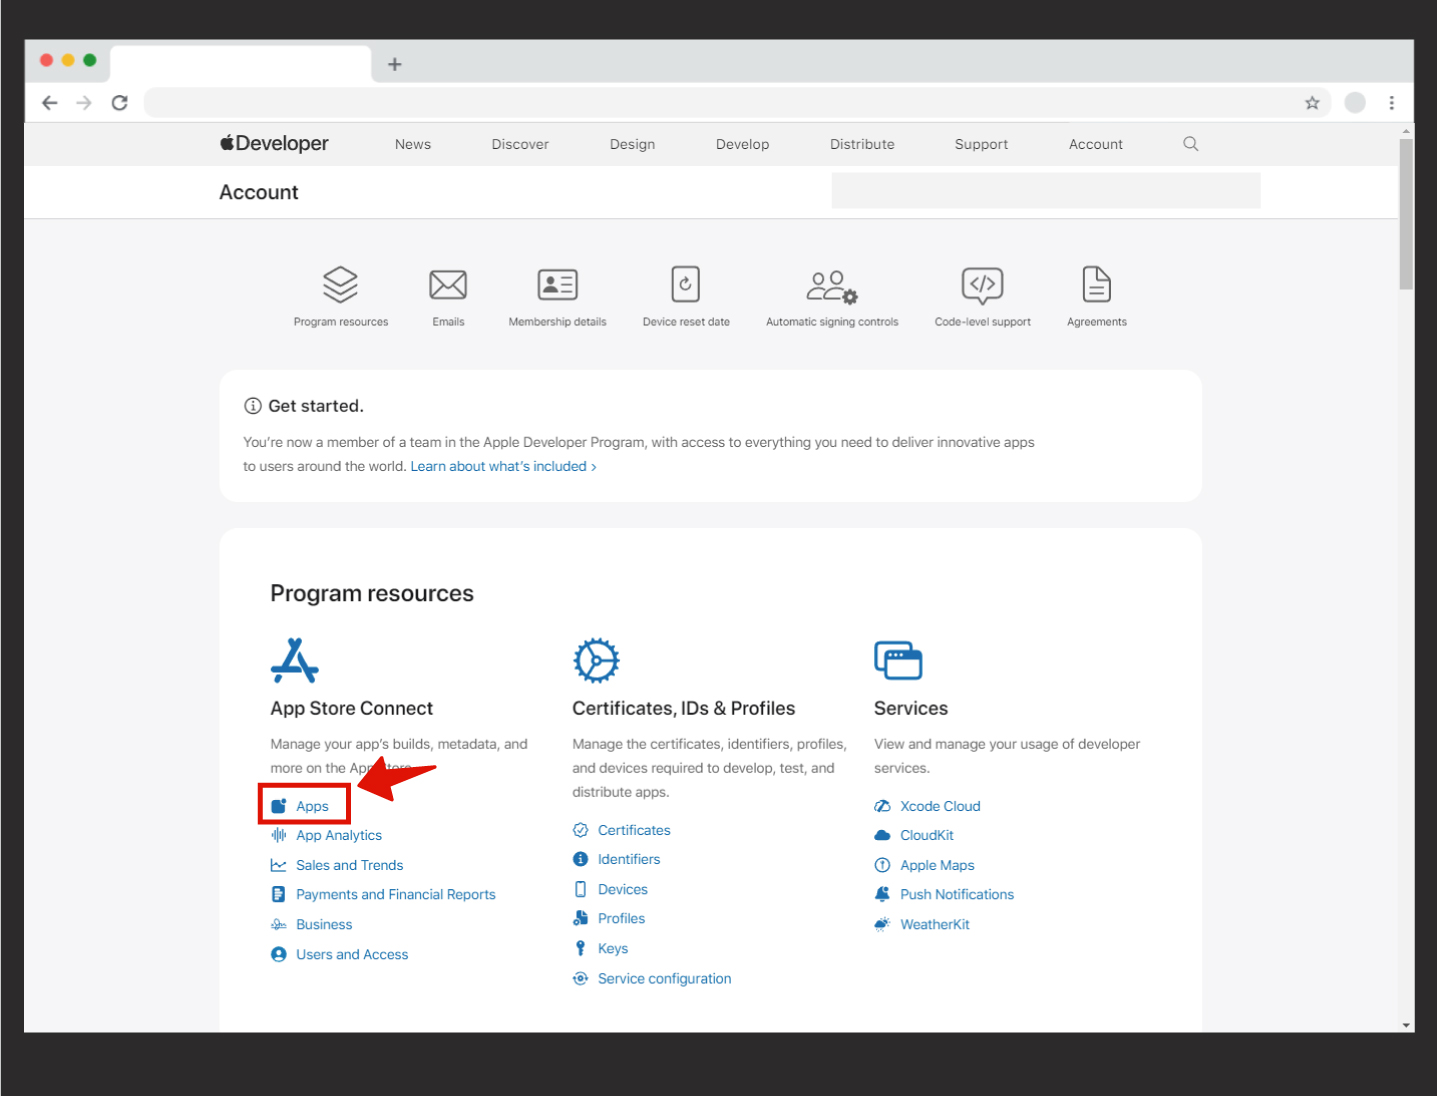
Step 1: To upload your app to the Apple App Store, log in to your Developer Account with your Apple ID at https://developer.apple.com/account/.
After logging into your Apple Developer Account, click on the Apps section on the screen that appears.
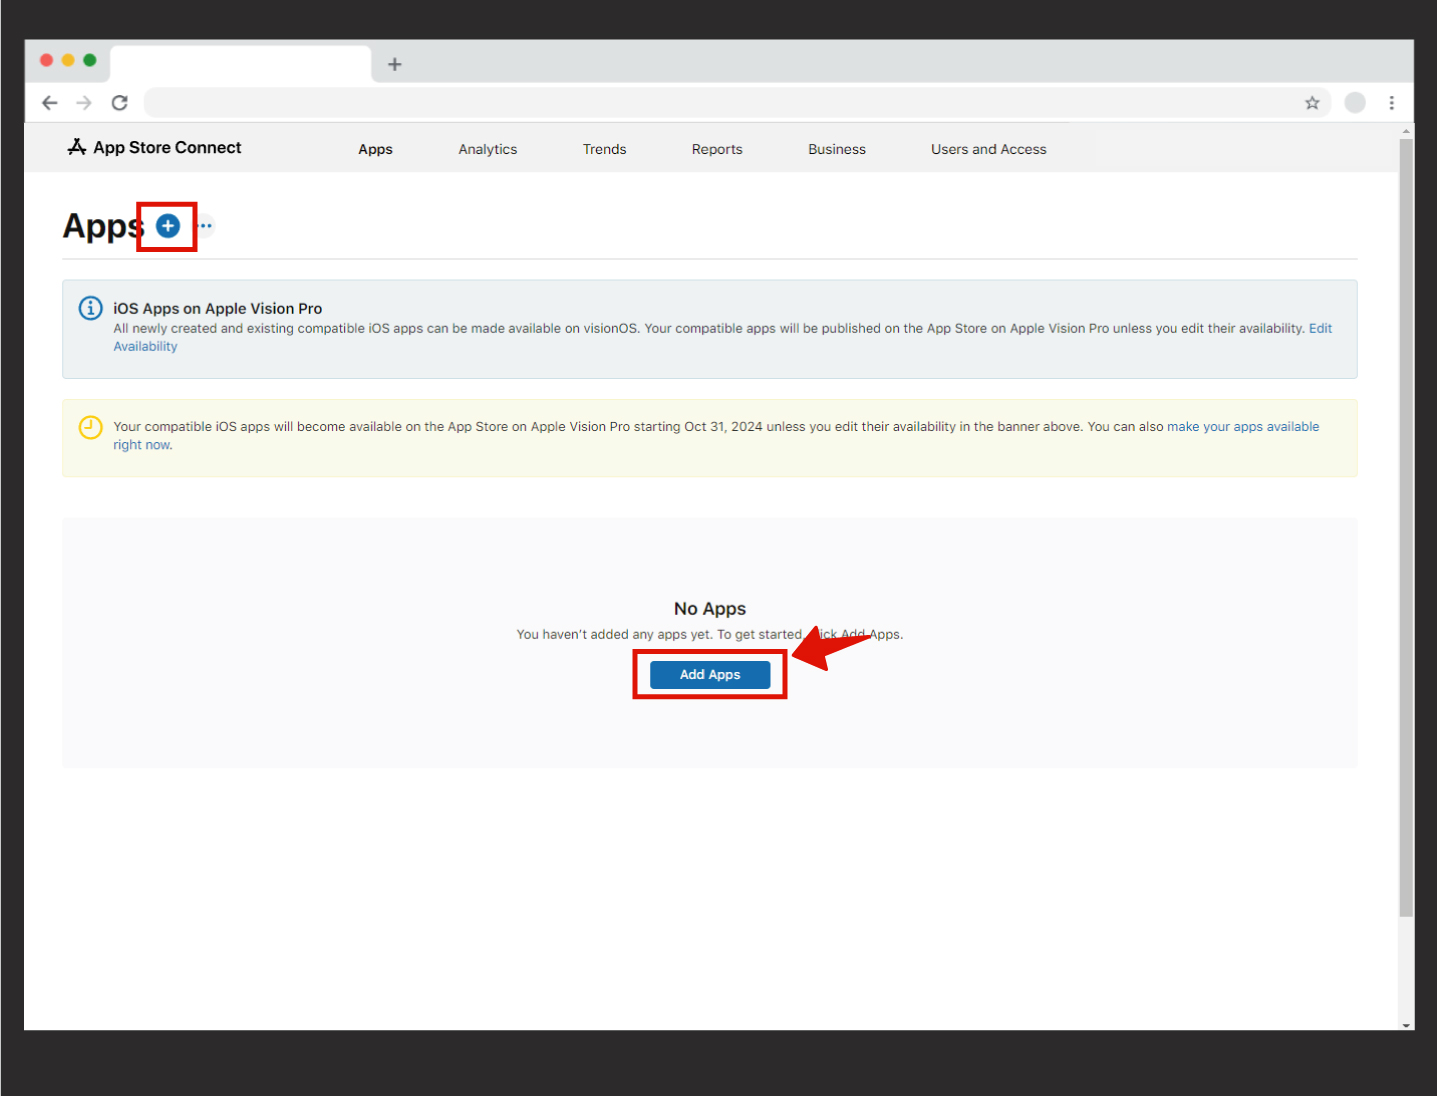
Step 2: A new screen will appear where you can view the applications available on the Apple App Store.
If you haven’t uploaded any apps before, this screen will appear empty, just like the image shown below.
If you haven’t created a Bundle ID yet, you can refer to the How to Create a Bundle ID? document.

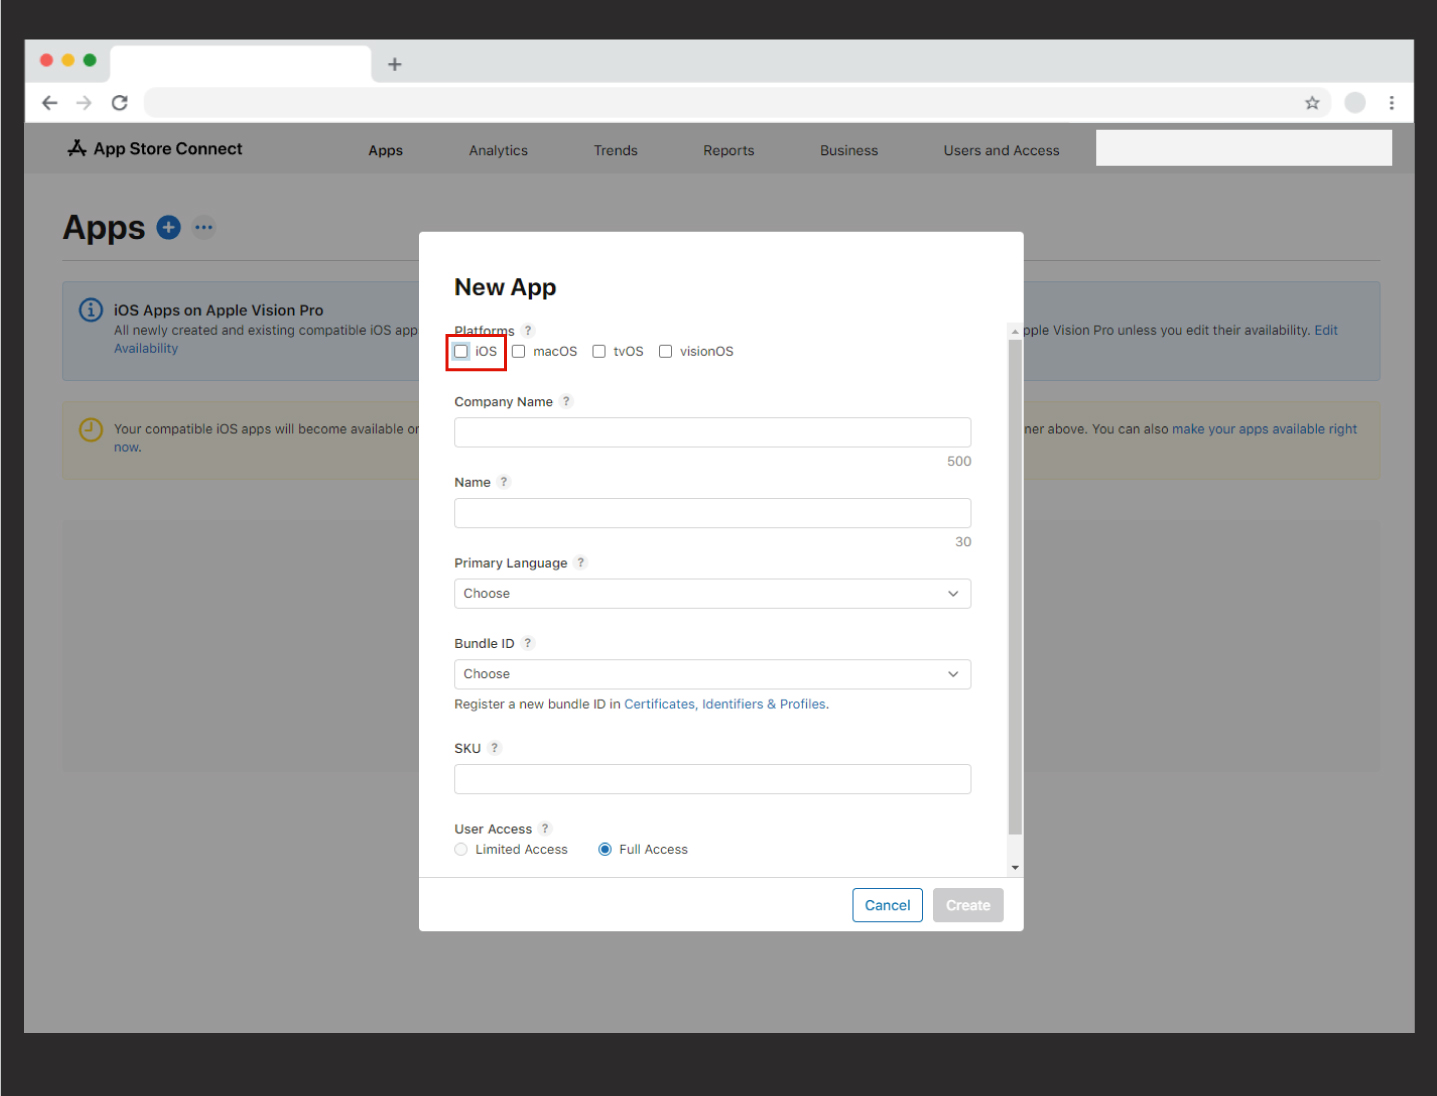
Through this wizard, you need to enter the following information about your app:
- Platforms: The platform where your app will be available. (Since tvOS is not supported on Mobiroller, you should select only iOS.)
- Company Name: Your company name
- Name: Your app name
- Primary Language: The language of your app
- Bundle ID: The package name you previously created
- SKU Number: You need to create a unique code for your app. (Suggested format: Date + App Name, e.g., 061021testapp)
- User Access: Choose whether your app will have limited or full access. (Full Access is recommended.)
Once you’ve filled in the required fields, click the Create button to continue.
Step-6: On the screen that appears, upload the app screenshots in 6.5-inch (1242×2688 pixels) JPEG format.
We recommend uploading at least 4 screenshots in this section.

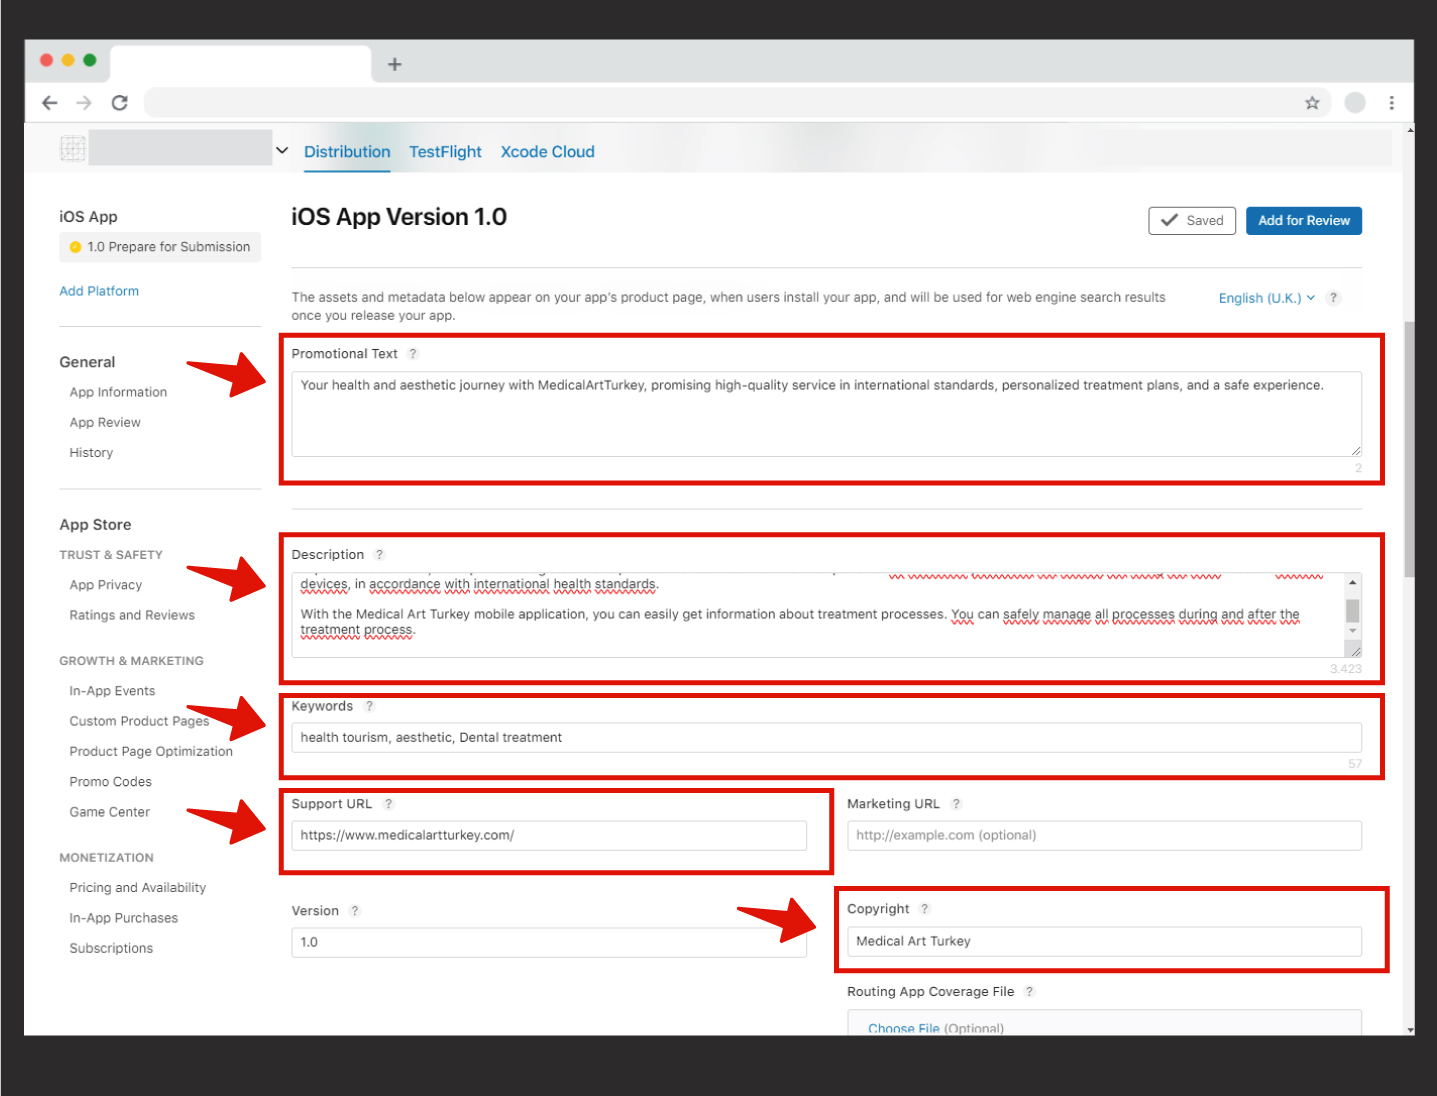
Step-7: After uploading the screenshots, you need to fill in the sections located further down on the same screen:
- Promotional Text: This is the promotional text for your app.
- Description: This is the section where you describe your app on the Apple App Store.
- Keywords: Enter the keywords for your app here, separated by commas.
- Support URL: This is where you enter the website, support, or contact page for your app. You must provide a working website in this field.
- Copyright: This is where you specify the copyright for your app. If you’re not sure what to write, you can simply enter the name of your app.
Step-8: After completing the previous step, scroll down to the Contact Information section. Here, you need to enter your contact details that Apple can use to reach you.
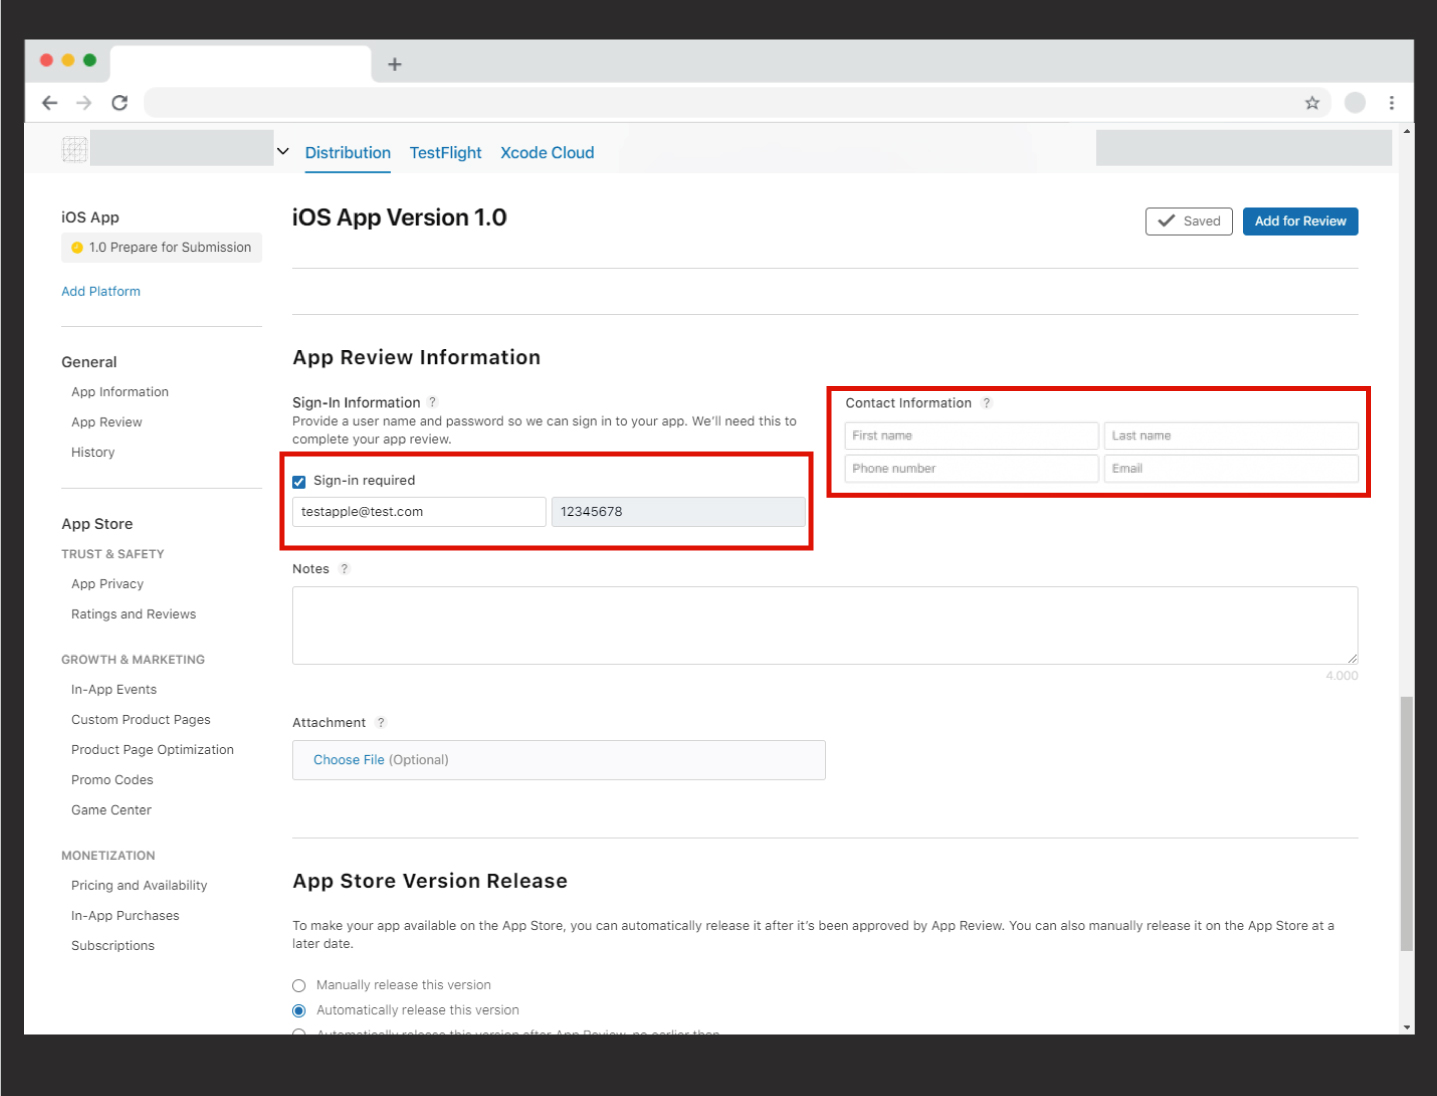
If your app or website includes a membership/login section, you must provide Apple with a demo account so they can review the app. Click on the Sign-in required option and enter demo account credentials in the field that appears below. The required login details are:
Username: test@apple.com
Password: 12345678
You must also create this user account both in your app and on your website.In the Mobiroller panel, you can create this account for Apple under Membership Settings in the left-hand menu.
If your app does not have a login system, you can leave this section unchecked and blank.
After completing these steps, don’t forget to scroll to the top of the page and click the Save button.
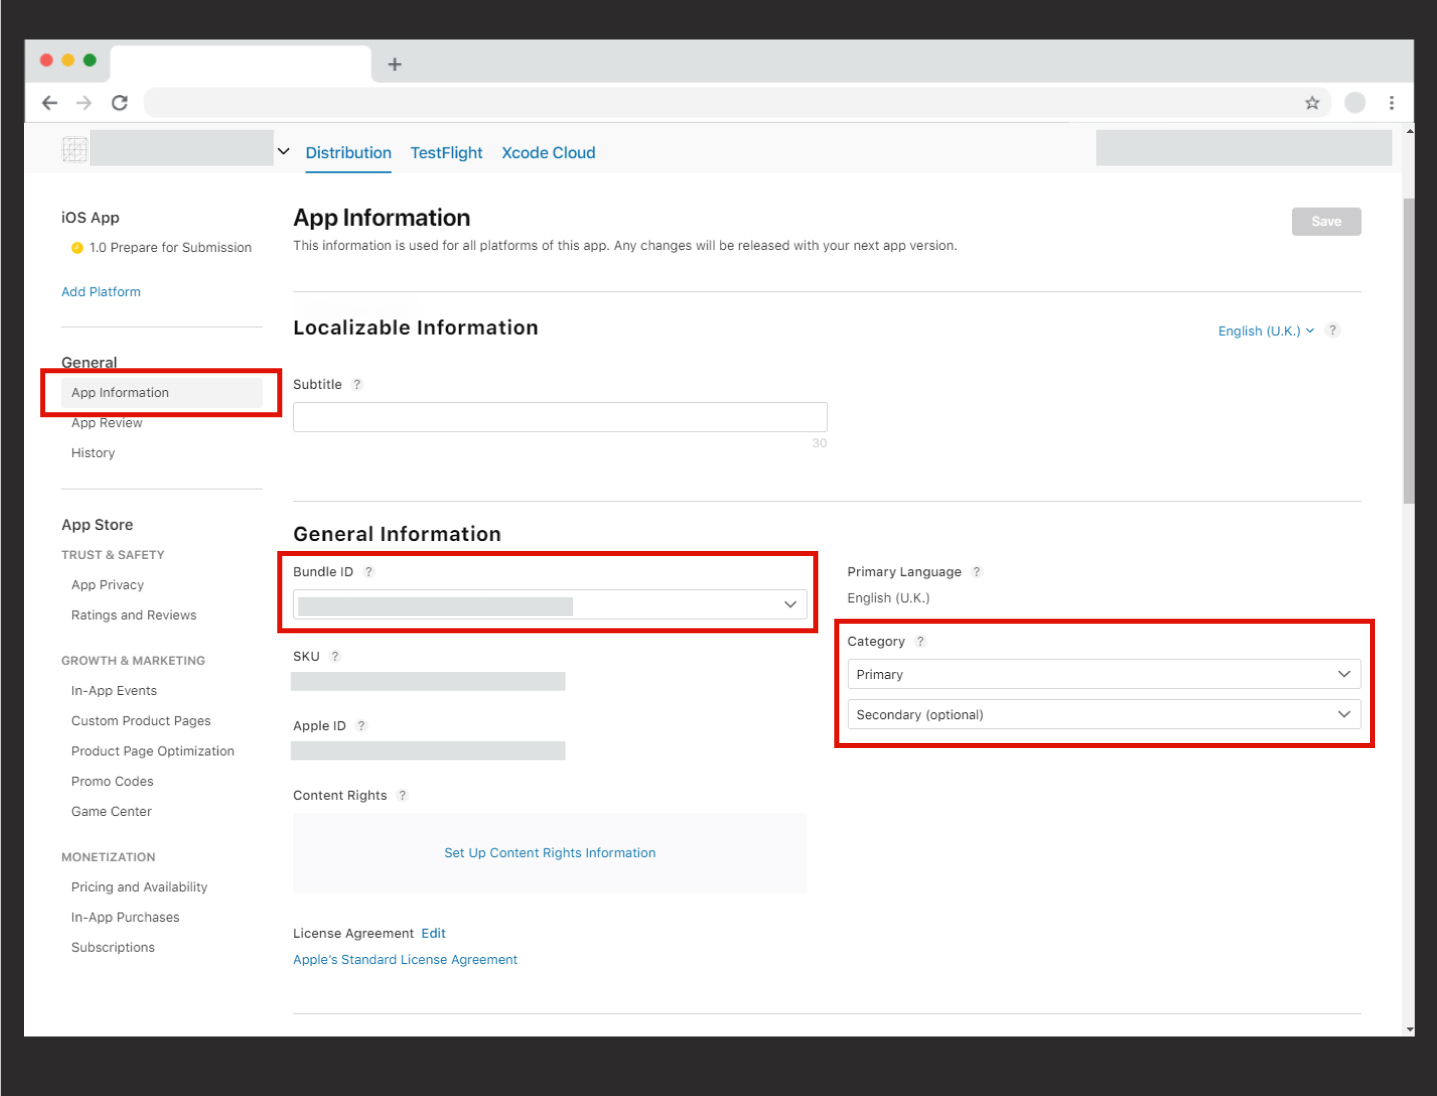
- Step 9: Go to the App Information section located on the left side of the screen.
- In the Subtitle field, enter the subtitle of your app. (This field is optional, so you can leave it blank if you prefer.)
- Bundle ID: You can select or change the Bundle ID you previously created for your app from this section.
It is important to select the correct Bundle ID here. If the wrong one is selected, an error will occur during the IPA production.
- Category: You need to specify the category of your app. Add the primary category in the Primary section and the secondary category in the Secondary section.
Adım-10: In this section, you need to enter the general information about your app.
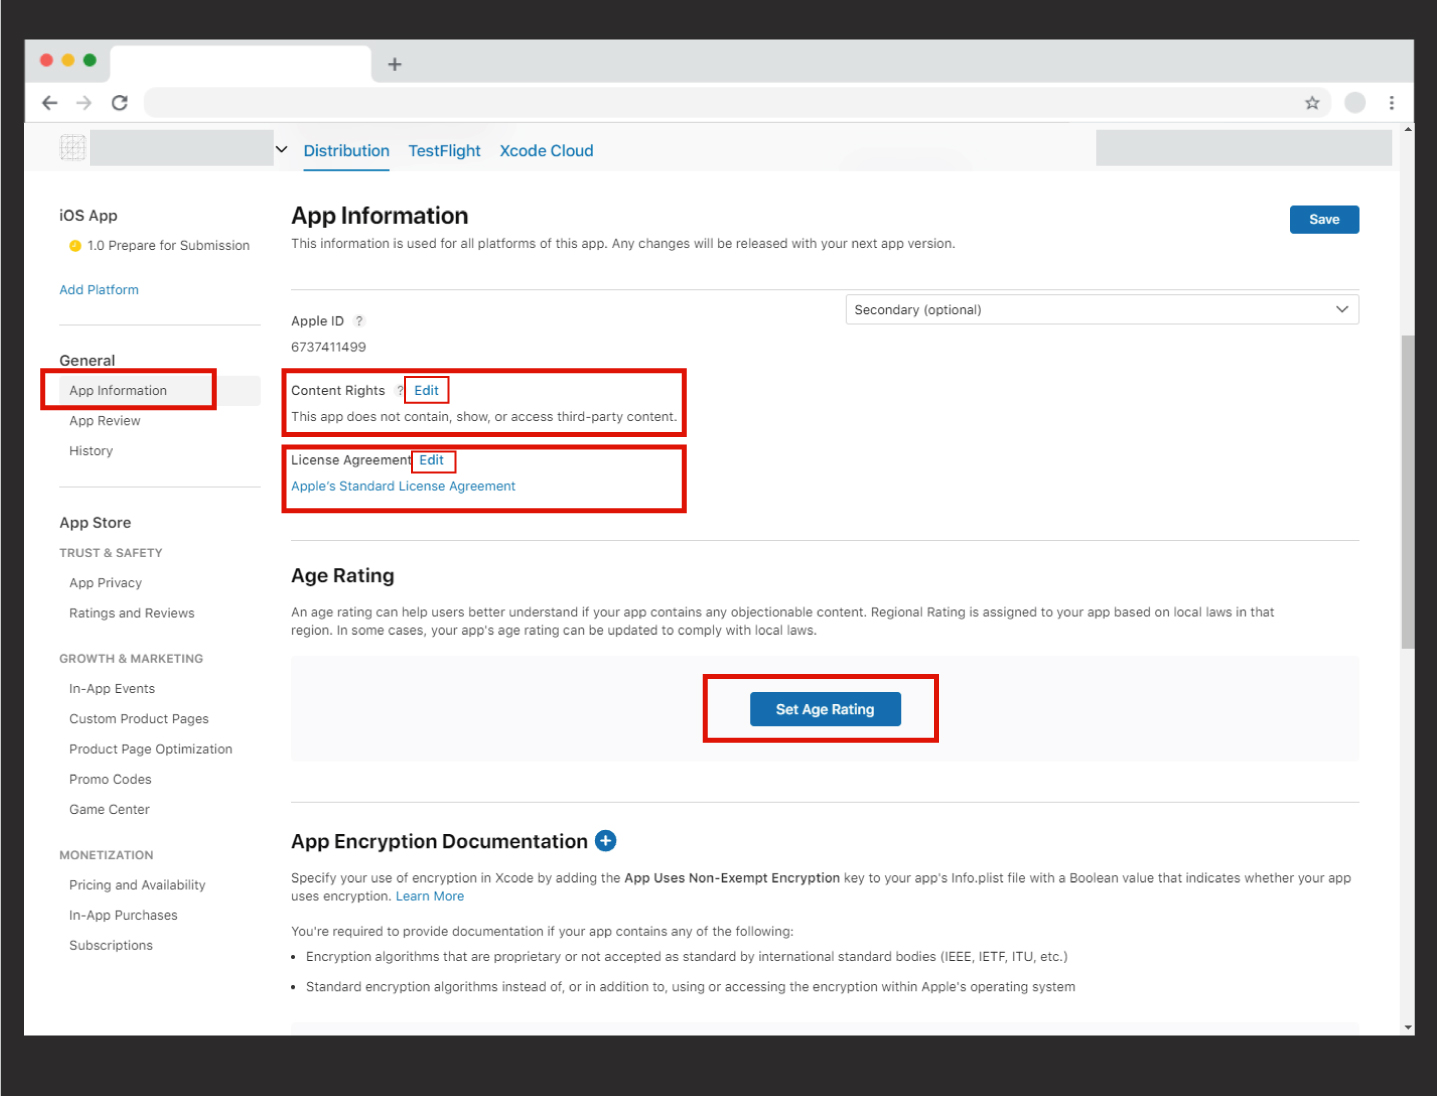
- Content Rights: You need to specify whether your app has access to third-party content and, if so, whether you have the rights to use it. (For example, if you’re pulling news from a news site, do you have the rights to those news articles? If you’re displaying YouTube content in your app, is this content owned by you?)

- License Agreement: You need to agree to the license agreement.
- Age Rating: Based on the content of your app, you should select the appropriate options below and then click the Next button.

In the first option, if your app provides access to restricted sites, select Yes; otherwise, select No.
In the second option, if your app involves gambling, select Yes; otherwise, select No. Then click the Next button.
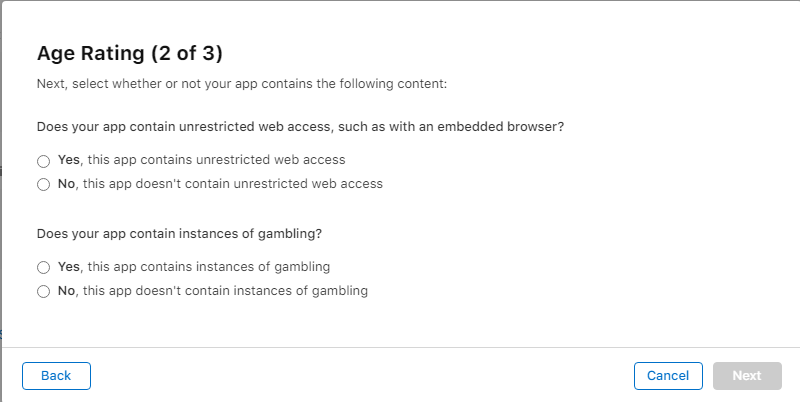
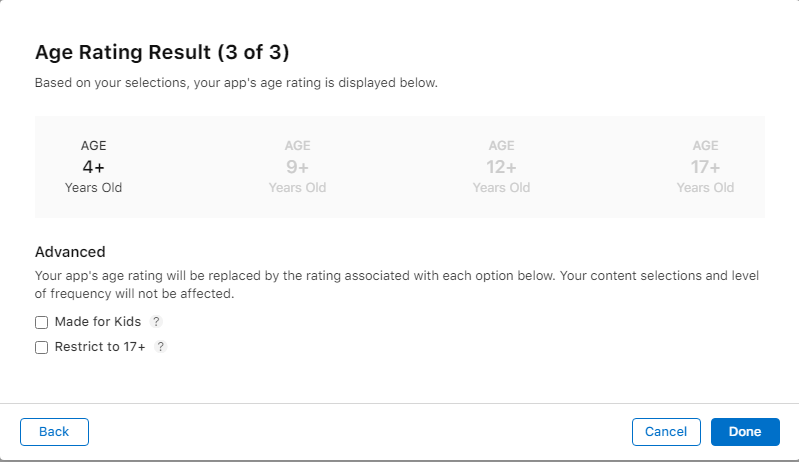
To reduce the likelihood of your app being rejected, you should select Restrict to 17+ here and click Done. After completing this step, don’t forget to click the Save button located at the top right of the page.
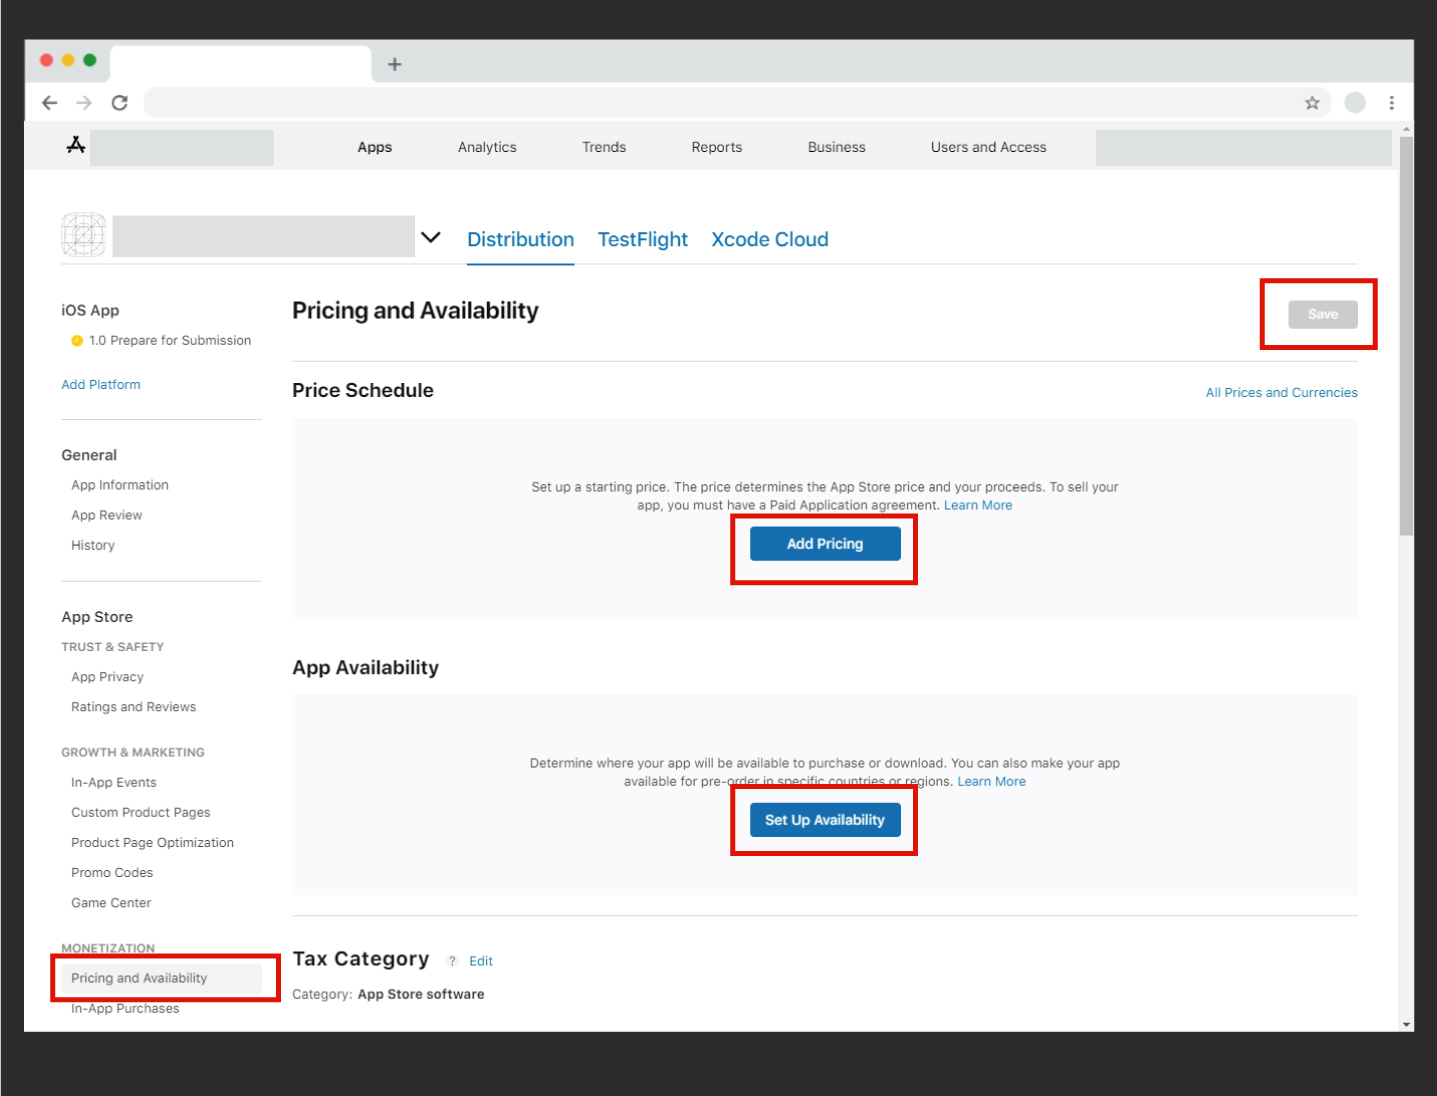
Step 11: After completing the App Information section, click on Pricing and Availability on the left side of the screen, and set the price of your app under the Price section. Afterward, select the relevant countries in the App Availability section on the same page.
Once you’ve completed these steps, don’t forget to click the Save button at the top right.
Step 12: After completing the Pricing and Availability section, click on App Privacy on the left side of the screen.
Privacy Policy URL:
If you have created a privacy policy page for your app, you can provide the link to the relevant page here. If you don’t have such a page, you can access the MobiRoller Privacy Policy that you can use for your Apple Store listing.
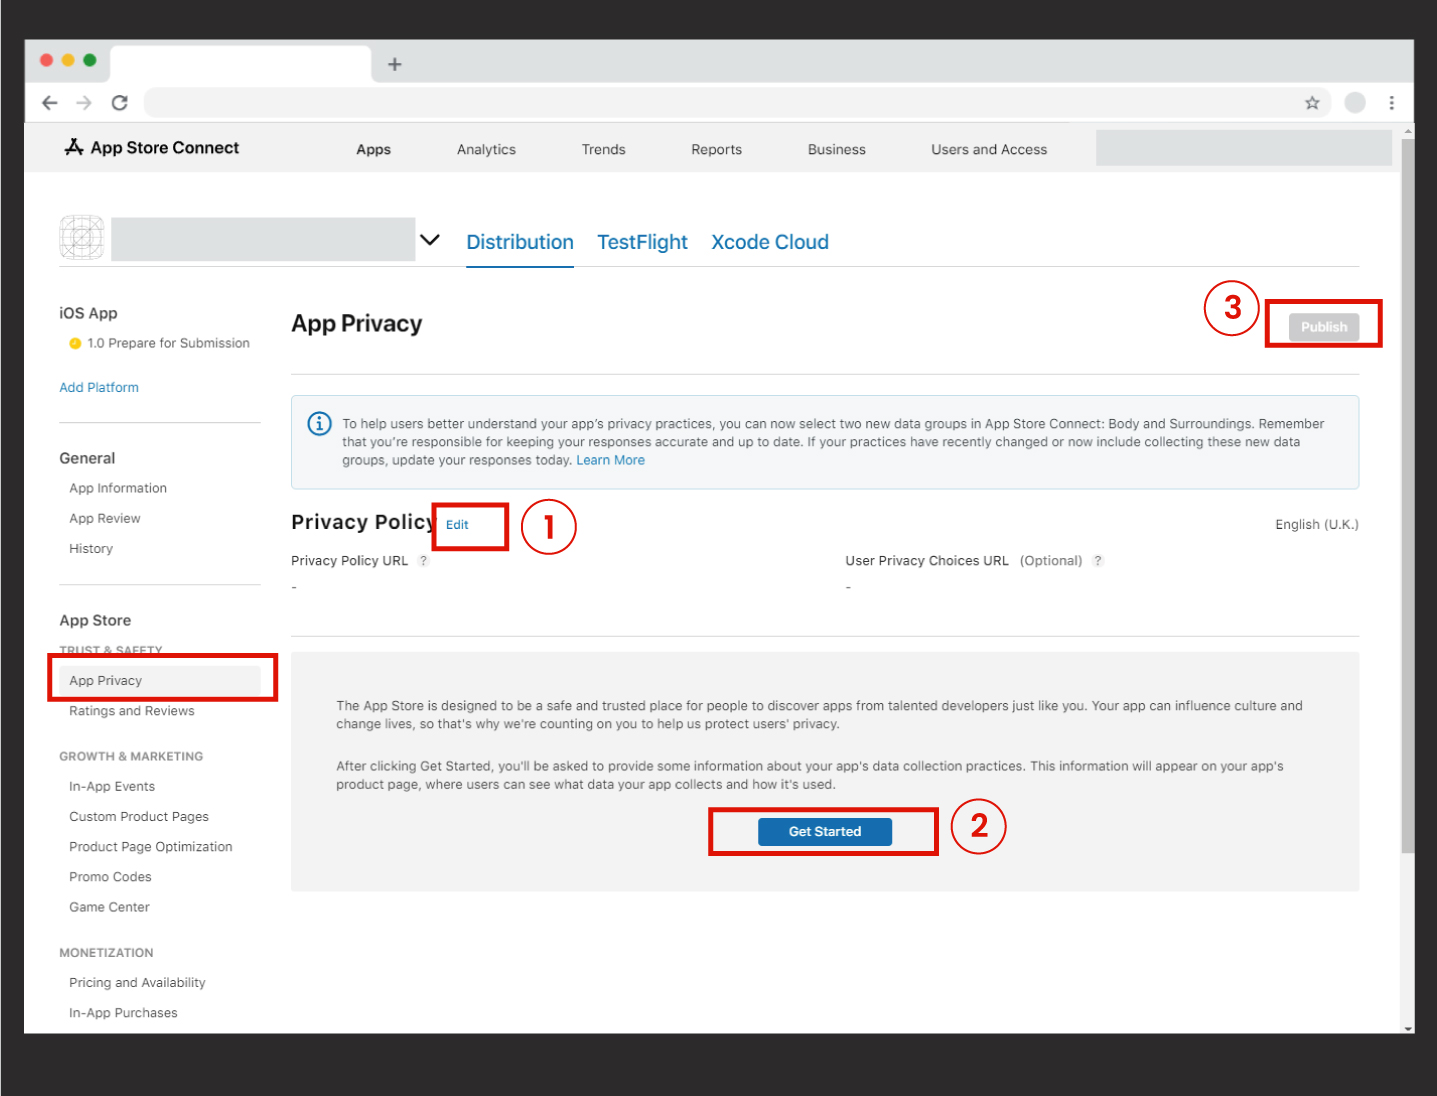
– First, click on Edit to add a Privacy Policy link for your app. After adding the relevant link, click the Save button.

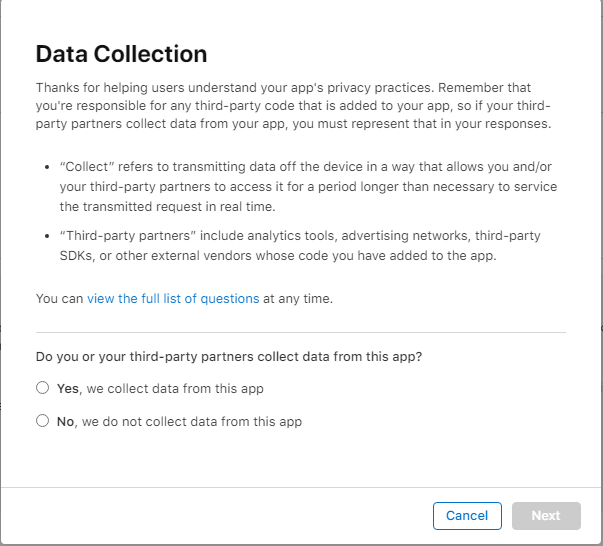
– After uploading the Privacy Policy, click on the Get Started button. In the Get Started section, you must specify what data your app collects and for what purposes. If there are no cookies or data collection systems, you can select No. After selecting the appropriate option for your app, click the Next button. If you selected Yes, you will be asked to choose which data you collect and why.
– After completing the data collection steps, click the Publish button in the top right corner to confirm your Privacy Policy and the information you provided regarding data collection.
Step-13: If your app will have in-app purchases (product sales, subscription processes, etc.), you must complete these transactions before submitting your app for review. Otherwise, the in-app purchase functionality in your app will not work.
You can find how to make in-app purchases here.
Note: Your app’s logo is taken from the logo you uploaded in the Mobiroller panel. The logo should not have any transparent areas. Otherwise, all transparent areas will appear black.
After filling in all the required information, you need to generate the IPA file. To learn how to create the IPA file, you should follow the article below.
Now, you can review the “2.3. How to Create an IPA File for Apple?” article to generate the IPA file and publish your app.
For support, you should contact the Mobiroller Technical Team via support@mobiroller.com. Our technical team will assist you with errors and issues in your app.