To enable the In-App Purchase feature in your application, you must complete the following steps thoroughly and without any omissions.
(If you do not want the release to be publicly visible to users while activating In-App Purchase, an alpha release will be sufficient.)
If your current version is lower than the required version, you must generate a new APK and update your app on Google Play.
For guidance on how to update your app, please refer to the article: STEP-3: How to Update App on Google Play Store?
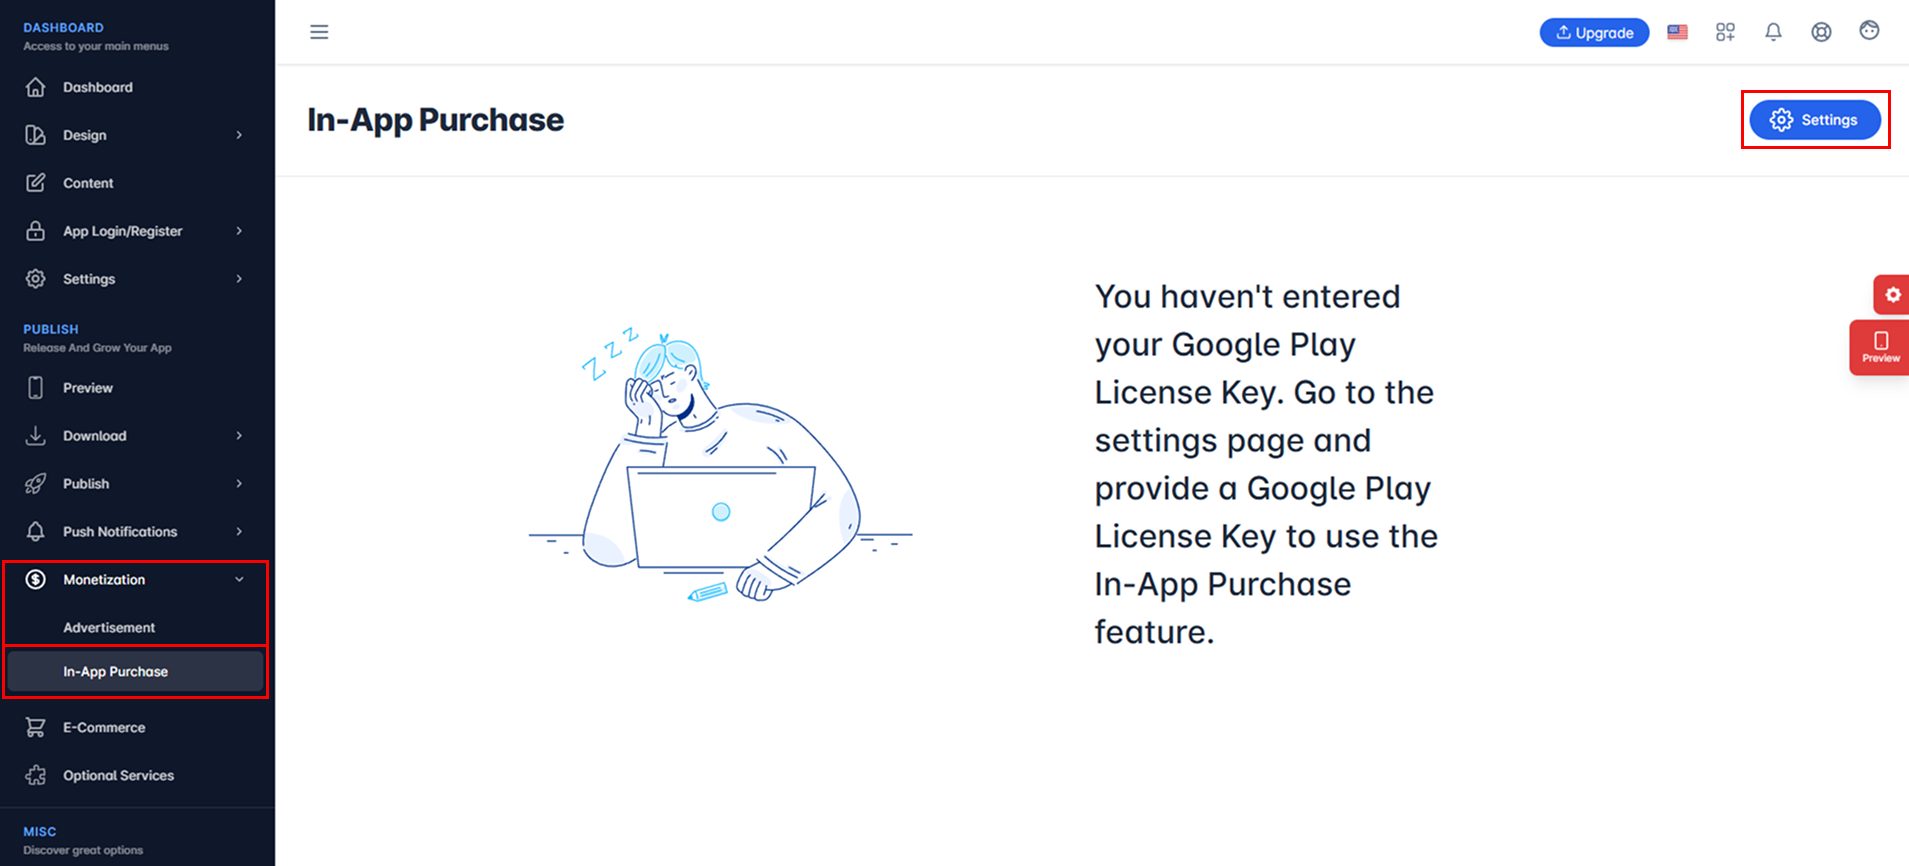
In the control panel, navigate to the Monetization > In-App Purchase section from the left-hand menu, and click the Settings button located there.
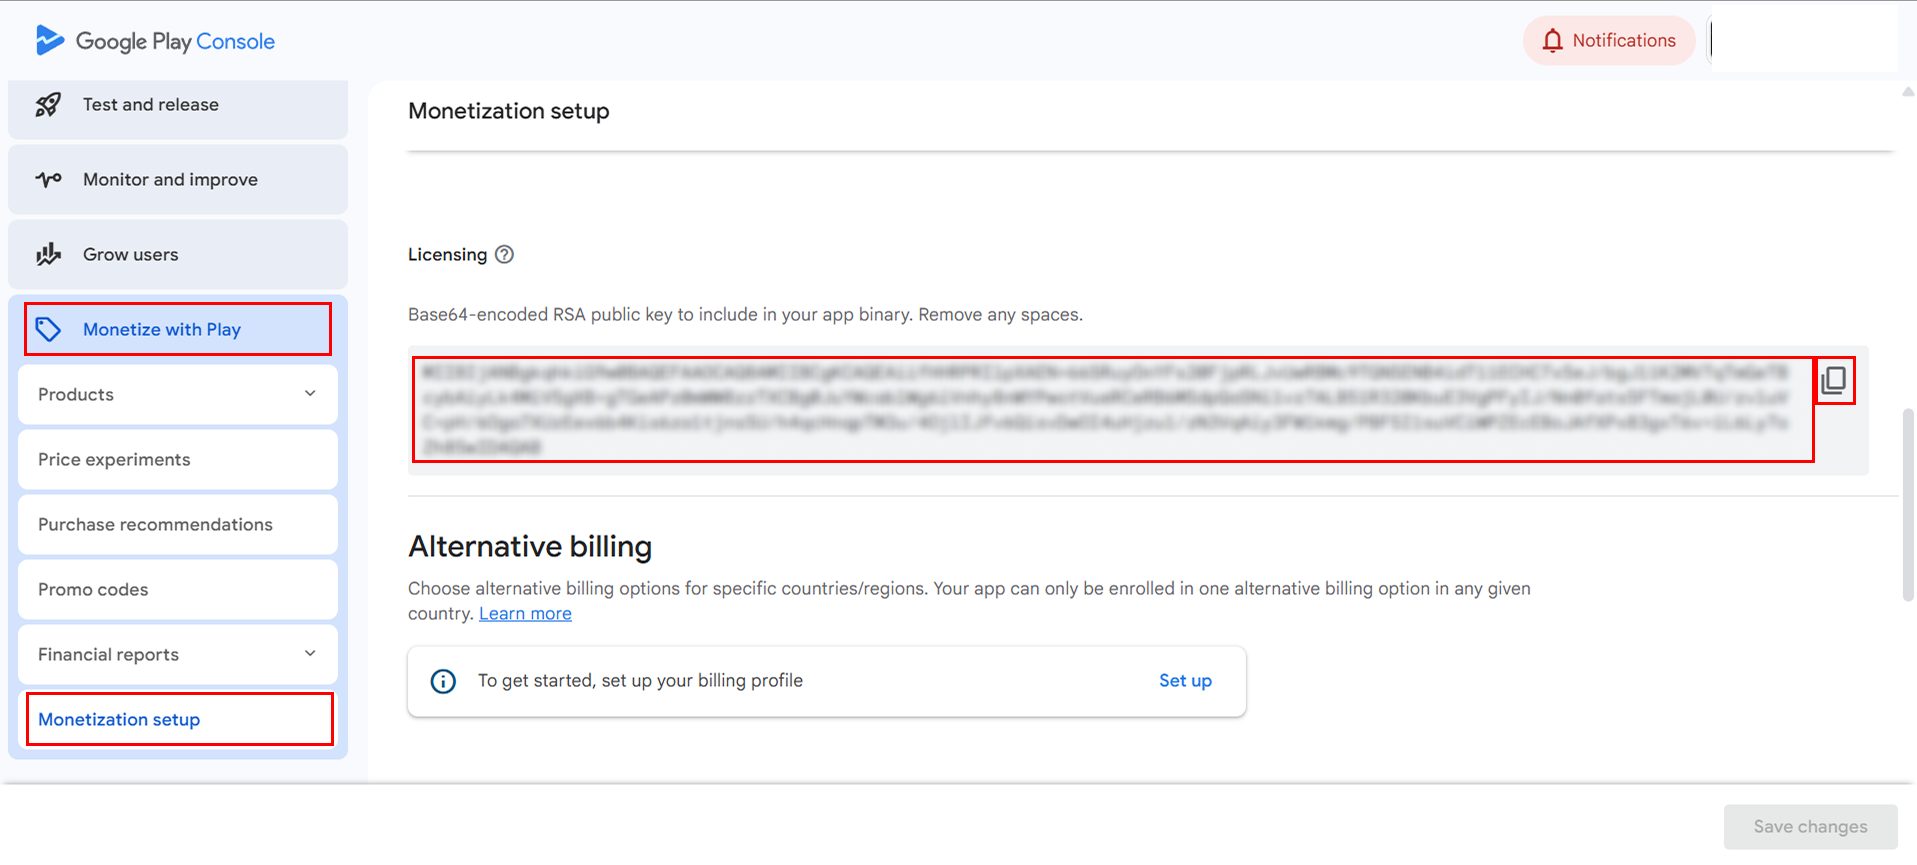
To obtain your Google Play License Key, log in to your app through your Google Play Developer account. Then, go to the Monetize with Play section and click on Monetization setup. From there, copy the Licensing key provided in that area.
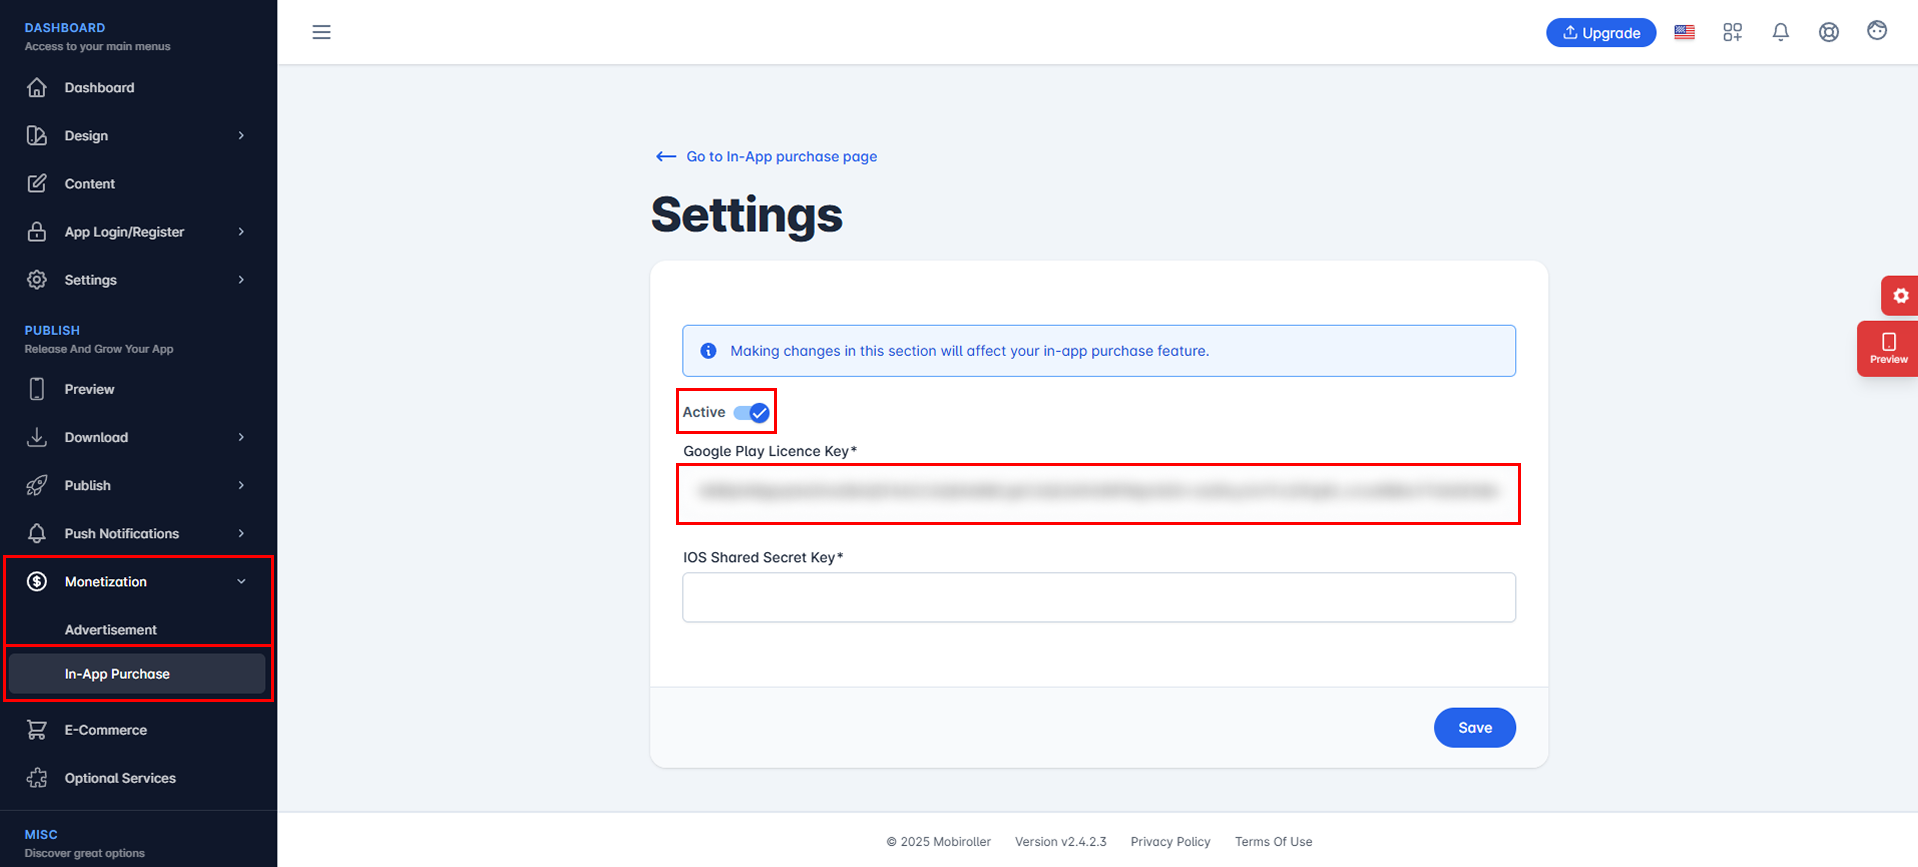
Paste the code you copied into the Google Play License Key field in the control panel, then click the Save button.
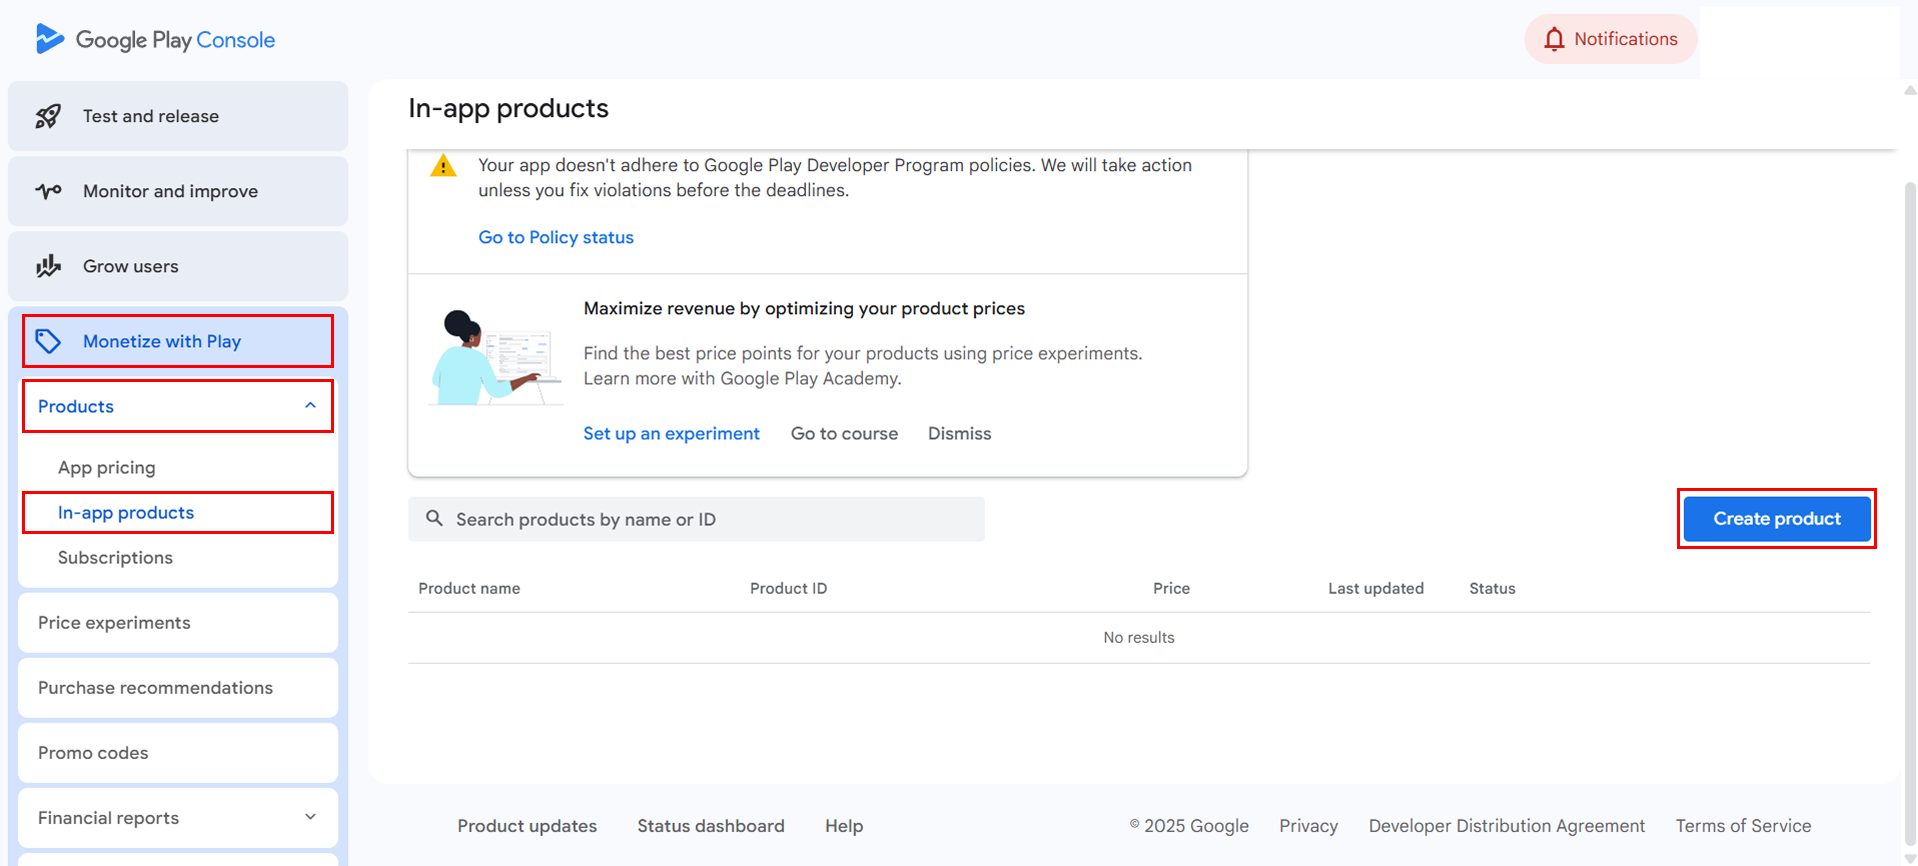
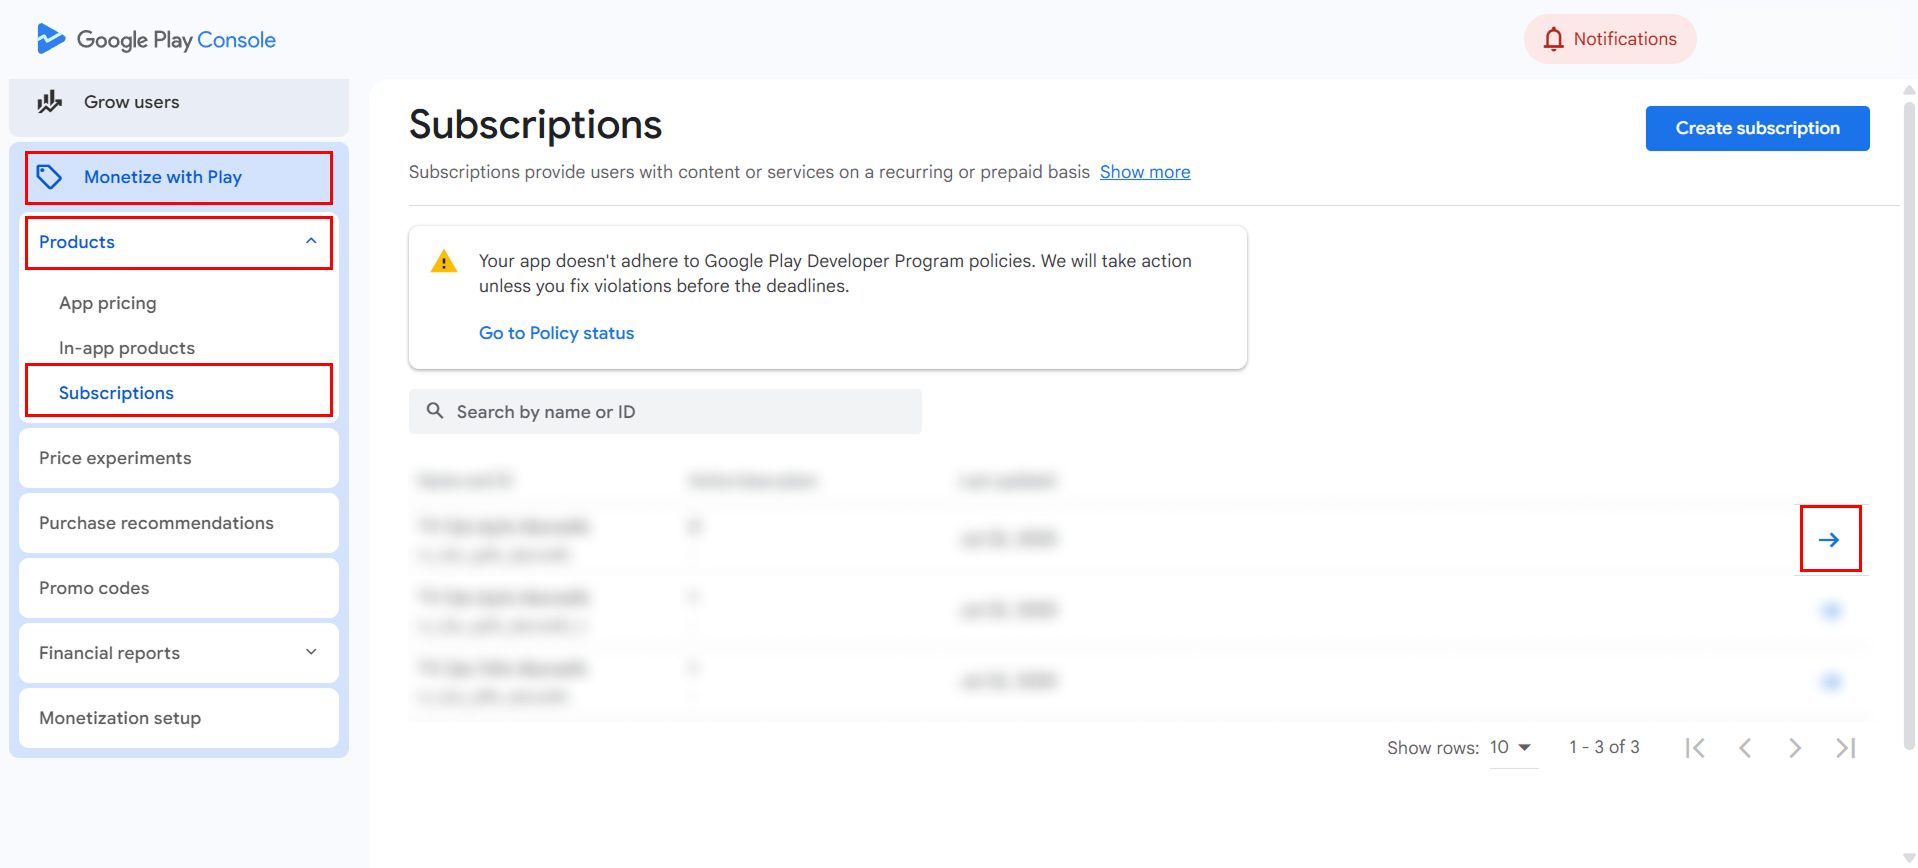
Next, log in again to your Google Play Console account and go to the Monetize with Play > Products section.
You will see three options: App pricing, In-app products, and Subscriptions.
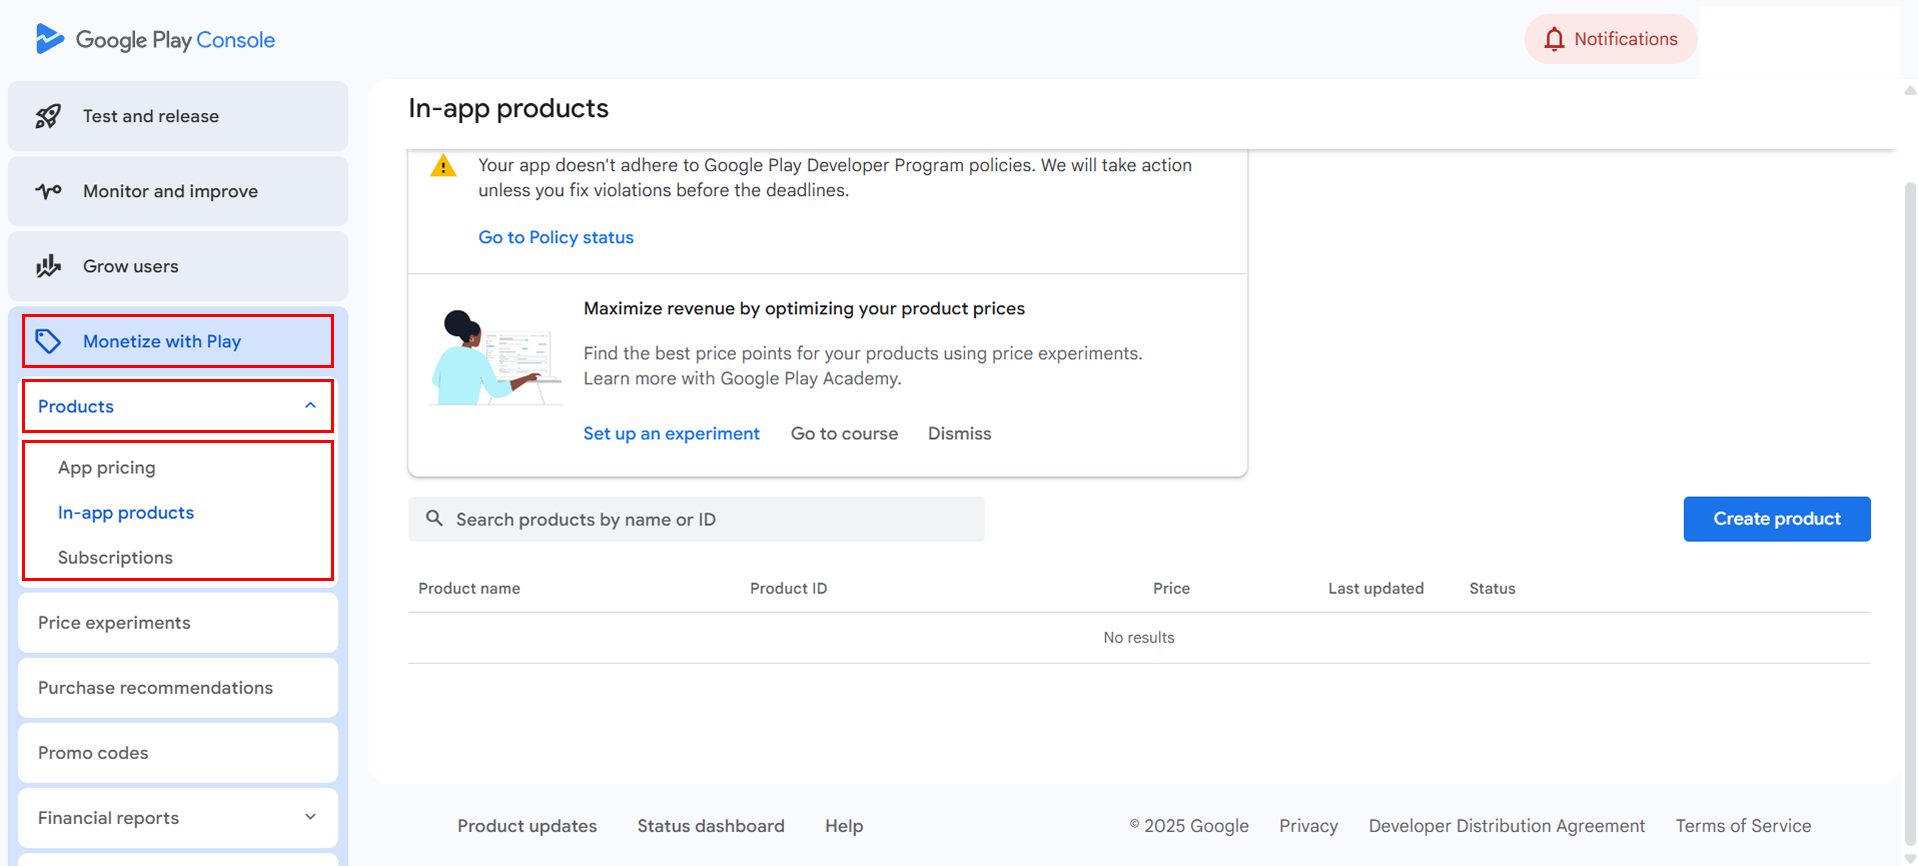
App pricing:This section allows you to set and adjust the price of your app if it is published as a paid app on the Play Store.
In-app products: Use this section for your one-time purchase items.
Subscriptions: This section lets you create subscription plans with options such as monthly, quarterly (3 months), semi-annual (6 months), or yearly billing.
Let’s review the In-App Products section:
Click the Create product button.
On the screen that opens, fill in the required fields.
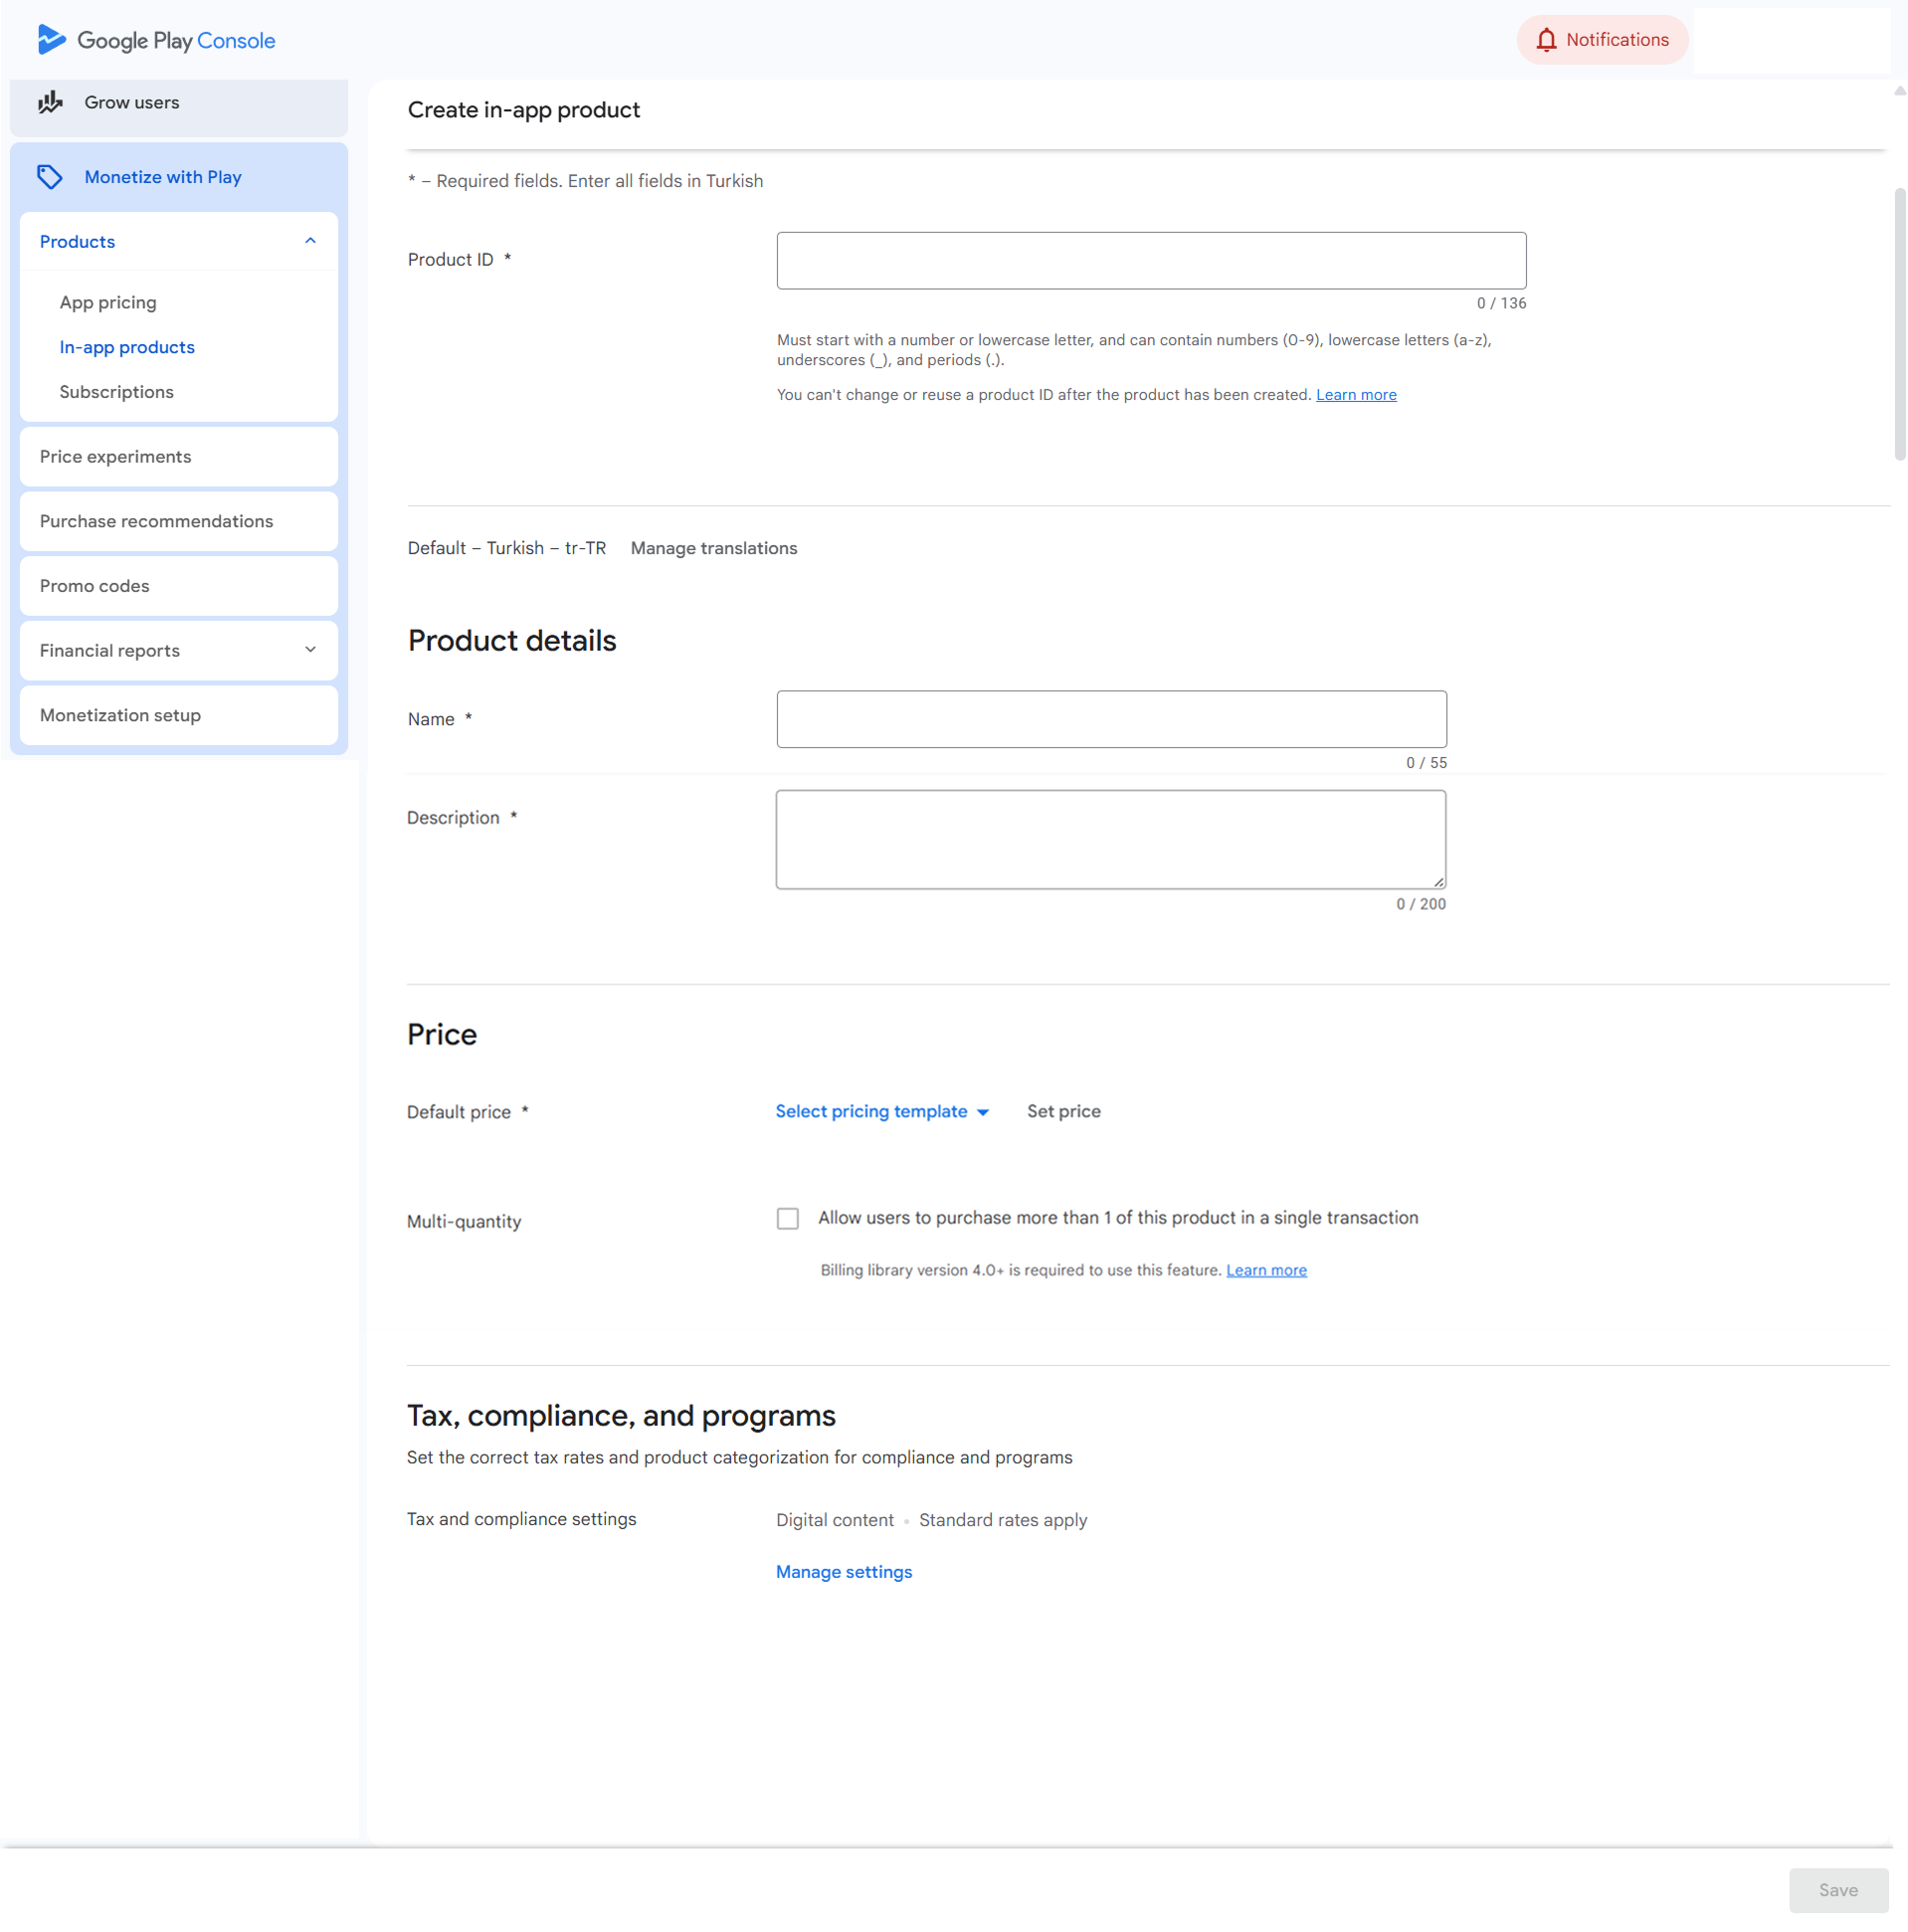
Product ID: This is the unique identifier for your in-app product. Product IDs must start with a number or lowercase letter and can contain digits (0-9), lowercase letters (a-z), underscores (_), and periods (.).
Name: Enter the product title that users will see after clicking the purchase button in the app.
Description: Enter the product description that users will see after clicking the purchase button in the app.
Price: Set the product price and specify the countries where the product can be purchased.
Multi-quantity: You can allow multiple quantity payments for this product. Users can purchase multiple quantities depending on their country or regional limits.
Tax and compliance settings: Set the correct tax rate and product classification for compliance and applicable programs.
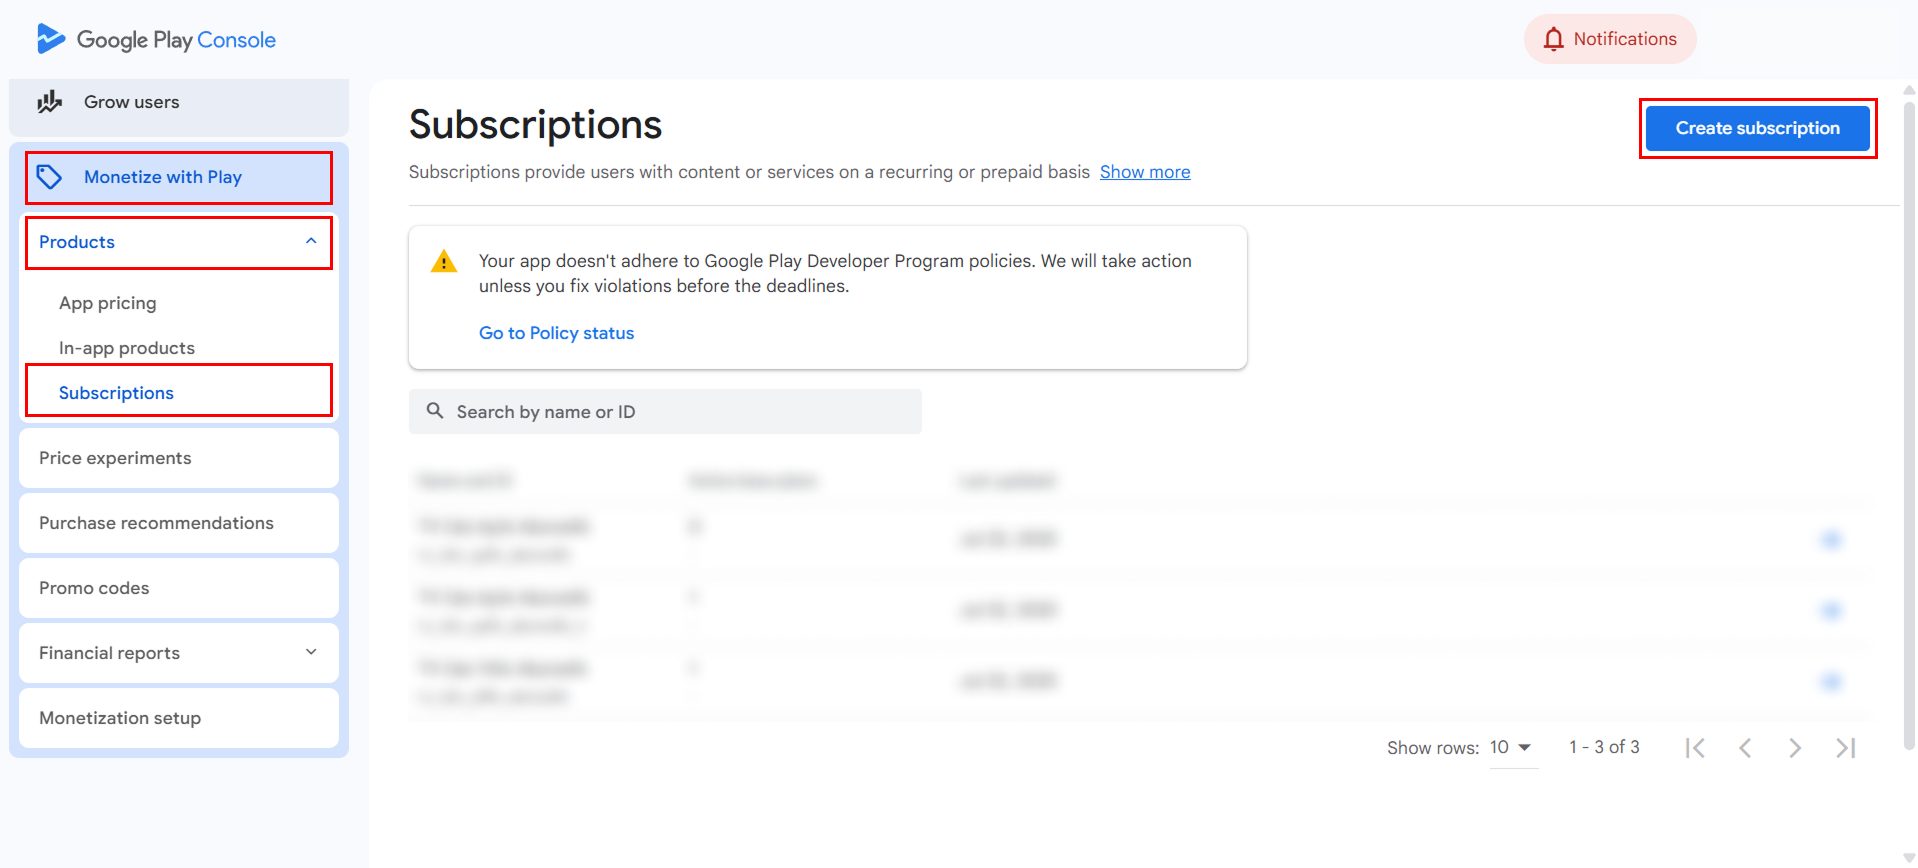
Now, let’s review the Subscriptions section:
Click the Create subscription button.
On the screen that opens, fill in the required fields.
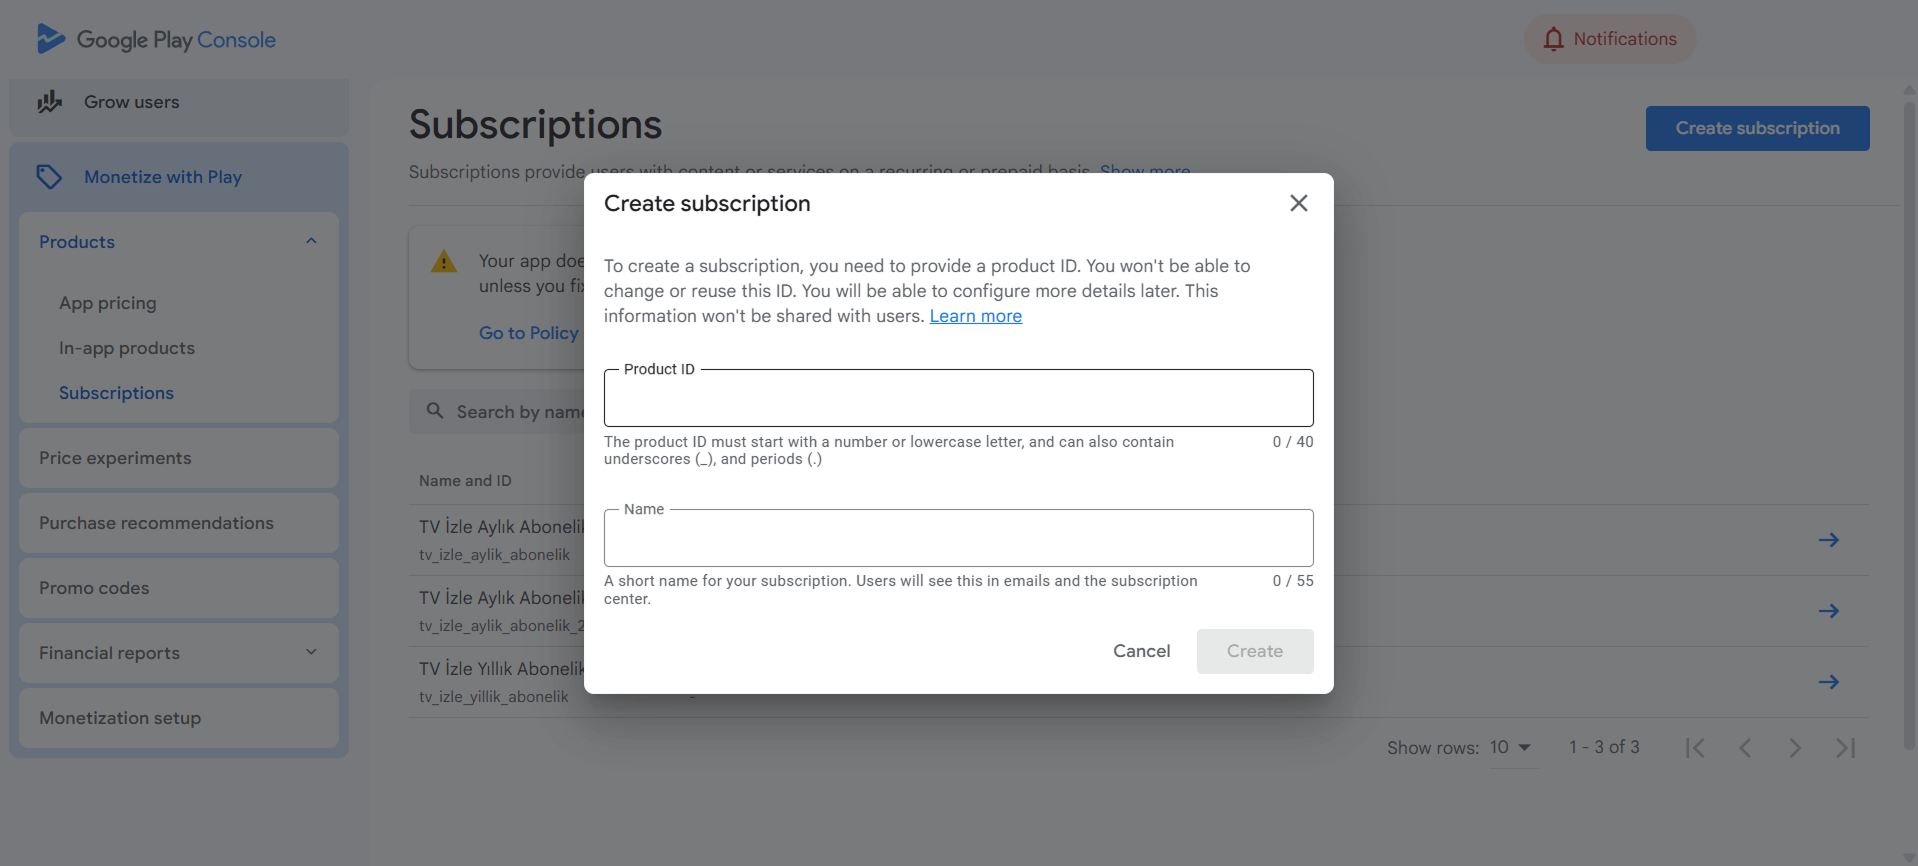
Product ID: This is the identifier you assign to the subscription product you want to add. It can contain letters or numbers, but make sure each product has a unique ID.
Name: Enter the product title that users will see after clicking the purchase button in the app.
After entering the required information, click the Create button.
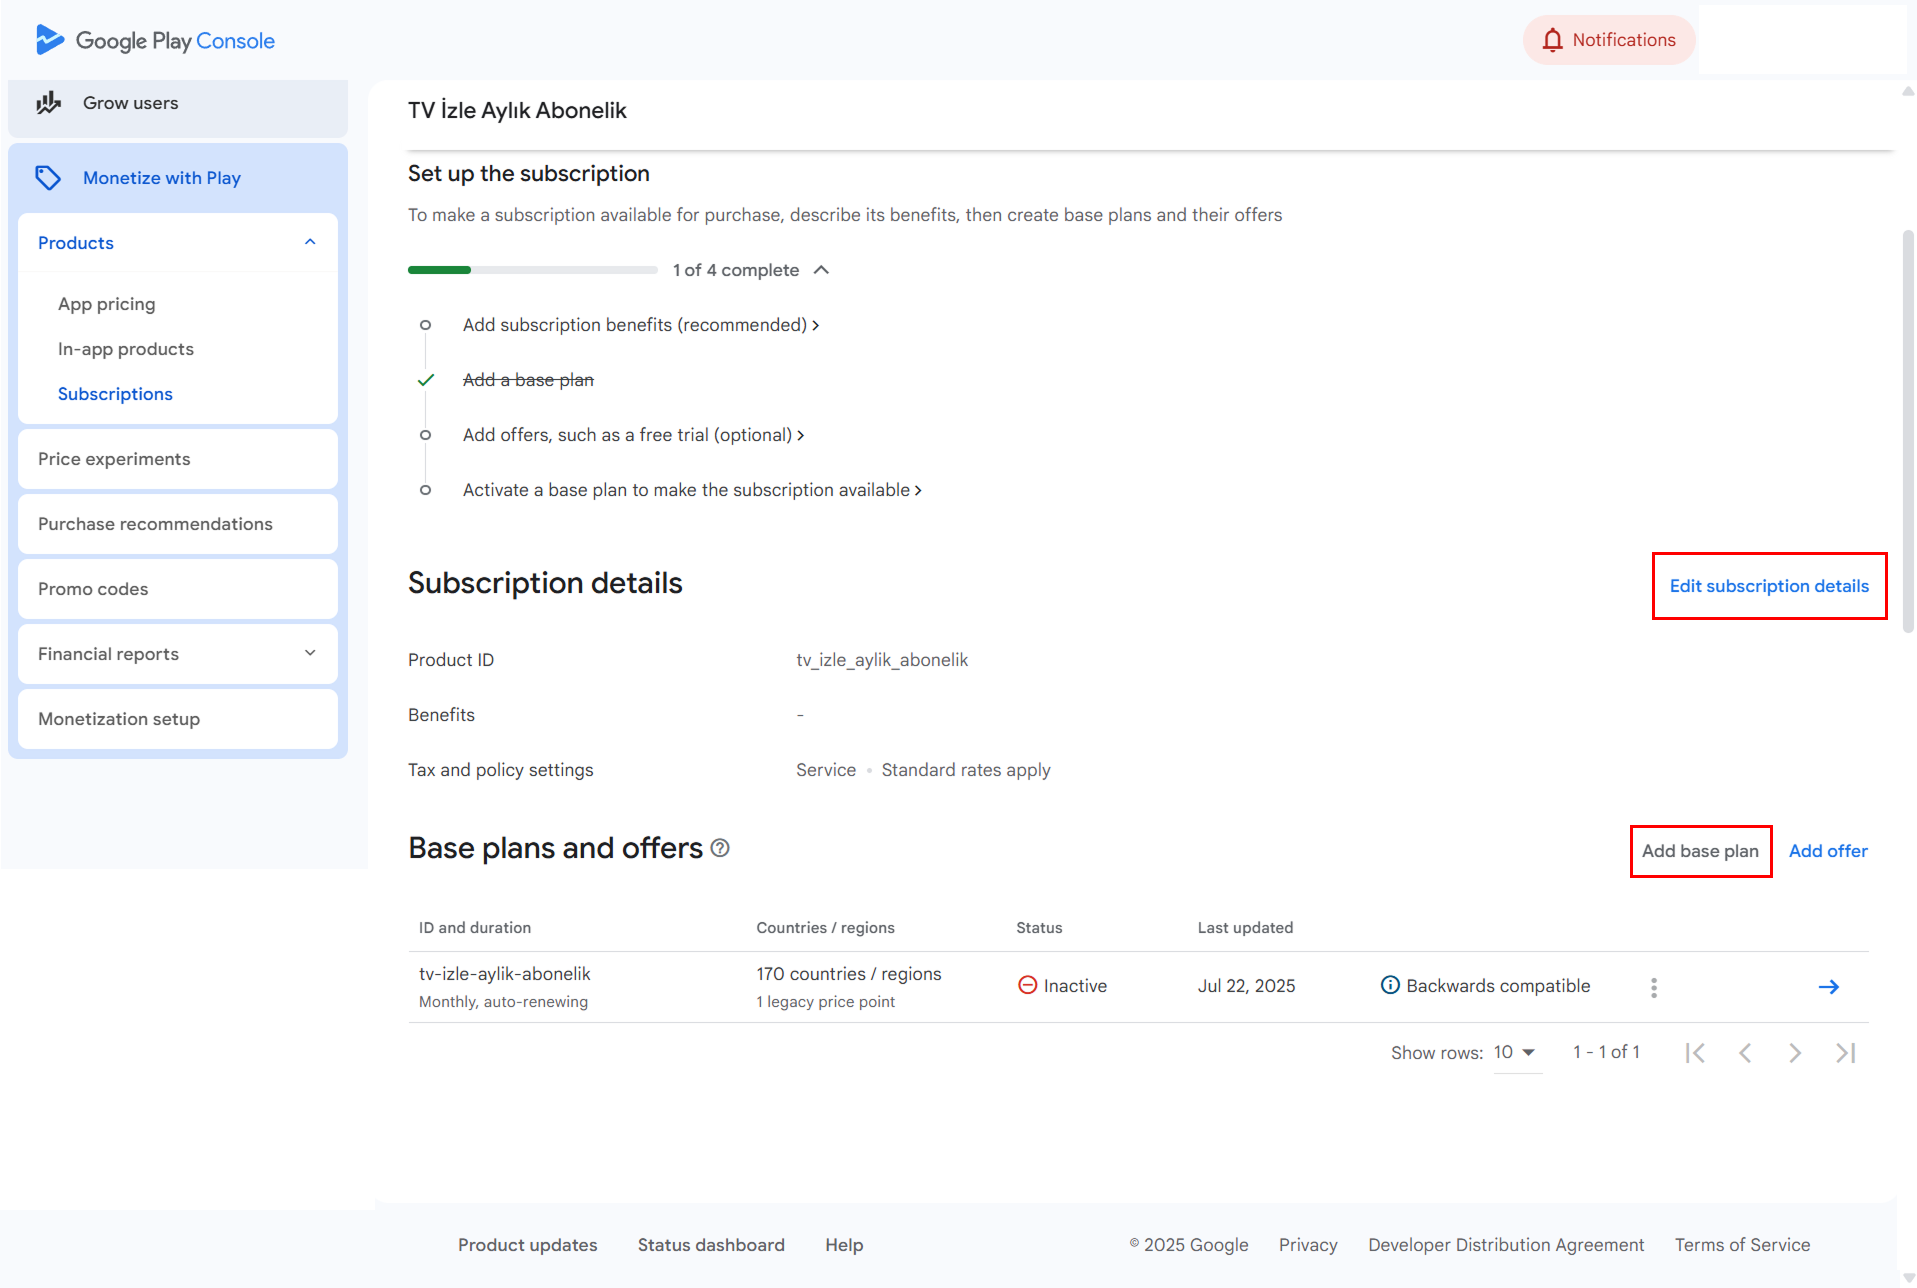
After creating the subscription, you must add a Base Plan. To do this, select the subscription you have just created.
On the opened screen, you can edit the subscription details by clicking the Edit subscription details button.
Click the Add base plan button.
On the screen that opens, fill in the required fields.
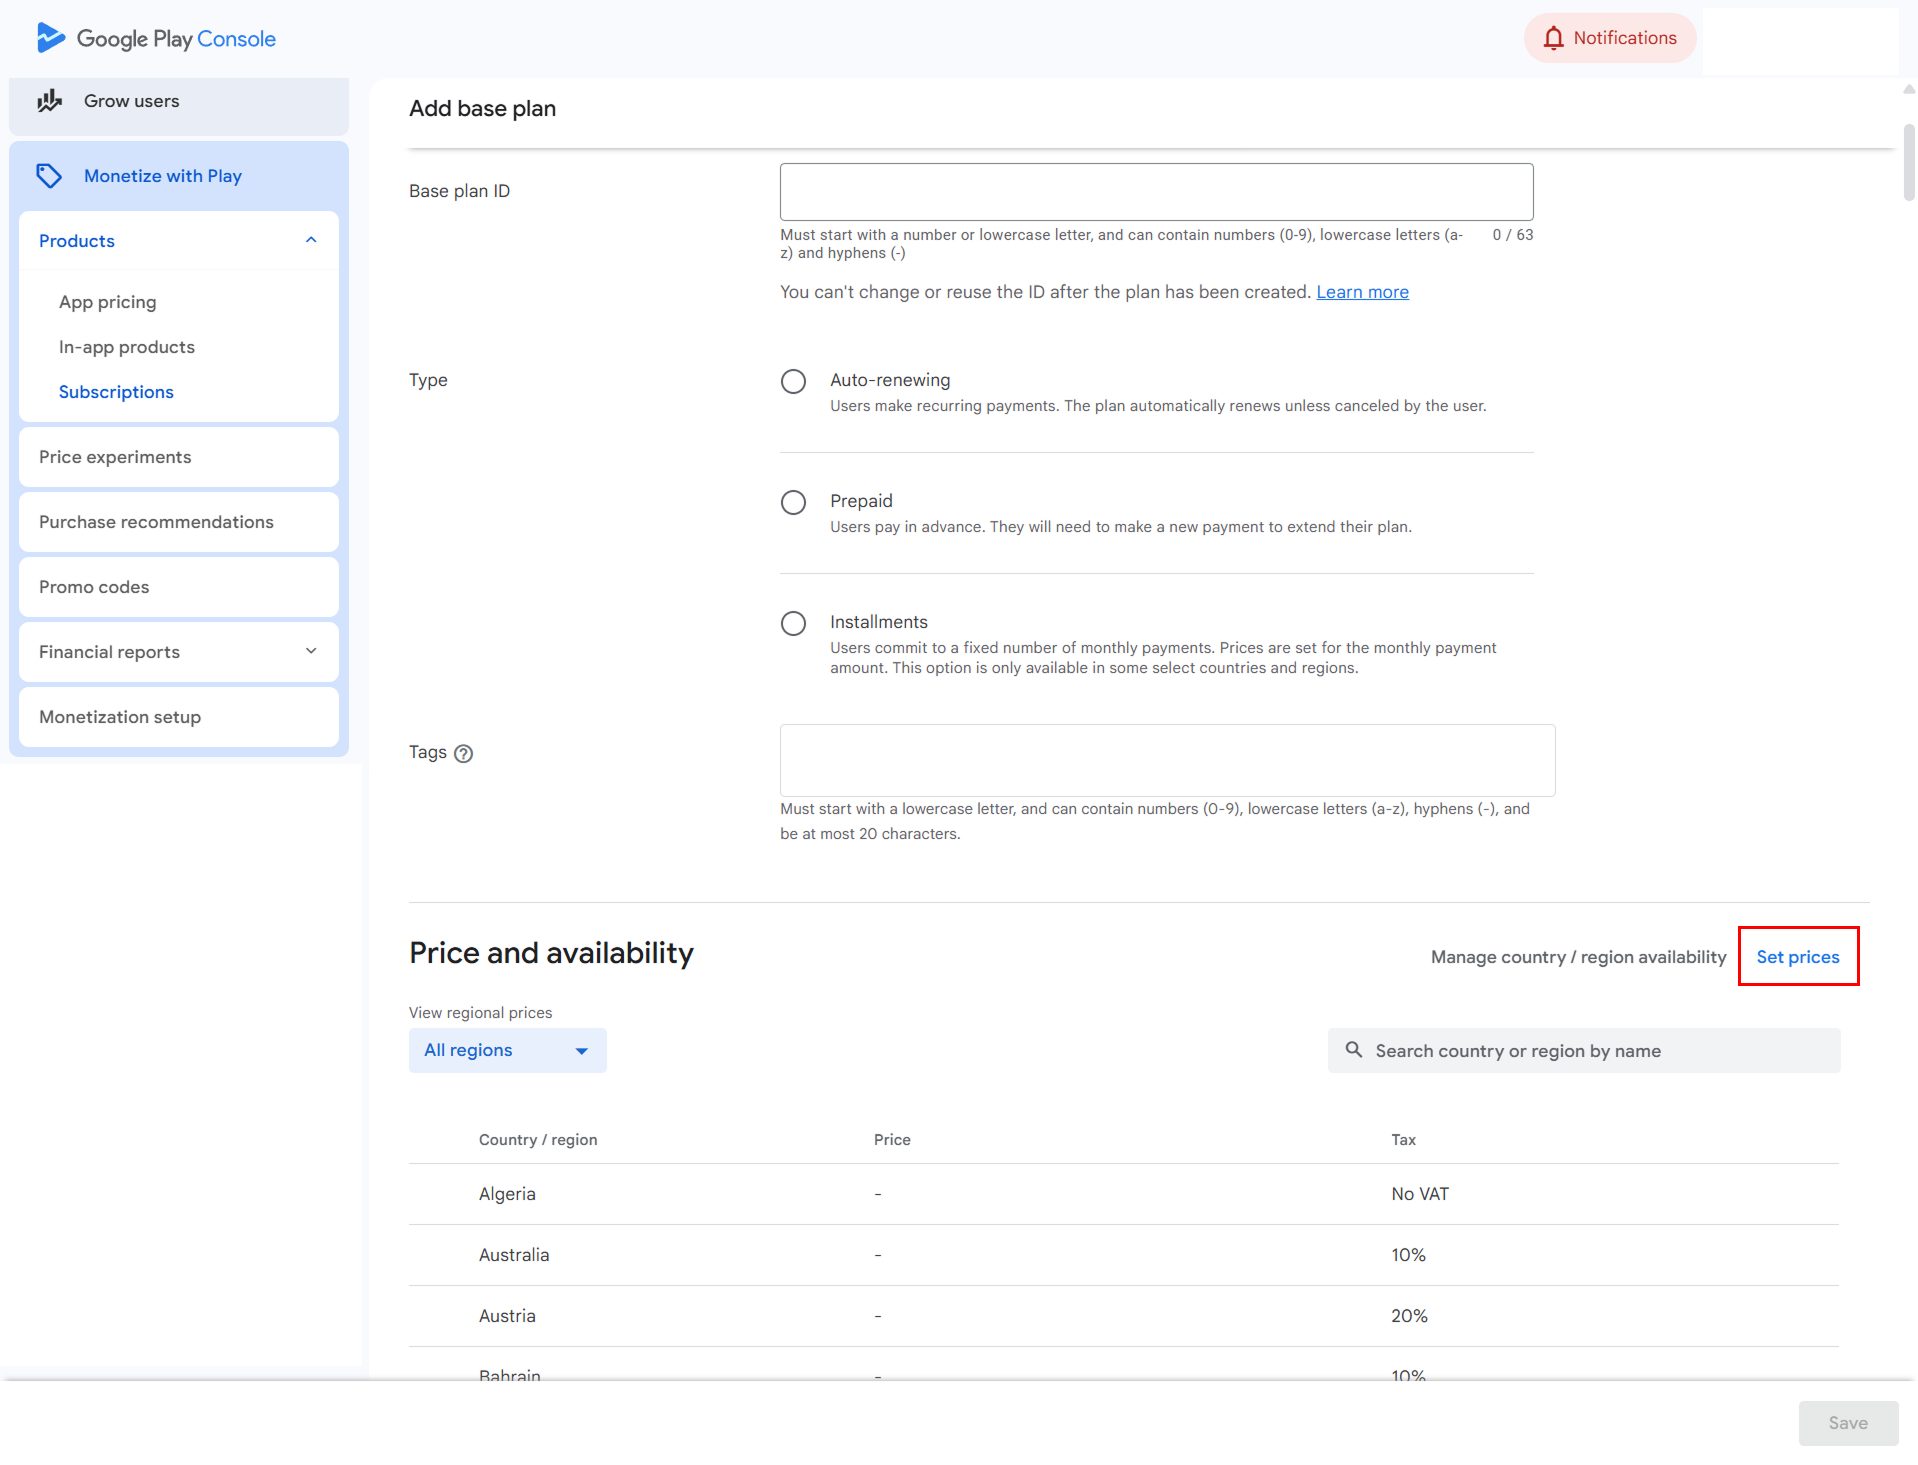
Base plan ID: This is the unique identifier you assign to the base plan you want to add. It can contain letters or numbers, but each plan must have a unique ID.
Type: Select the type of plan you want to create.
- Auto-renewing: Users are charged on a recurring basis. The plan automatically renews unless the user cancels.
- Prepaid: Users pay upfront. They must make a new payment to extend their plan.
- Installments: Users commit to a set number of payments. Prices are determined based on the monthly payment amount. This option is available only in certain countries and regions.
Price and Availability: Click the Set Prices button to open the screen where you can set the product price and specify the countries where it can be purchased.
After filling in the required fields, click the Save button.
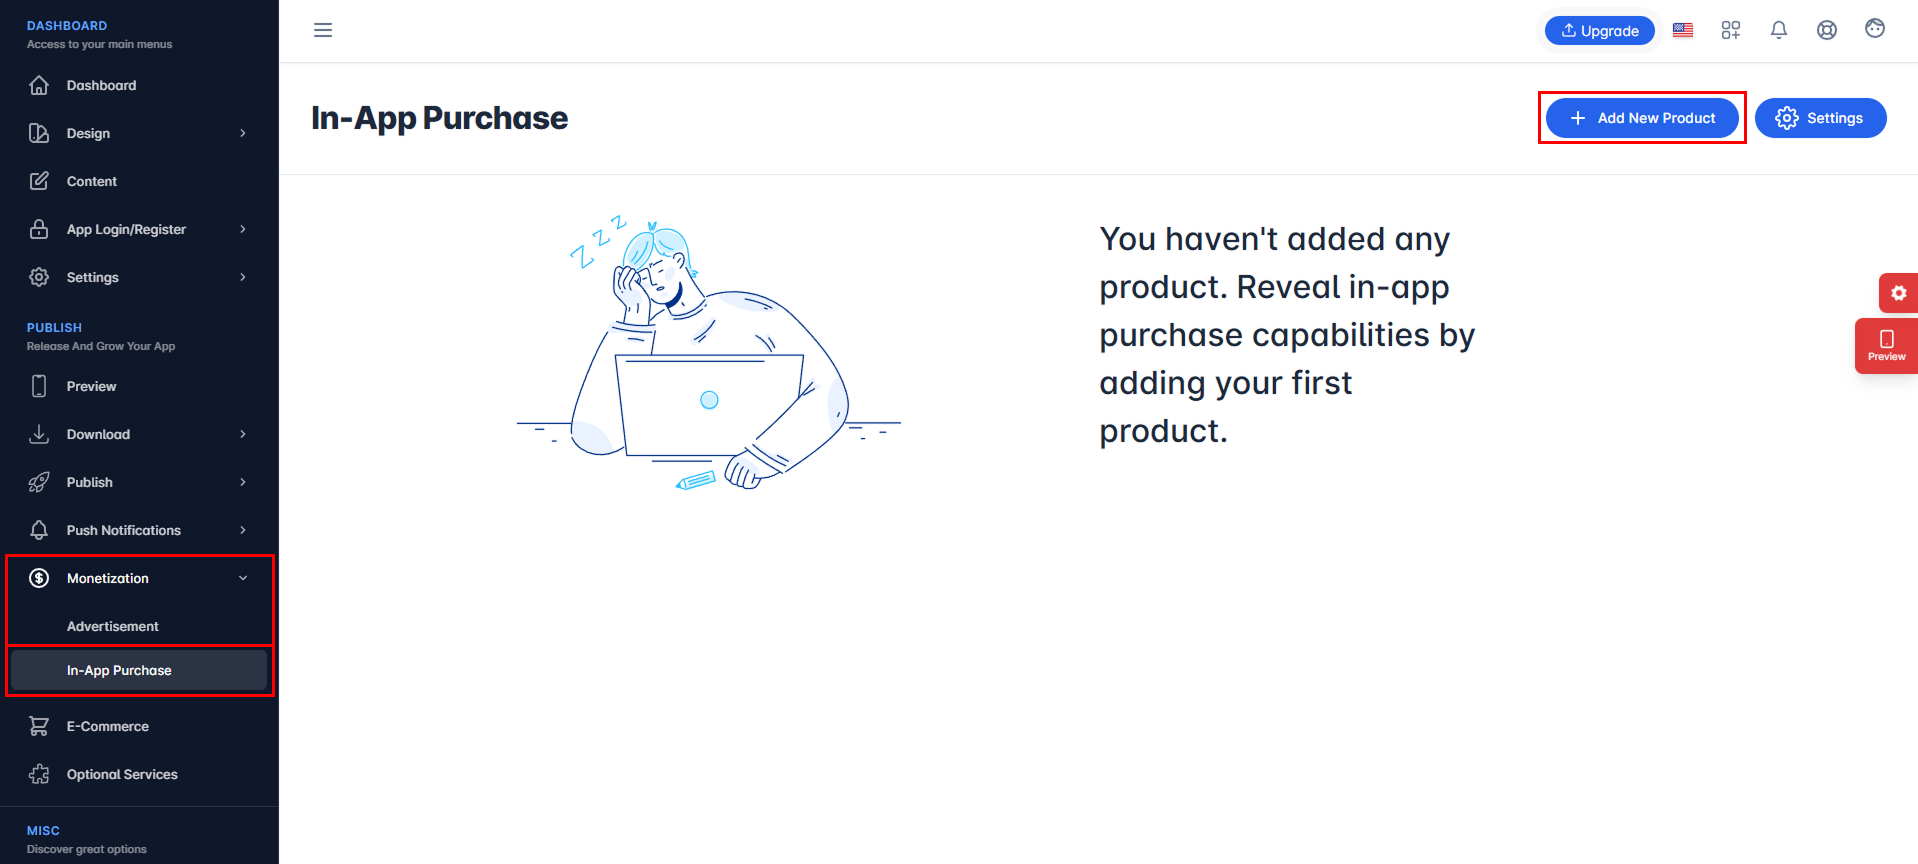
Then, go to the Monetization > In-App Purchase section in the Mobiroller panel and click the Add New Product button.
On the screen that opens, fill in the required fields.
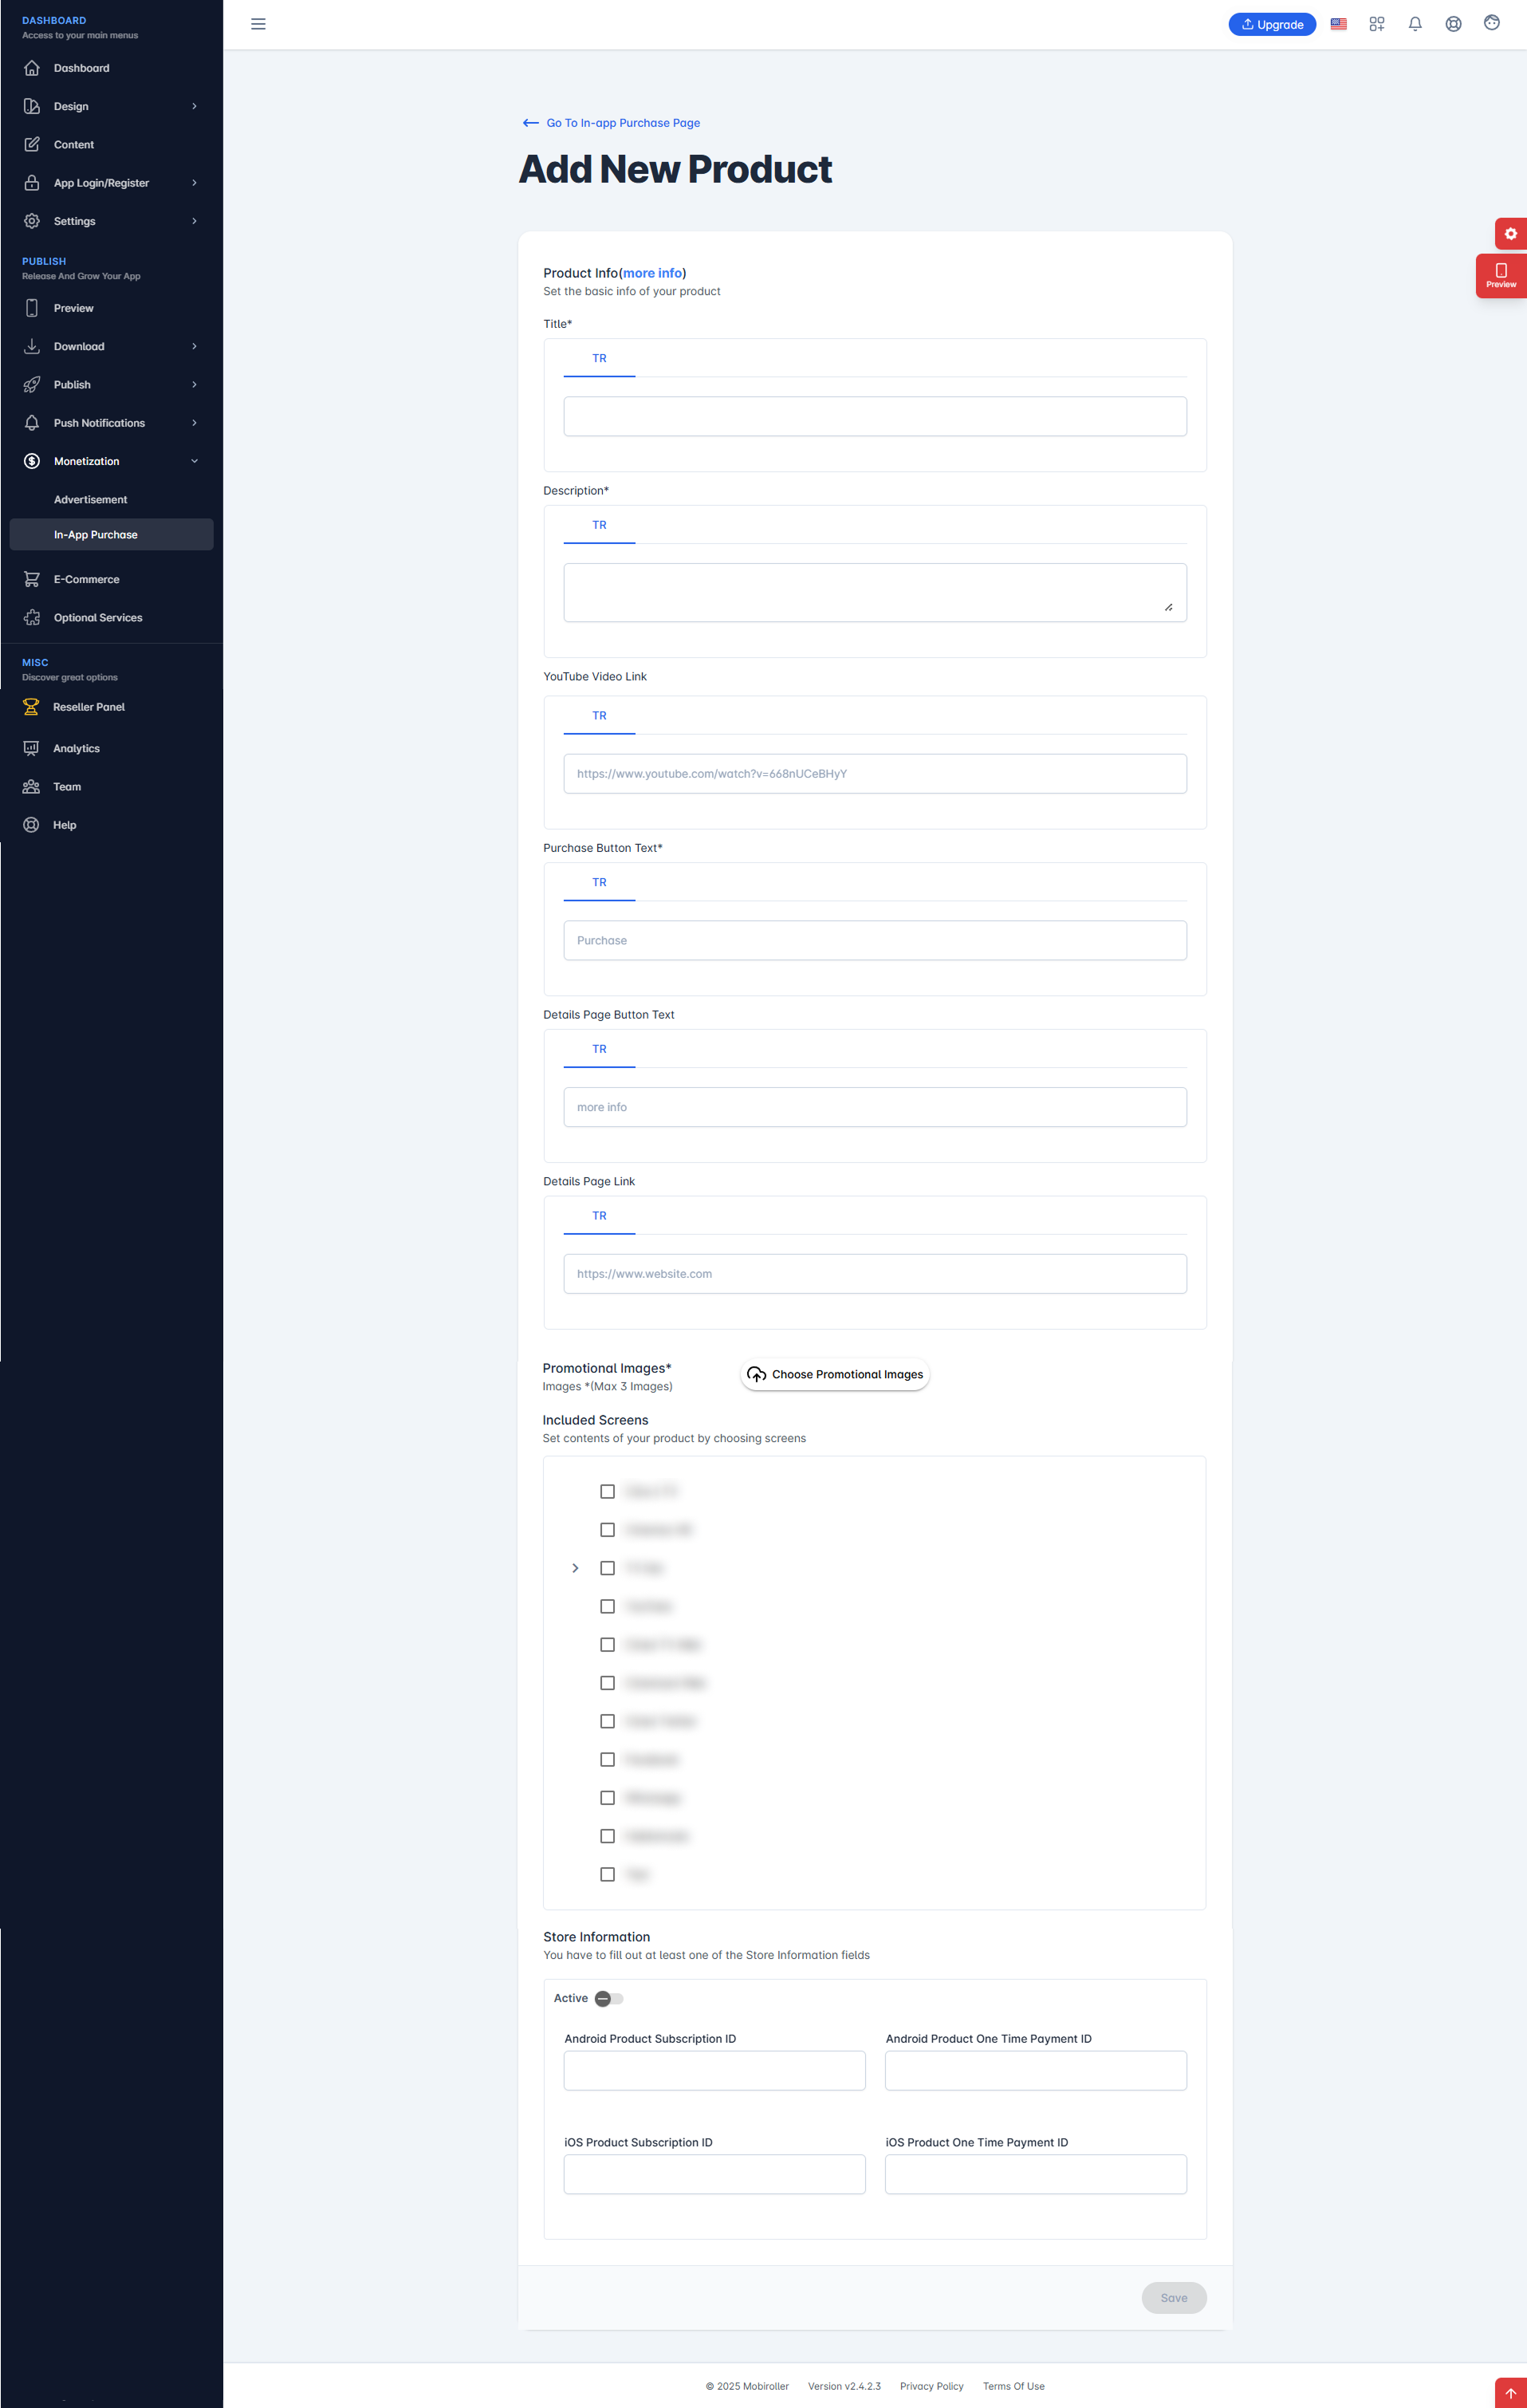
Title: Enter the product title that users will see before clicking the purchase button.
Description: Enter the product description that users will see before clicking the purchase button.
YouTube Video Link: Add a promotional video link that users will see before clicking the purchase button.
Purchase Button Text: Customize the text on the button that directs users to make a purchase after viewing product details.
Details Page Button Text: Customize the text on the button that directs users to more detailed information after entering the product details.
Details Page Link: Enter the URL where users can access more detailed information after viewing the product.
Promotional Images: Upload promotional images of the product (750×544 pixels) that users will see before clicking the purchase button.
Included Screens: Select the screens where the product will be available and valid for purchase.
Active: Control whether the product is available for sale by toggling this setting on or off.
Android Product Subscription ID: If your product is sold through a subscription model, enter the product ID created in the Subscriptions section of Google Play Console.
Android Product One Time Payment ID: If your product is sold through a one-time payment, enter the product ID created in the In-app products section of Google Play Console.
iOS Product Subscription ID: Click here for configuring in-app purchase settings for iOS.
iOS Product One Time Payment ID: Click here for configuring in-app purchase settings for iOS.
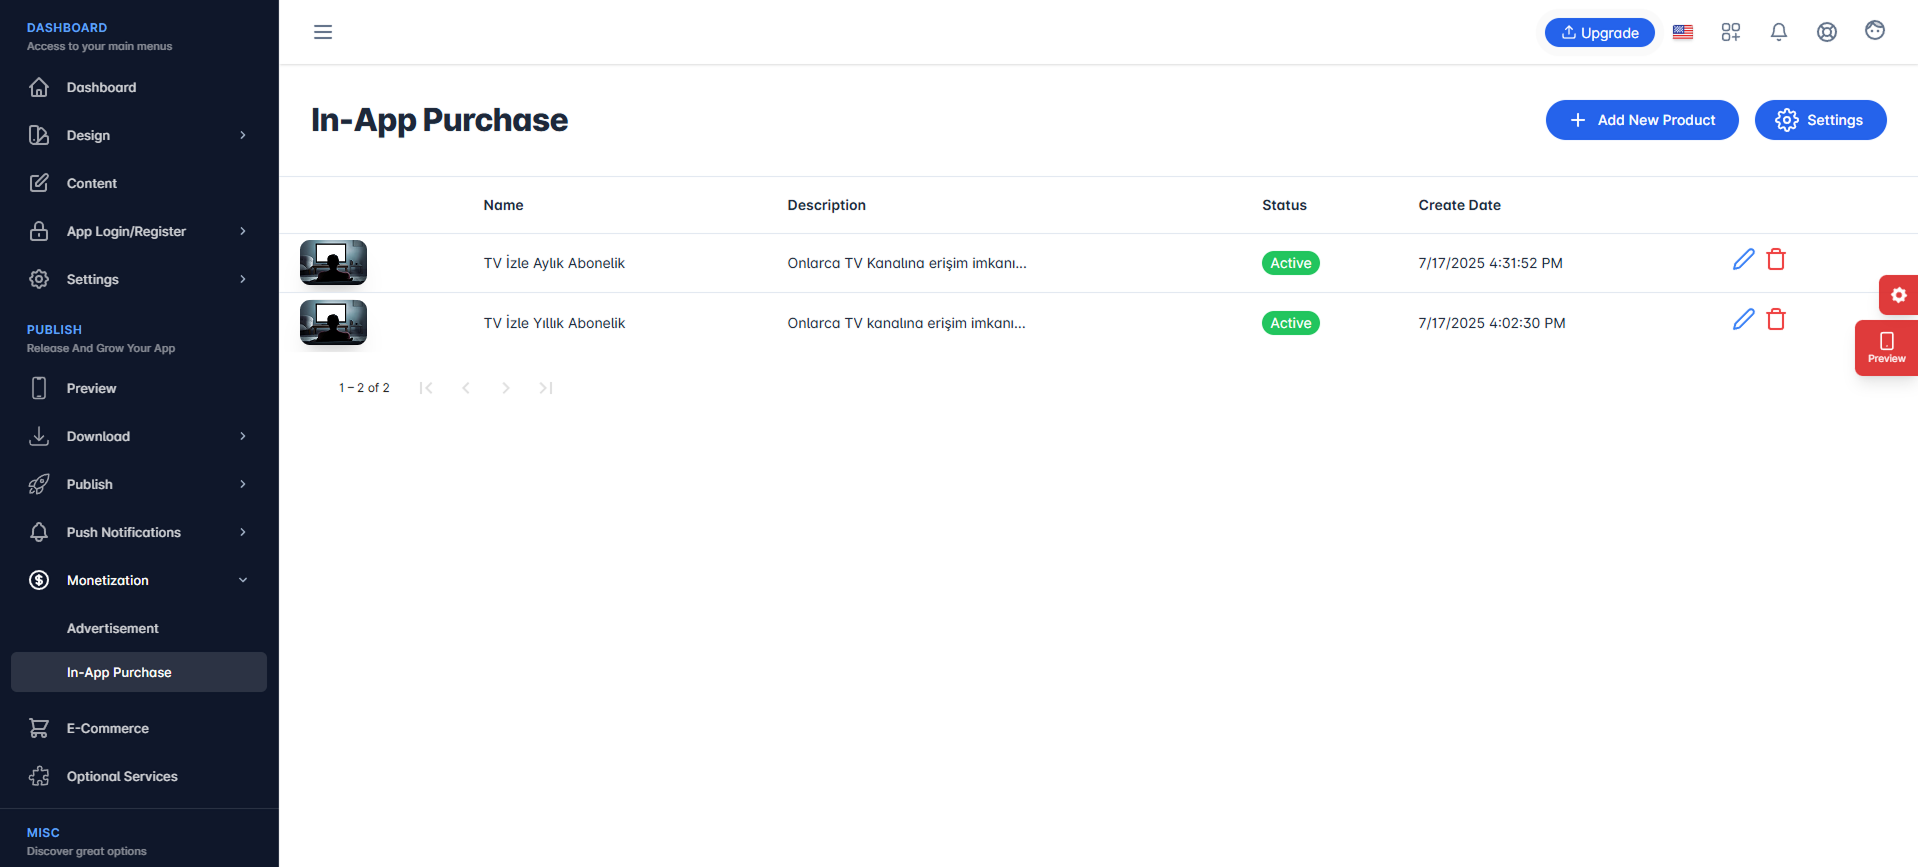
After adding the products, your In-App Purchase screen will appear as shown below.
You can add a product for a single screen by entering both a subscription ID and a one-time purchase ID, allowing you to present both options to the user.
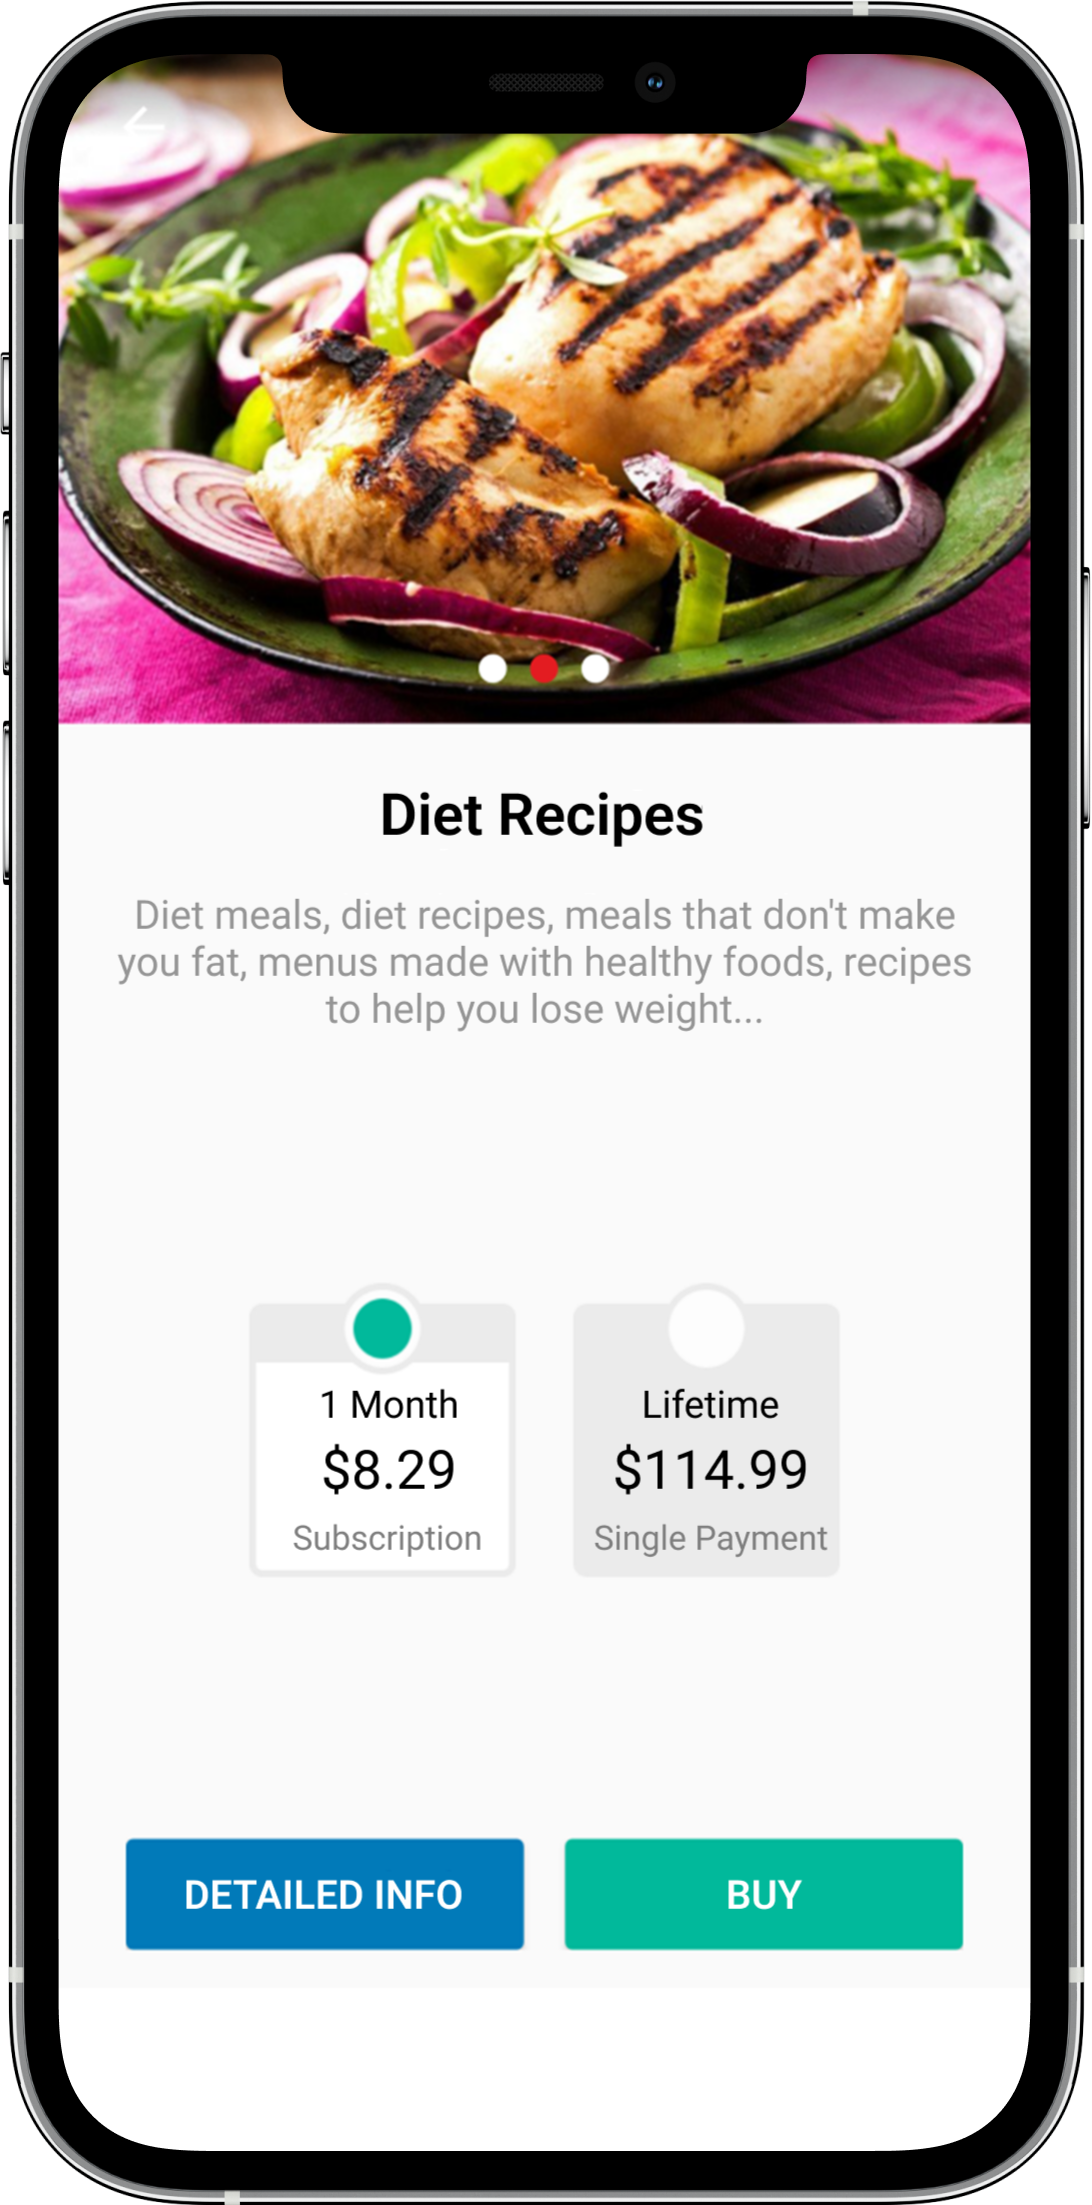
You can add multiple products for a single screen and offer them to users as a package system or bundle-style structure.
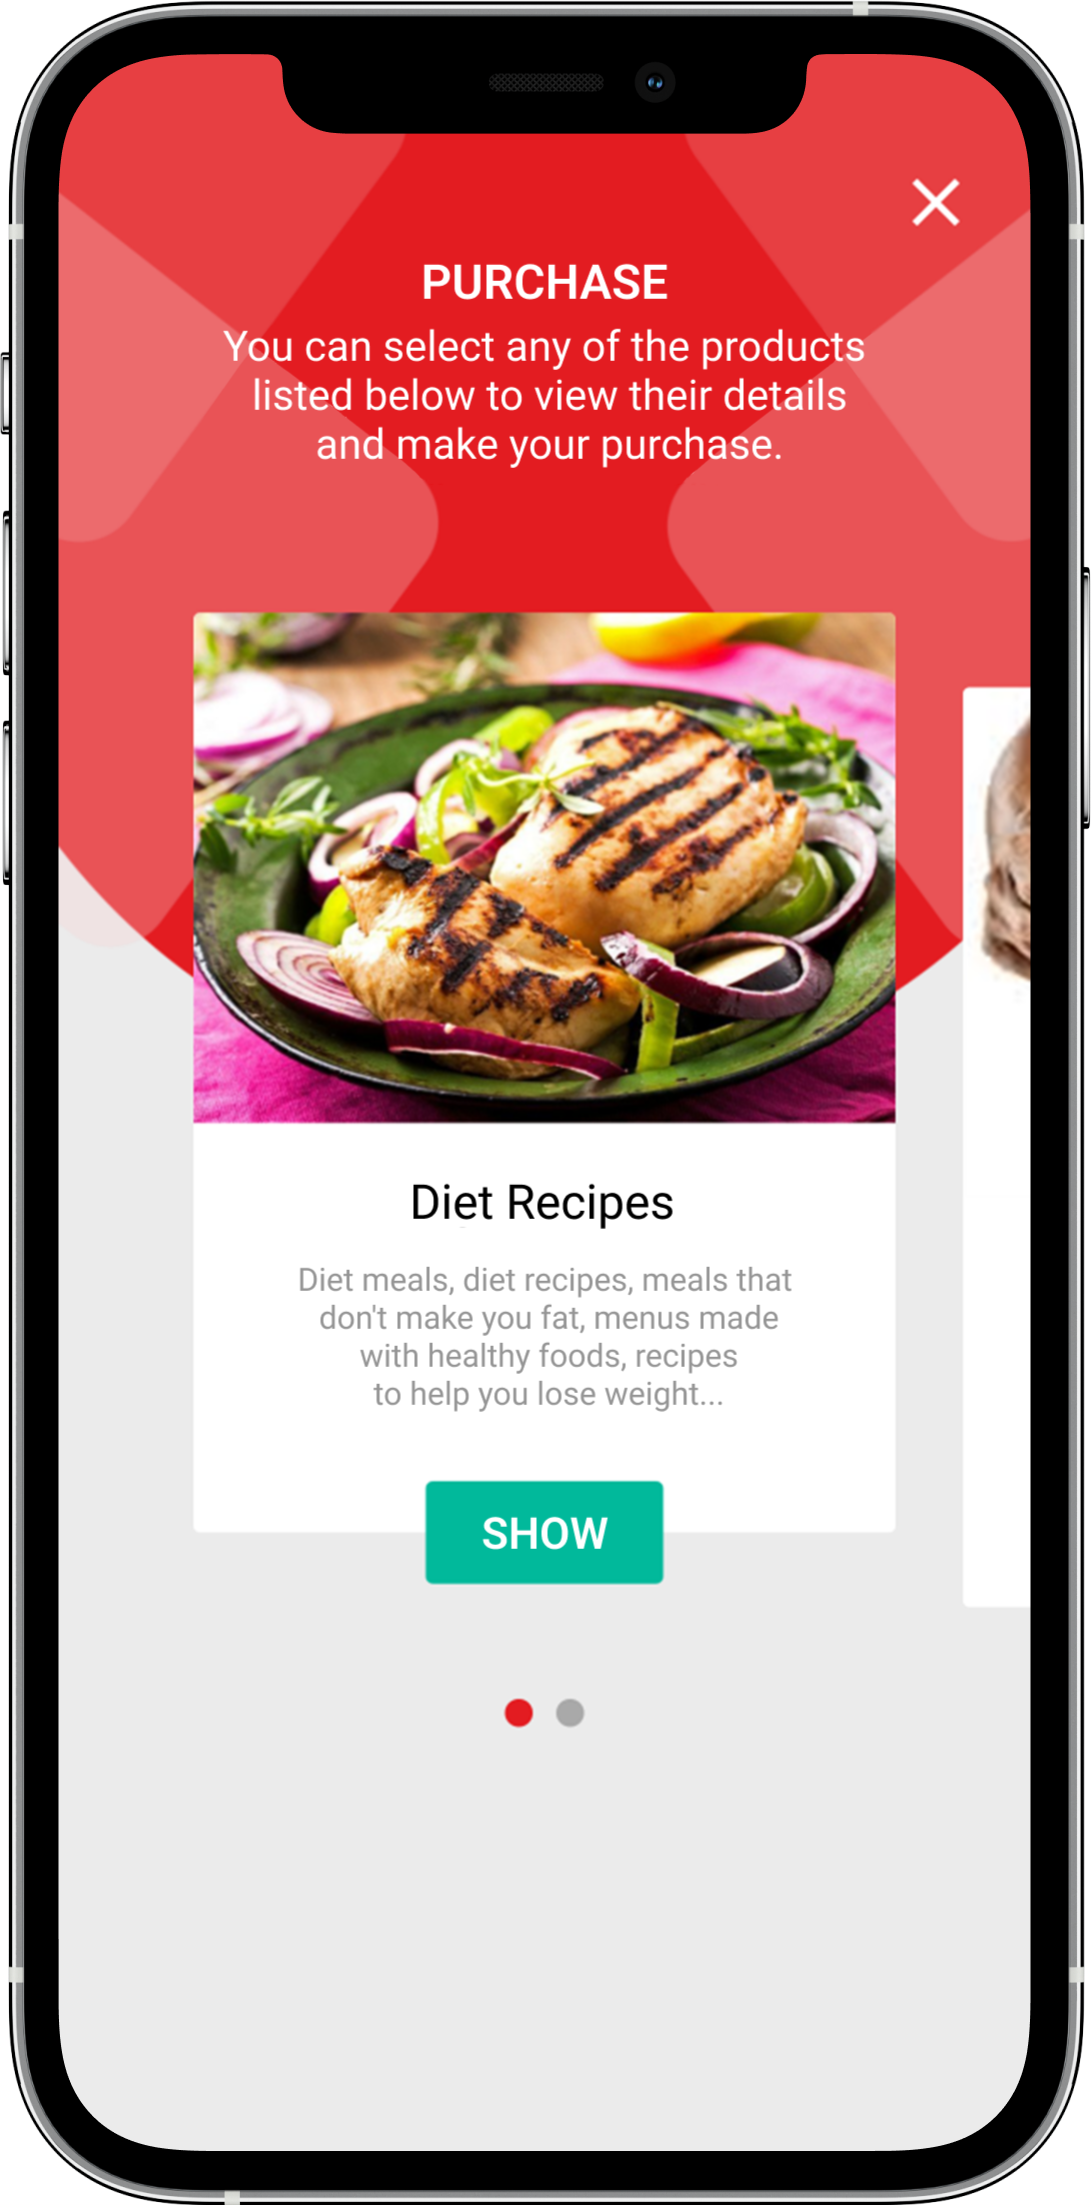
The design in this section is automatically generated. The top section color is derived from Design > App Colors > Navigation Bar Color.
The Show button’s label and color are also automatically assigned by the system.
Once you have followed all the mentioned steps correctly, the In-App Purchase feature will be successfully activated.
If you believe you have completed all the steps but are still encountering an issue, please email support@mobiroller.com with a screenshot of the error.
We will review your issue and provide a solution as soon as possible.