To activate the Chat/Messaging module in your app, you need to complete the following steps without any omissions.
The Chat module is currently available only for Android apps.
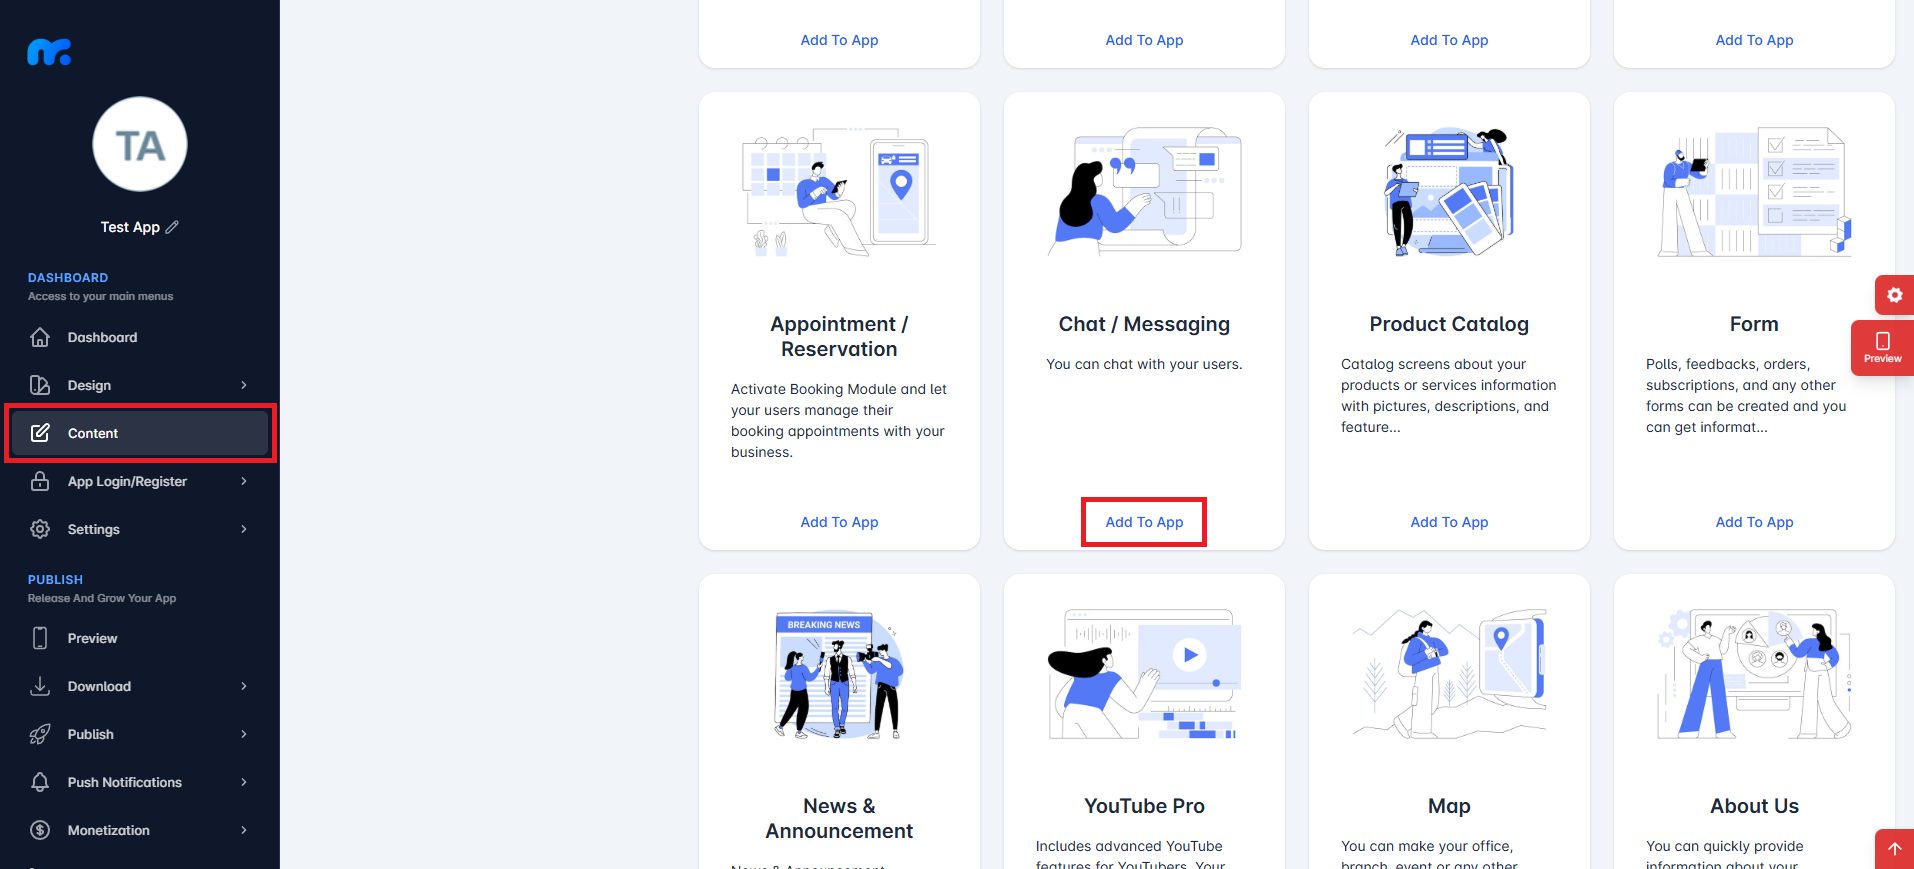
Click on the Content tab in the panel. Then, click the Add to App button located under the Chat/Messaging module.
On the screen that appears, enter the name you want the Chat/Messaging module to be displayed as within the app into the Title field. Then, click the Save button.
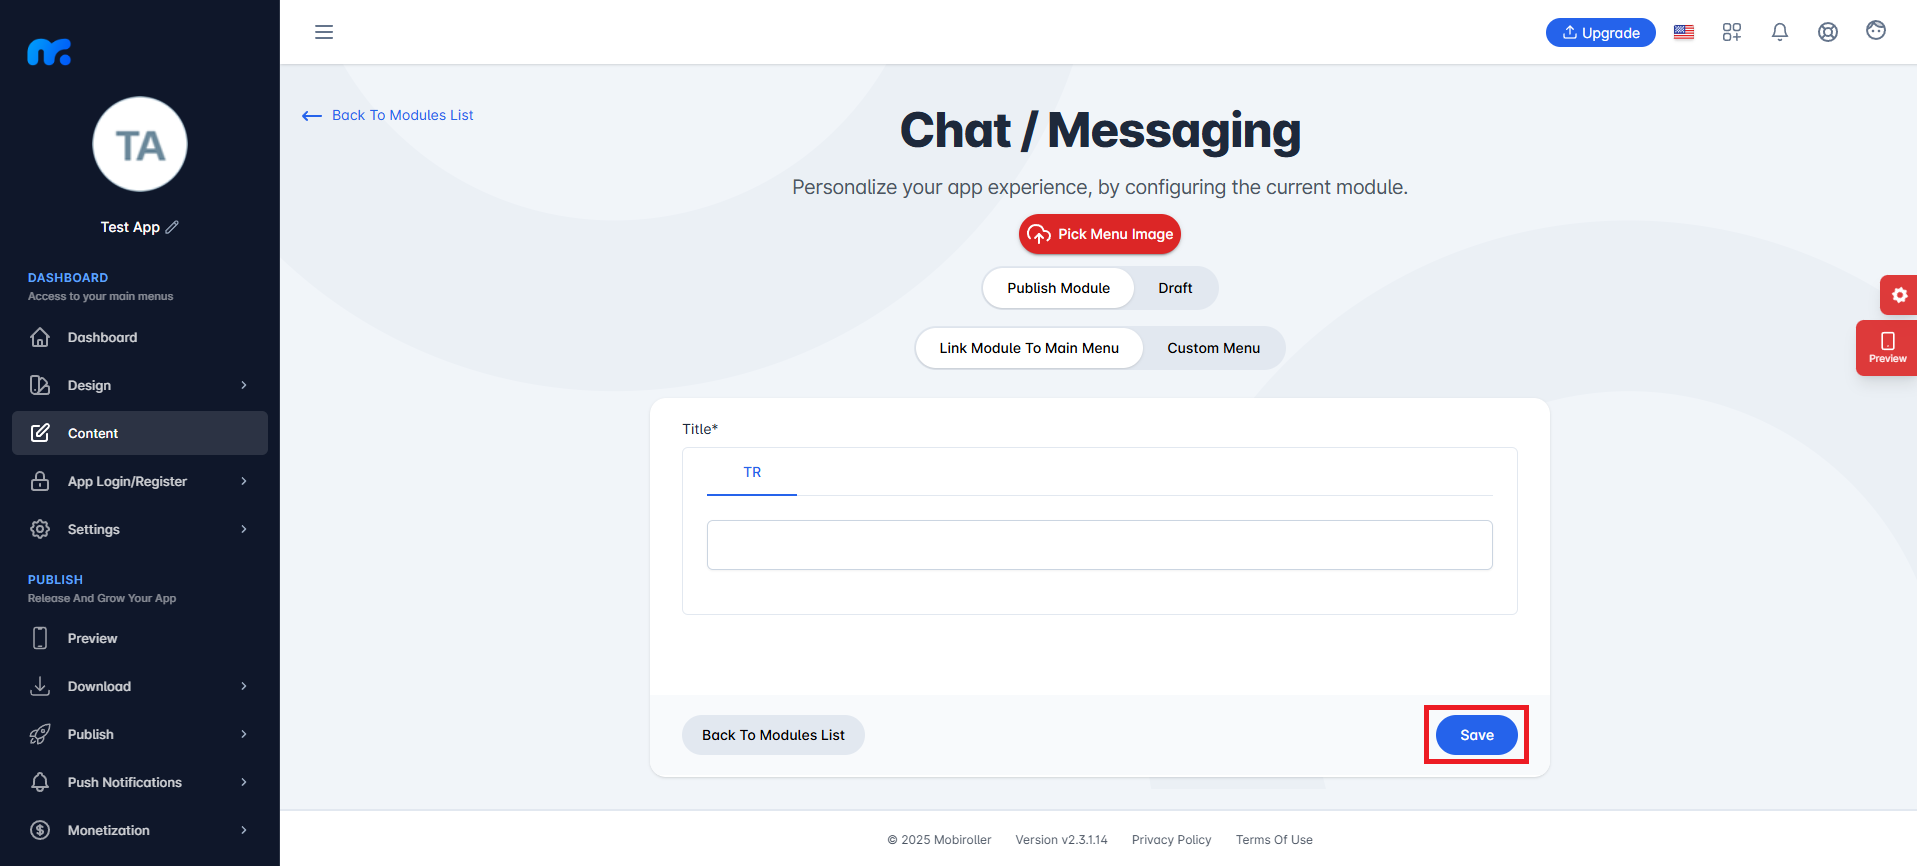
The Chat/Messaging module has been successfully added to your application.
To use the Chat/Messaging module, you need to configure the App Login/Register settings and set up your Firebase configuration.
Configuring App Login/Register Settings
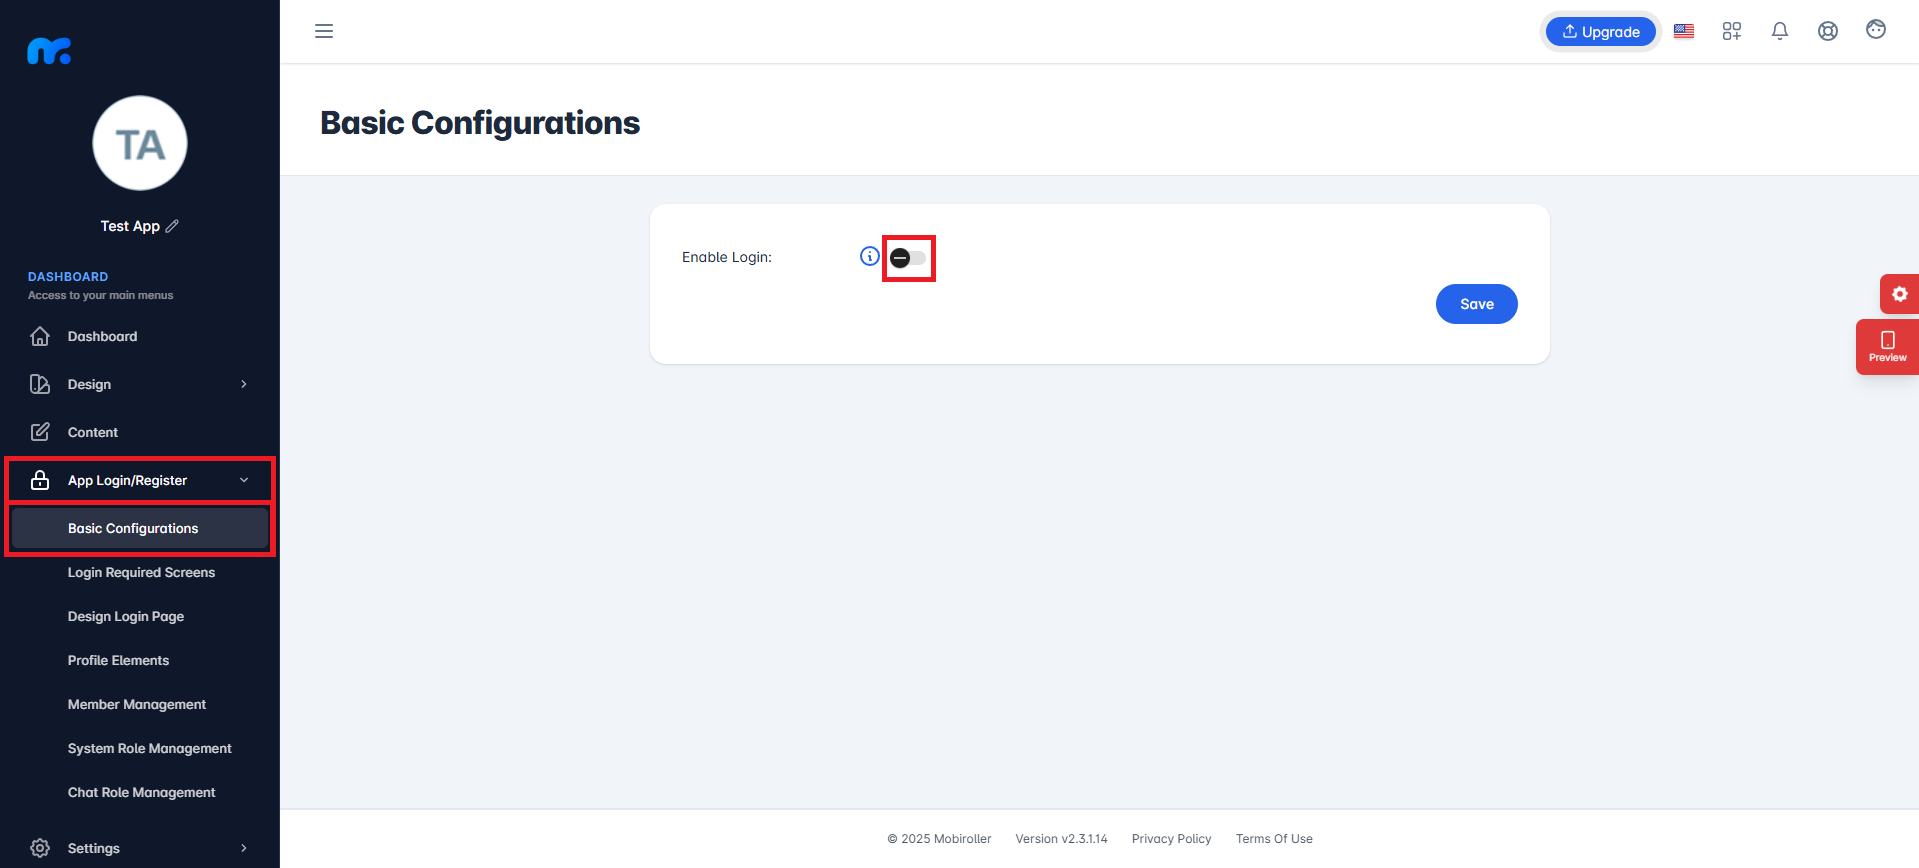
Click on the Basic Configurations section under the App Login/Register tab in the panel. On the screen that appears, activate the Enable Login button.
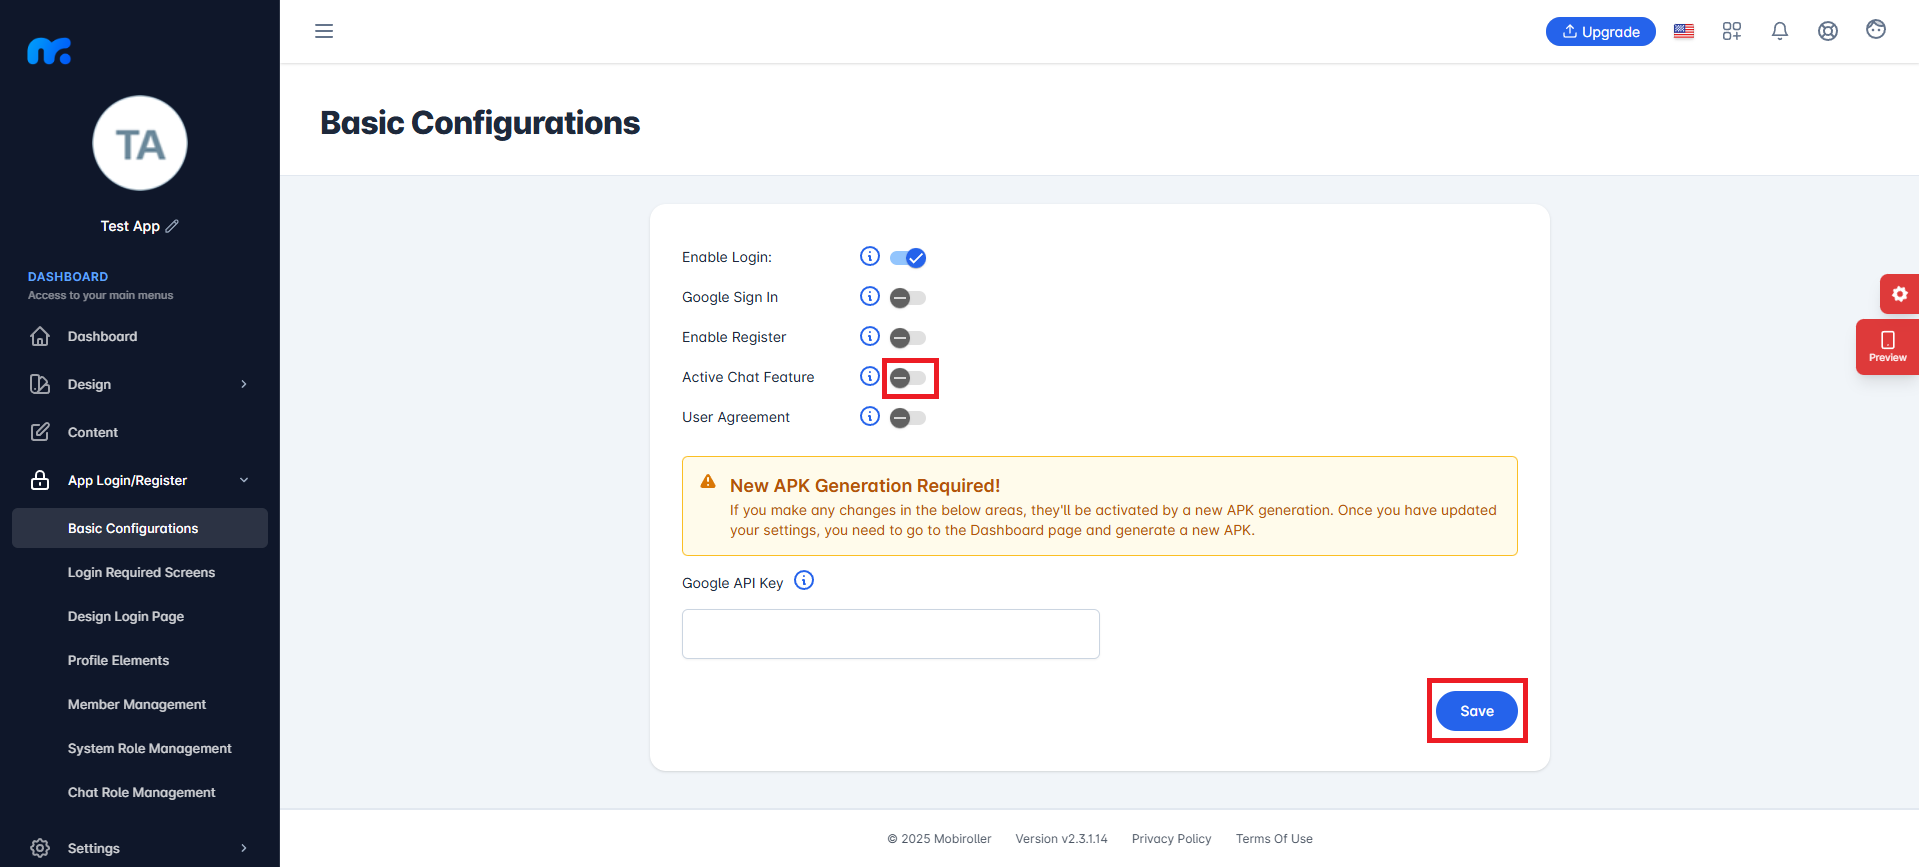
After enabling the Enable Login button, activate the Active Chat Feature button on the screen that appears, and then click the Save button.
Additionally, if you want to allow your users to register within the app or sign in with Google, you can enable these options in the same section.
Configuring Firebase Settings
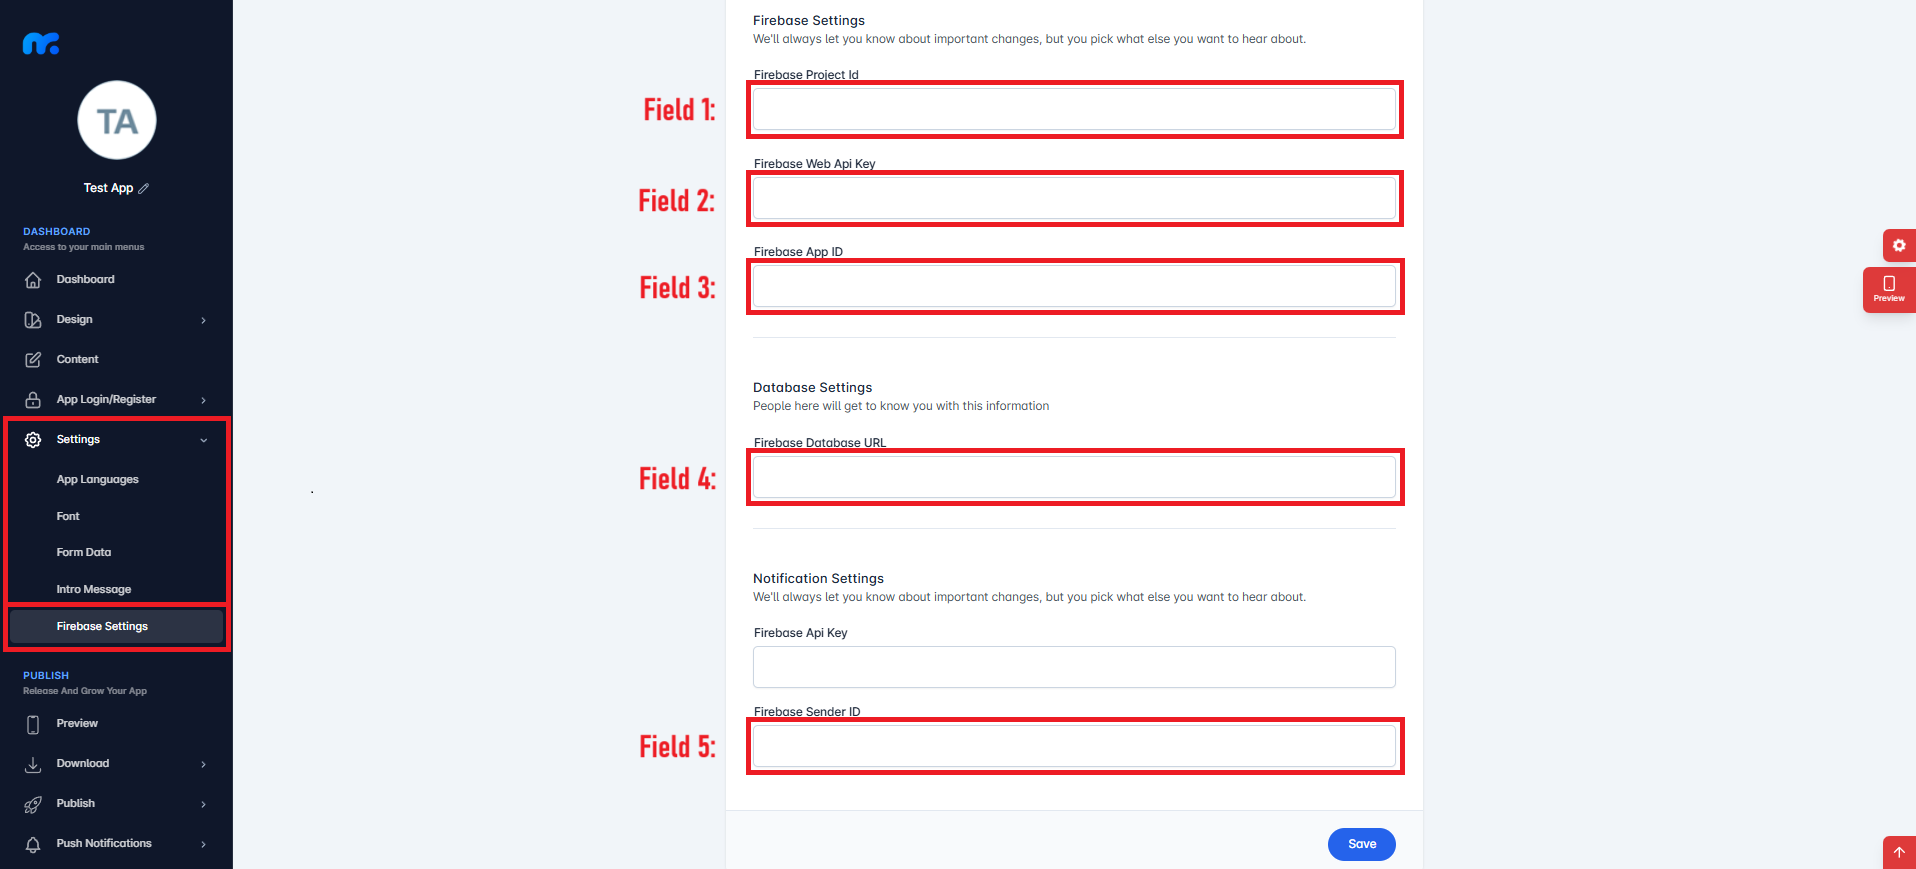
In the panel, click on the Firebase Settings section under the Settings tab. You need to fill in the fields on the screen that appears. To obtain the necessary information for these fields, please visit https://firebase.google.com/.
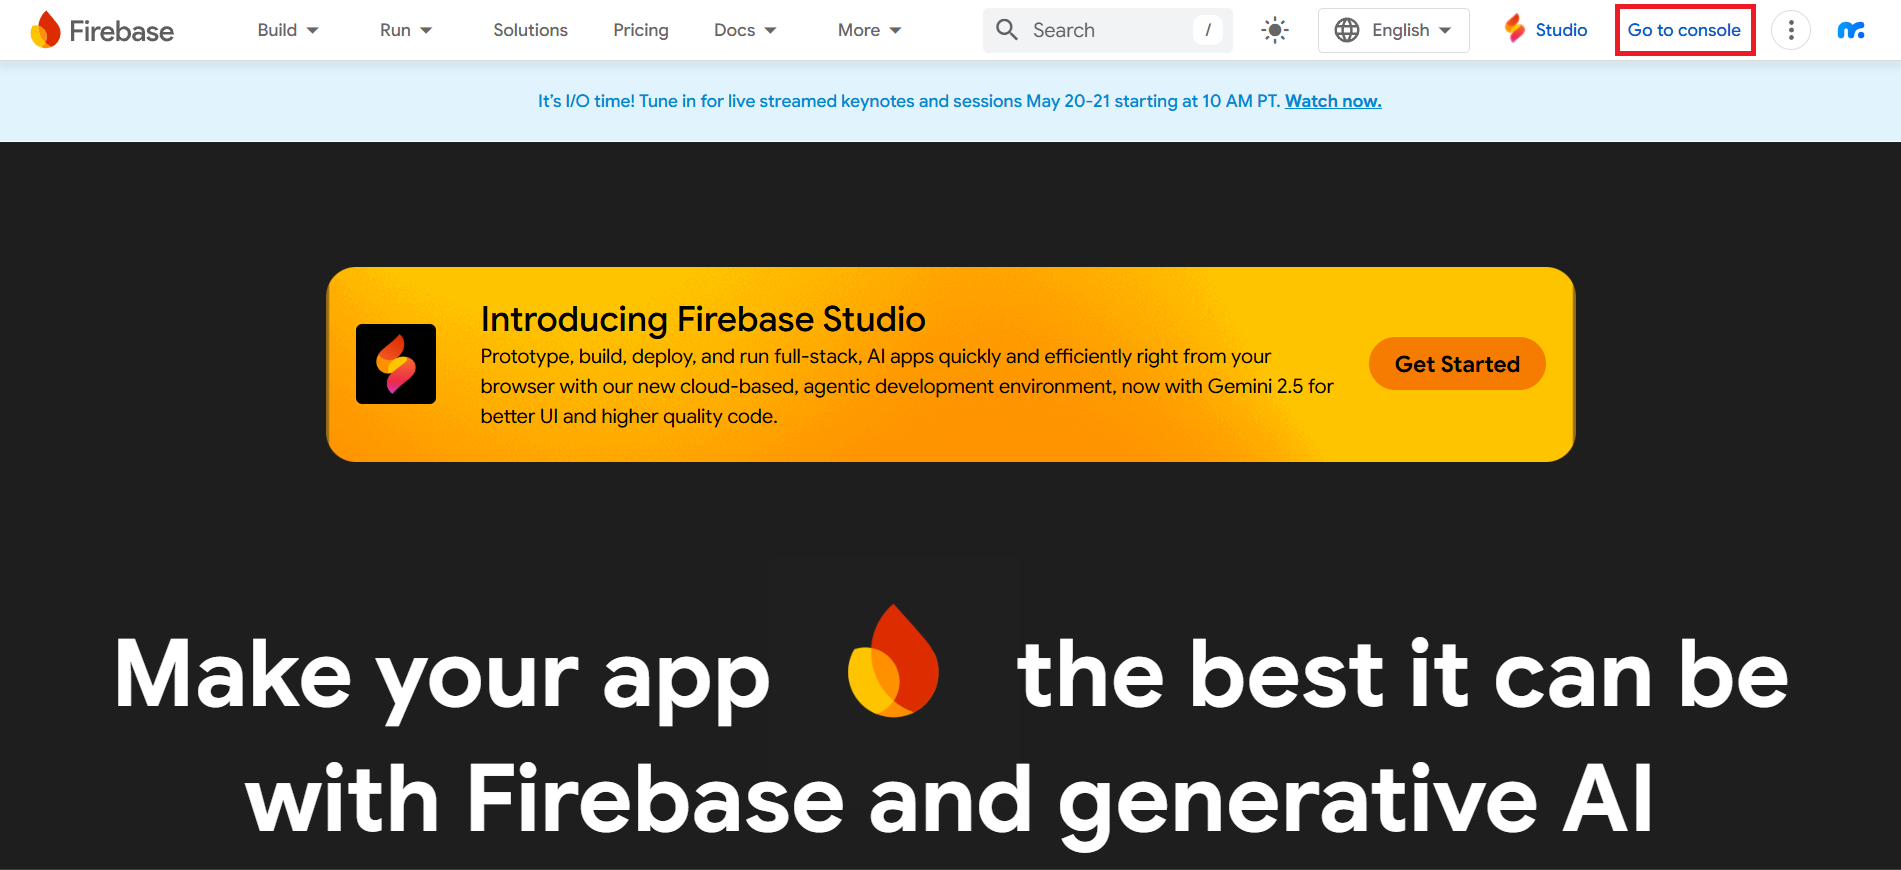
If you don’t have a registered Gmail account when you visit https://firebase.google.com/, first click Sign In at the top right corner of the site to log in with your Gmail account. After signing in—or if you already have a registered Gmail account—click the Go to console button located at the top right of the site.
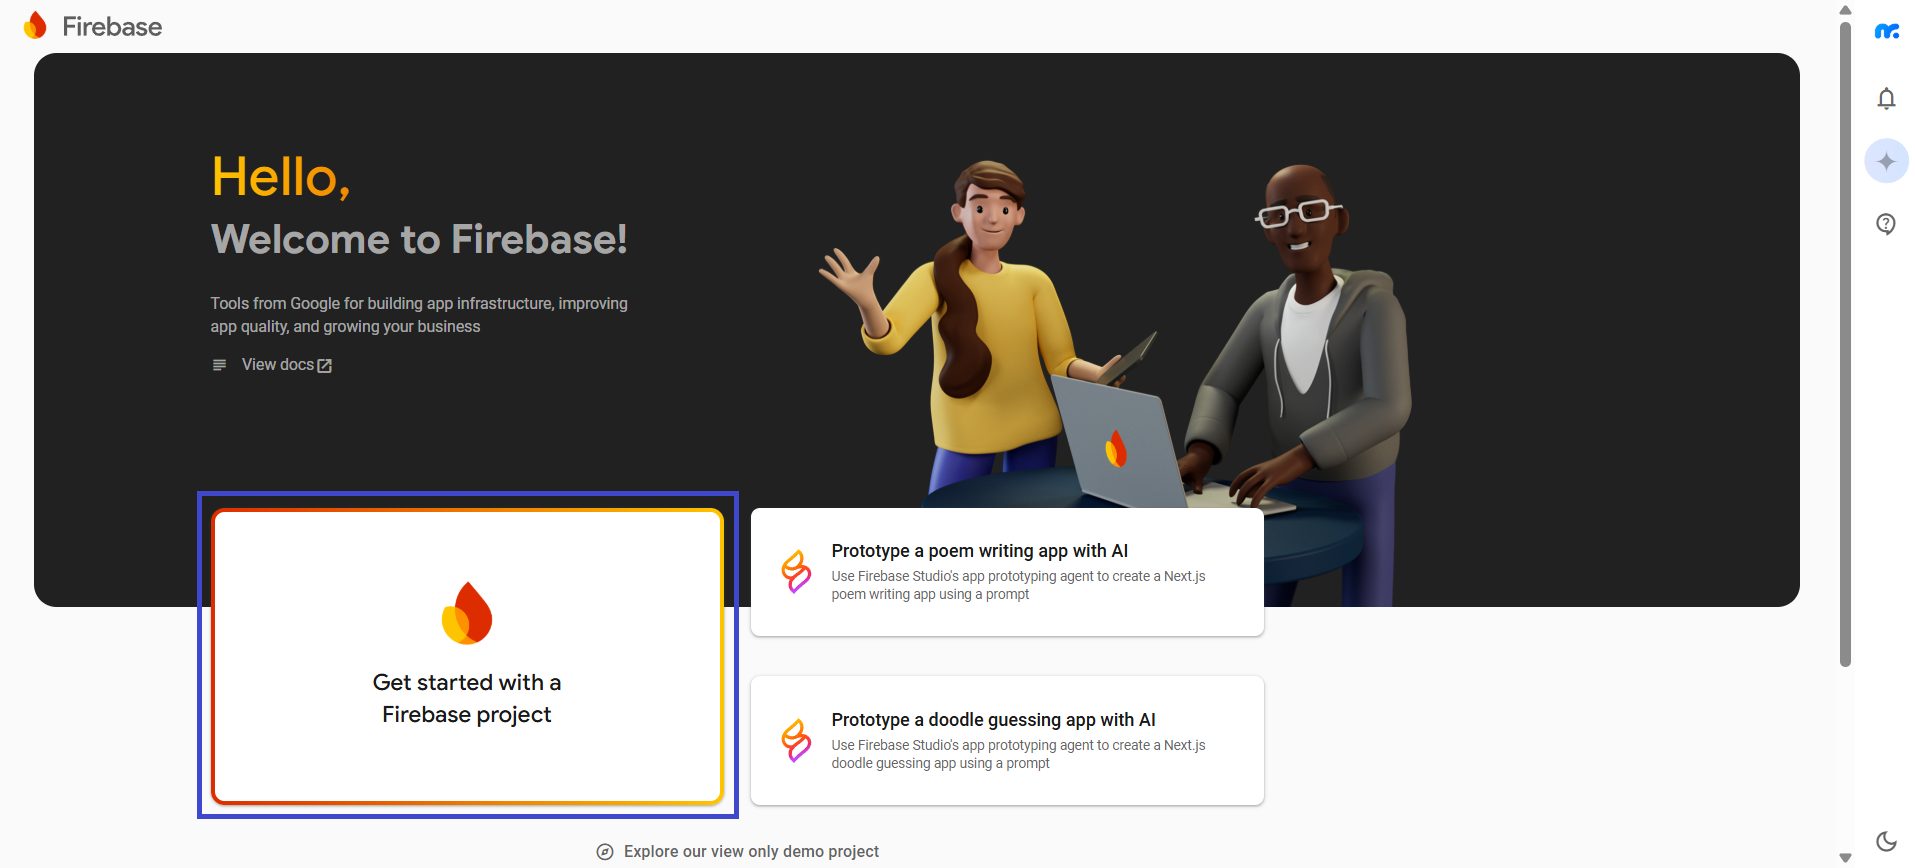
Proceed by selecting the Get started with a Firebase project option.
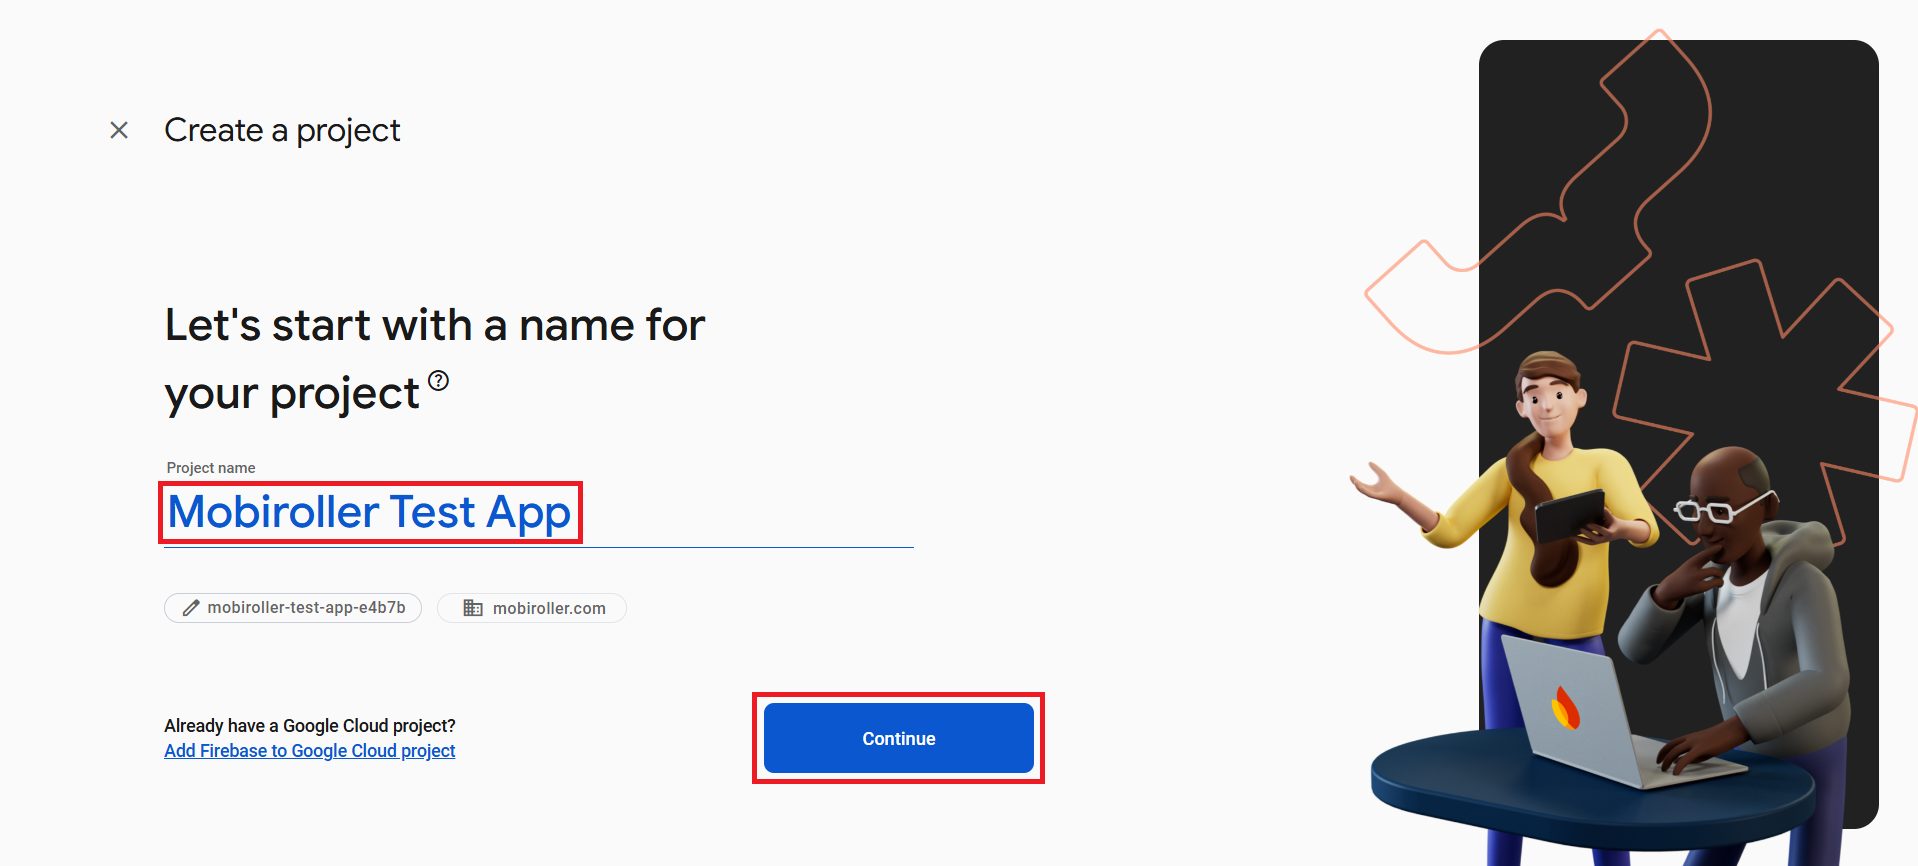
Enter your app’s name in the Project name field and click the Continue button.
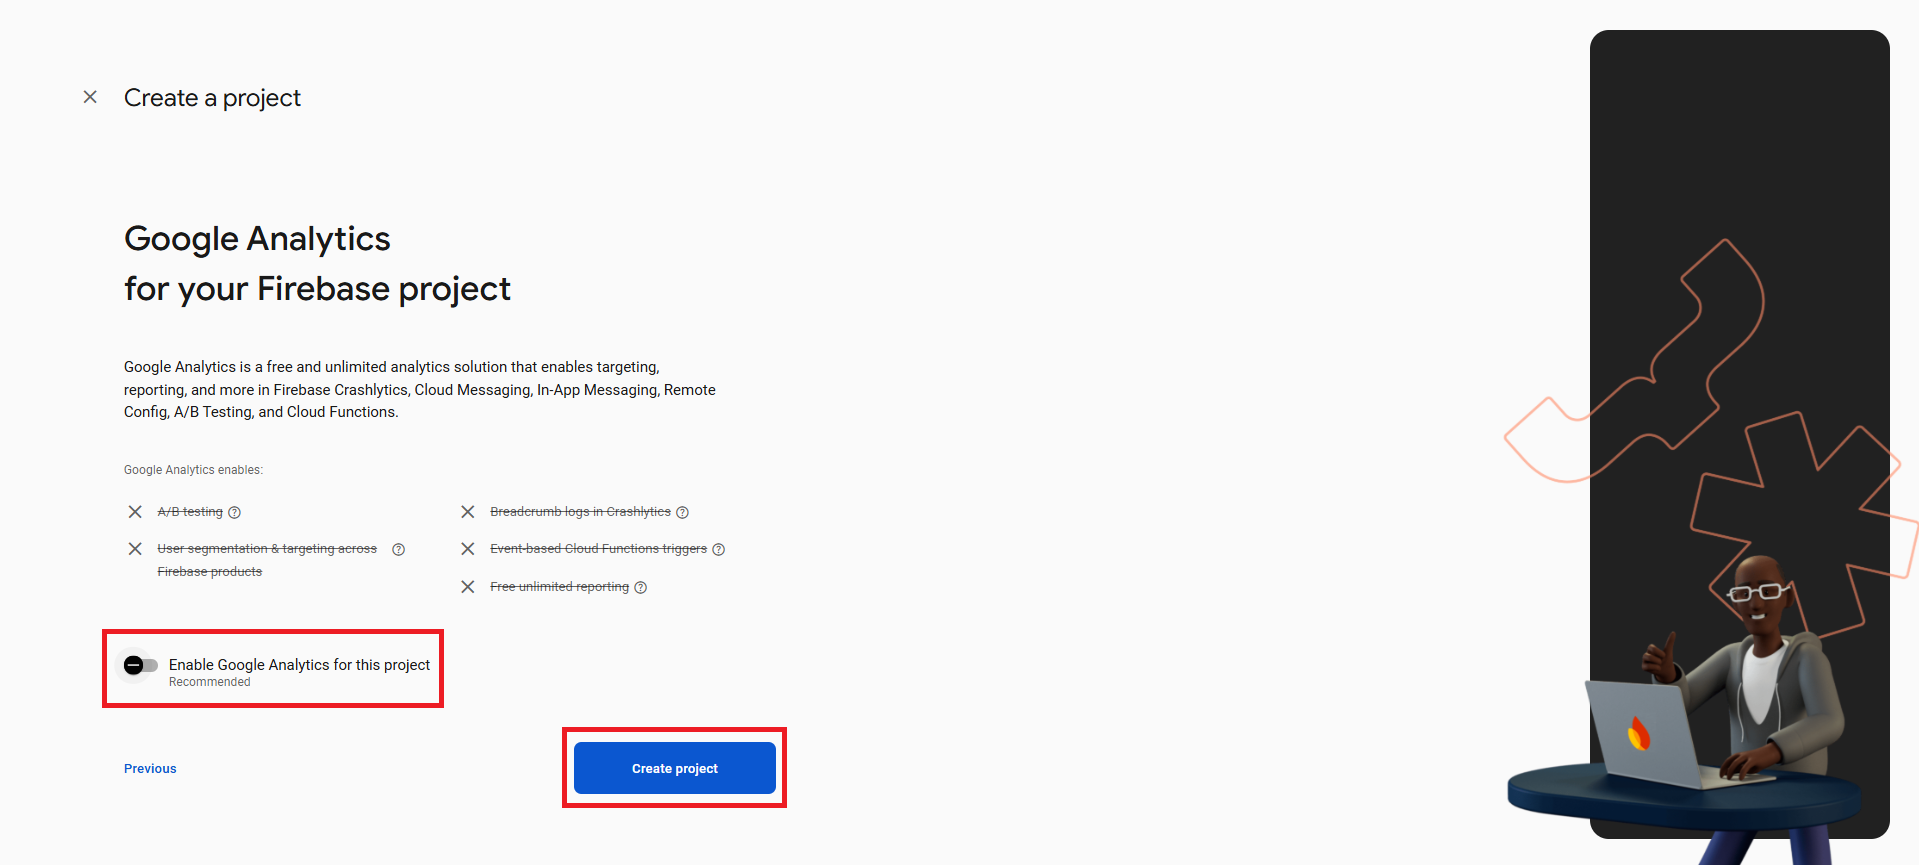
After this step, you can enable Google Analytics for your project. To activate Google Analytics, follow these steps:
1- Turn on the Enable Google Analytics for this project option, then click the Continue button.

2- Select the Google Analytics account you want to use. Then, click the Create project button.
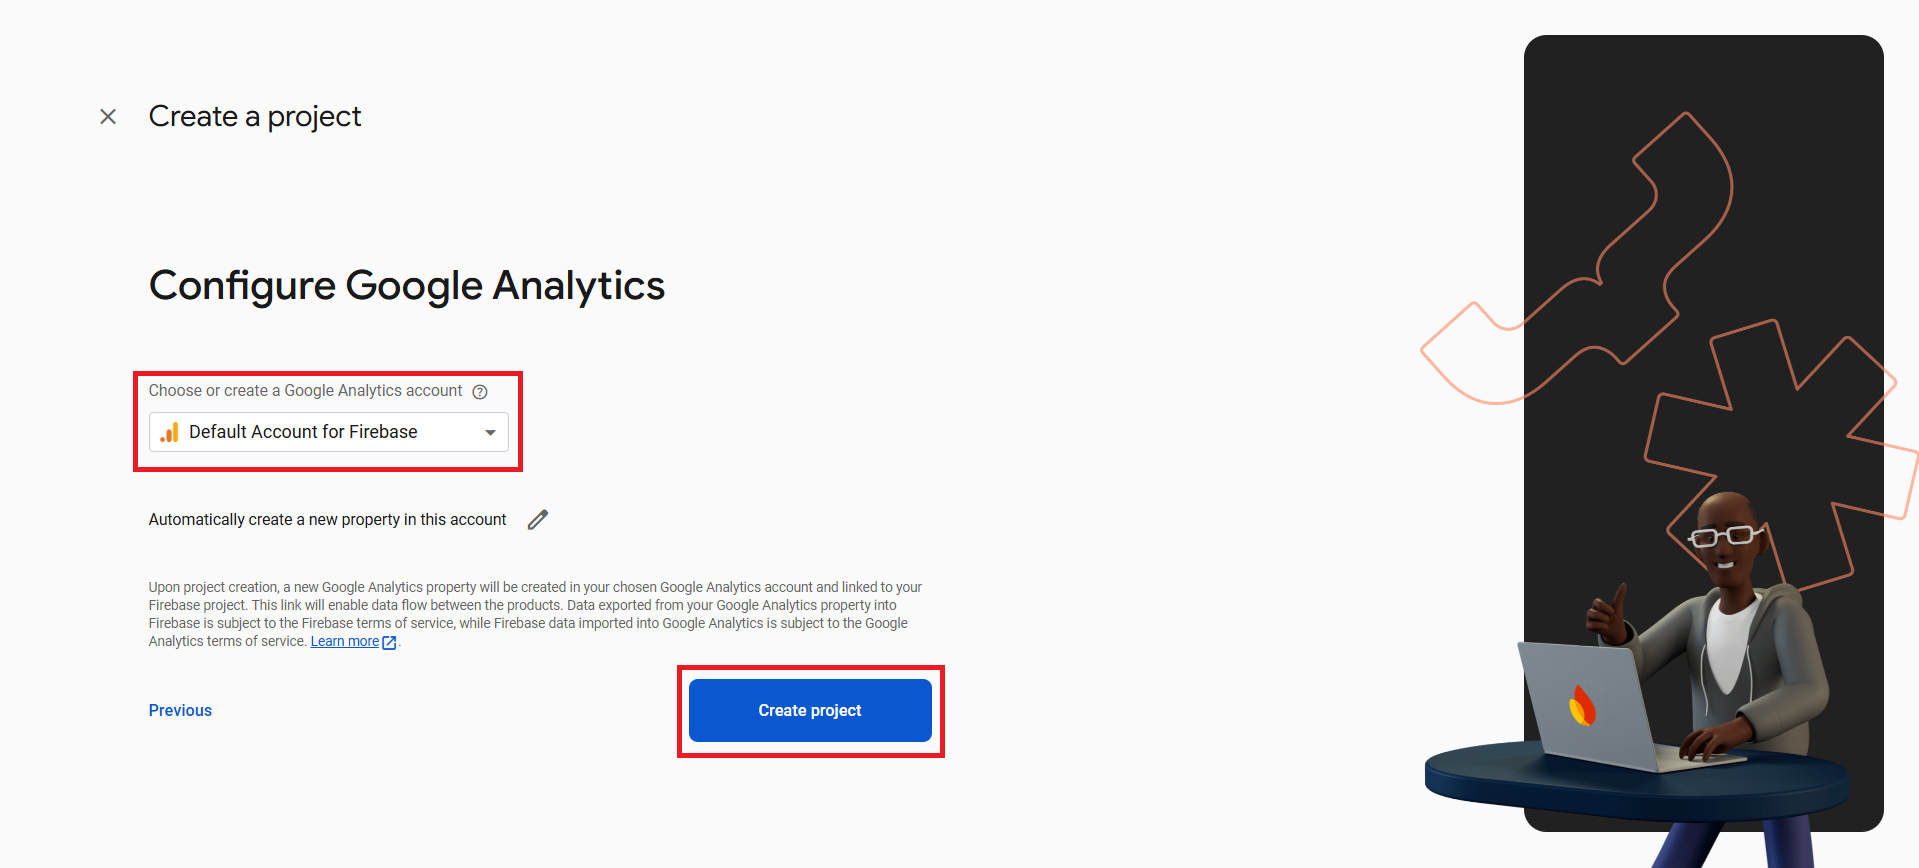
If you do not want to enable Google Analytics, turn off the Enable Google Analytics for this project option in the first step and then click the Create project button.
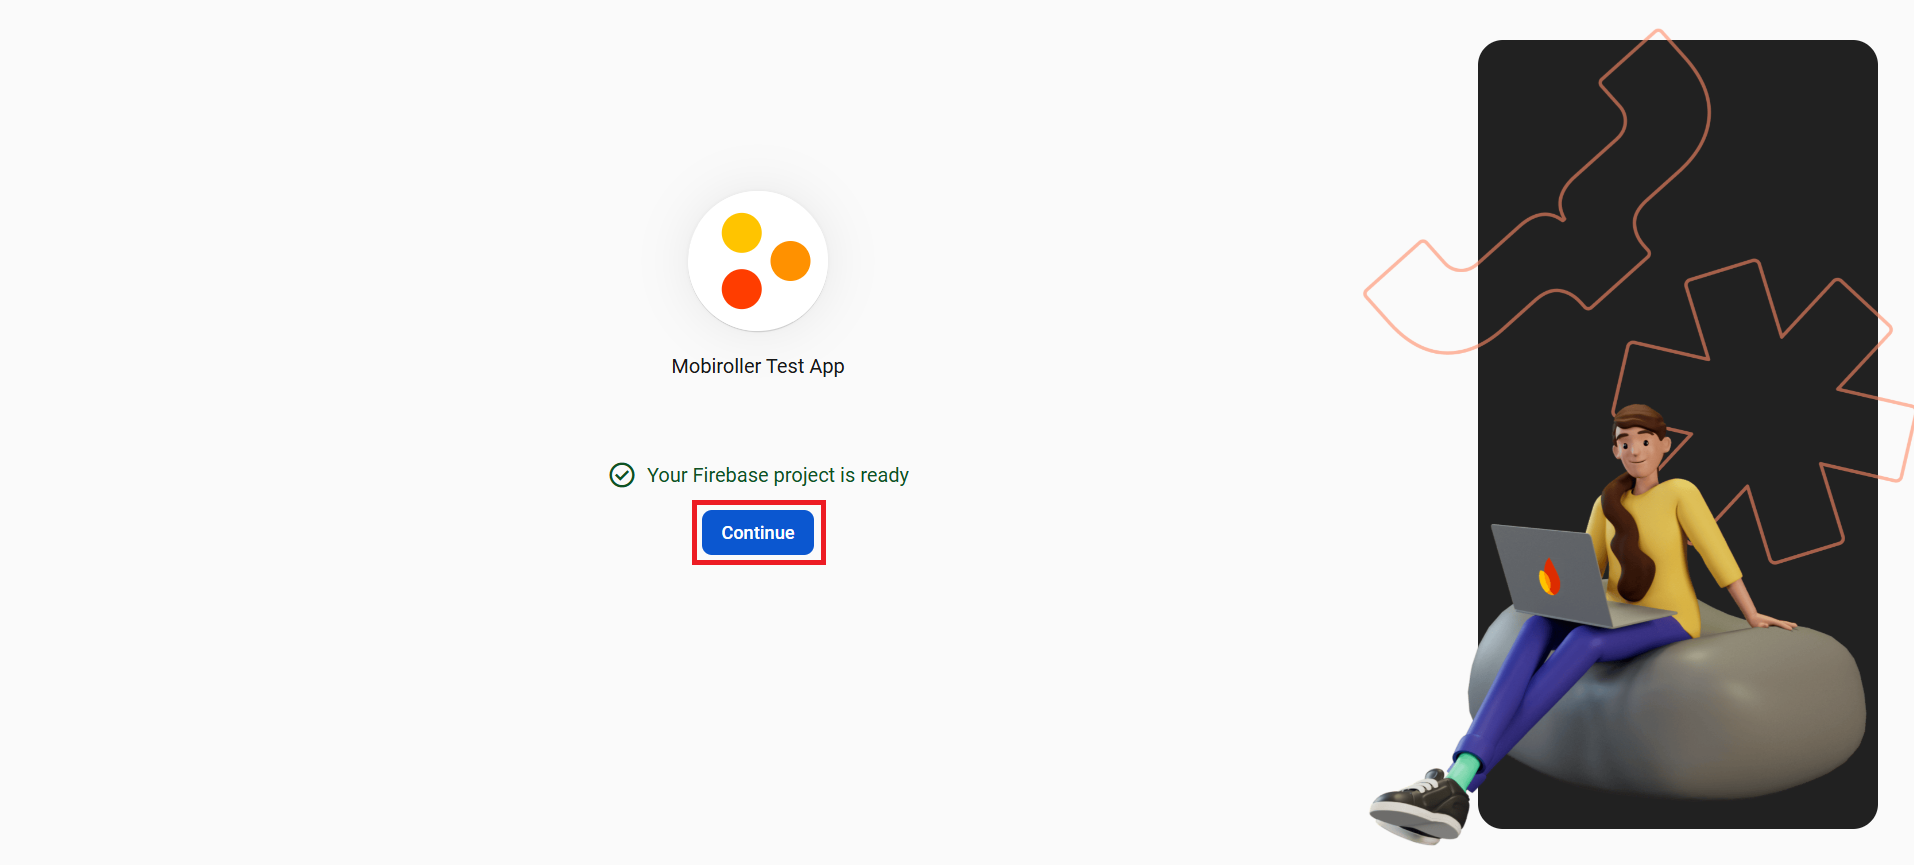
Your project has been created. On the screen that appears, click the Continue button.
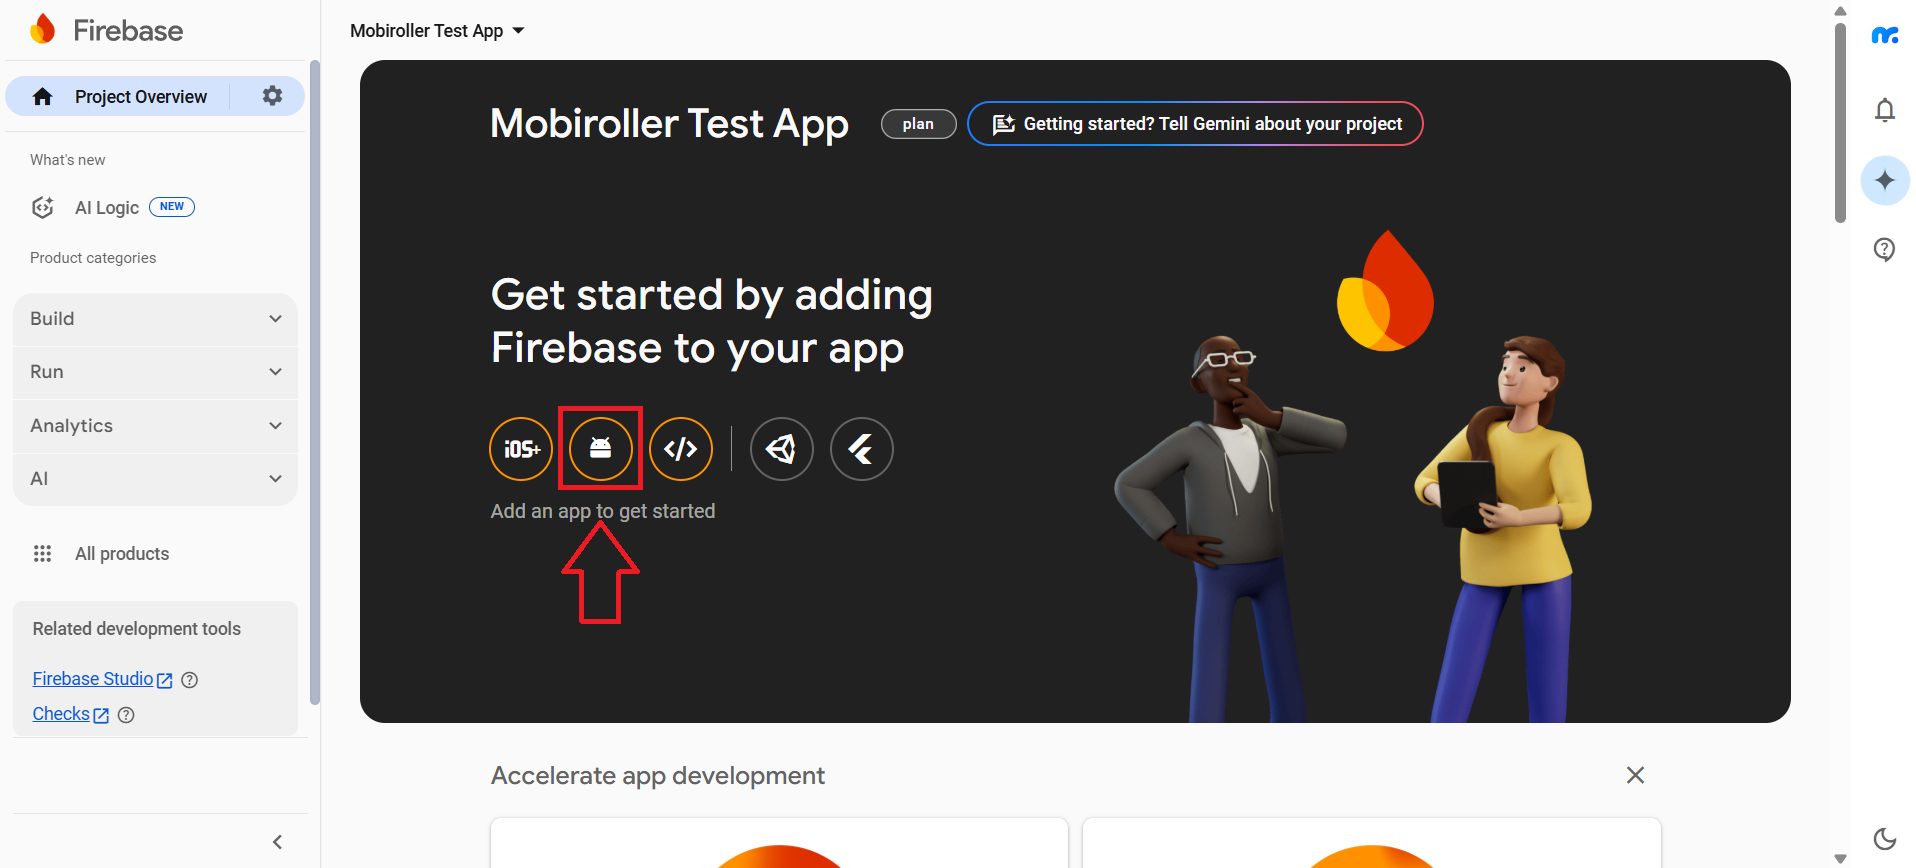
From the opened panel, click the Android option under the Get started by adding Firebase to your app heading.
In the Android package name field, enter the package name you specified while creating your APK (Android Package Name) in the Mobiroller panel. In the App nickname field, you can enter the name of your application.
You can access your package name under the Android Application section in the Download tab of the Mobiroller panel.
For detailed information about the package name, please refer to our article titled What is a Package Name?
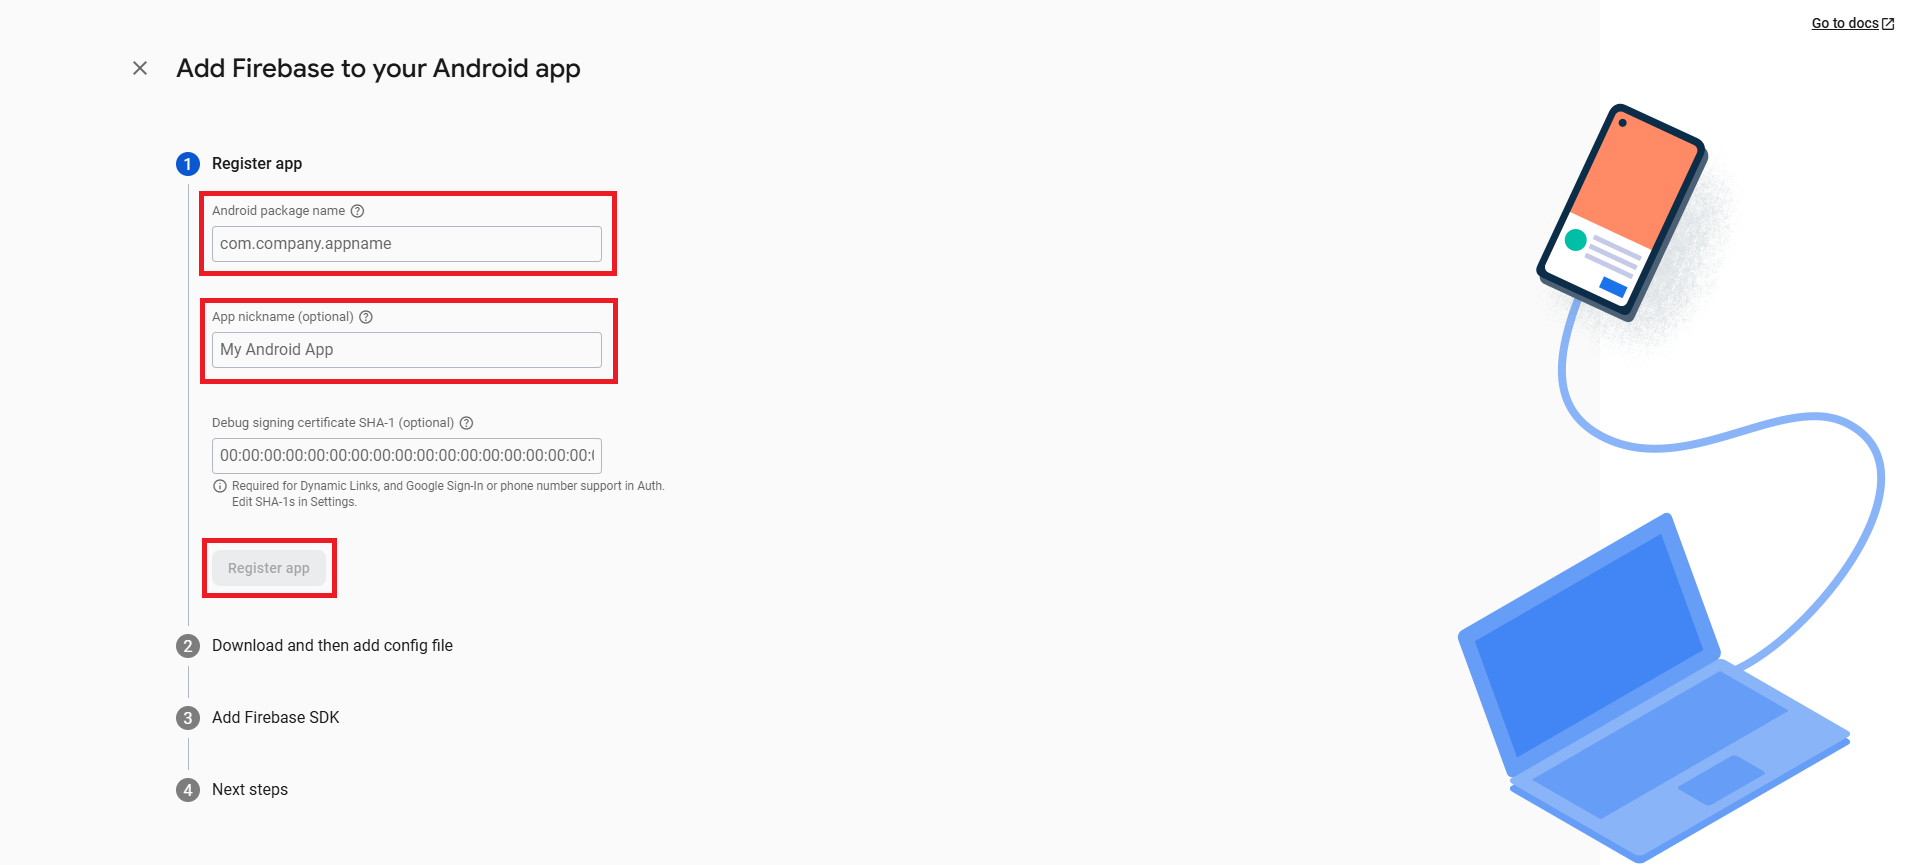
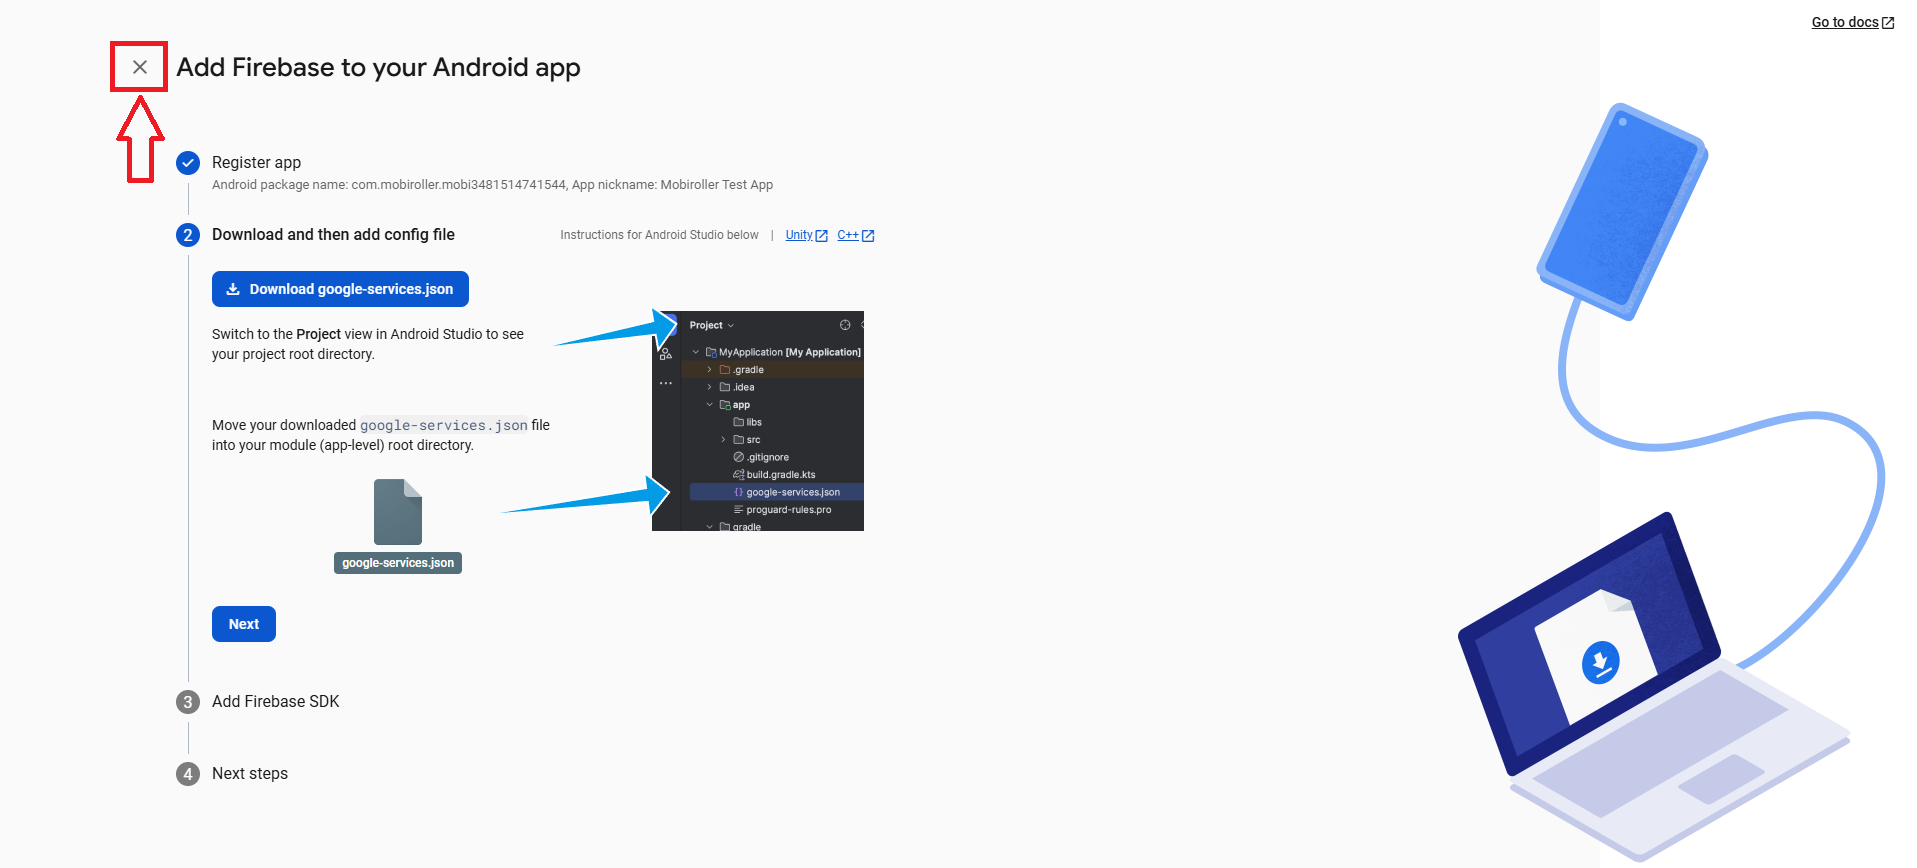
After entering your Android Package Name (APK) and App Name, click the Register app button. On the next screen, close it by clicking the (X) icon without making any changes.
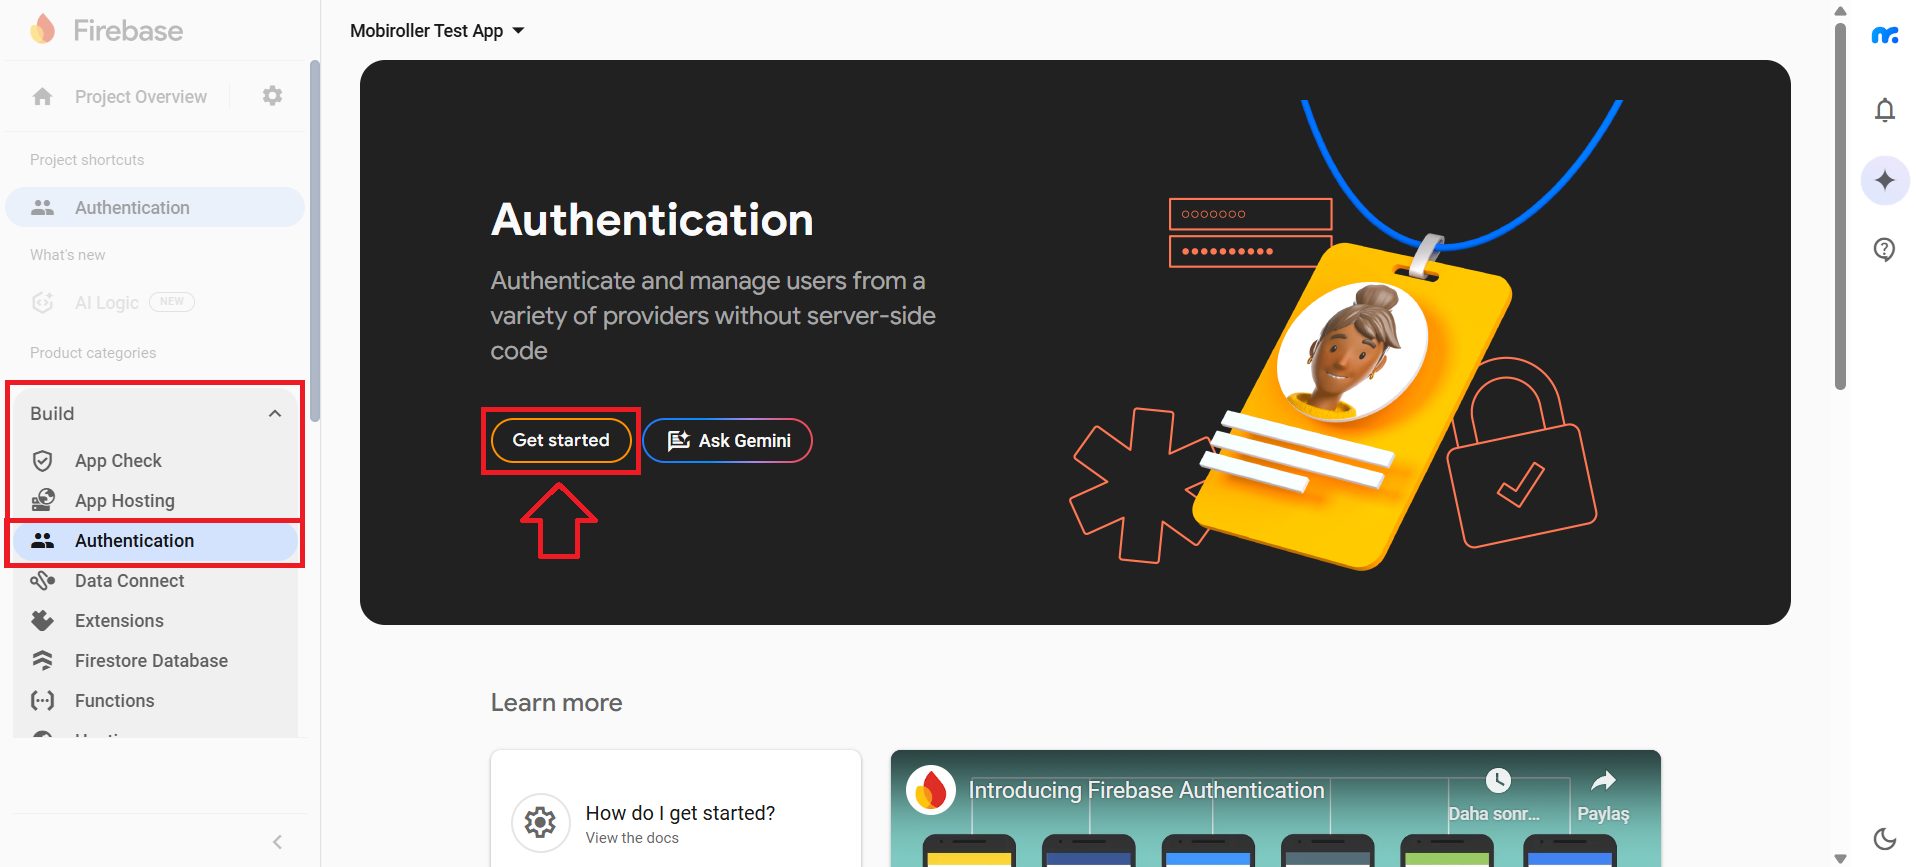
On the screen that appears, click the Build button on the left. Then, from the section that opens below, click Authentication. On the screen that appears, click the Get started button.
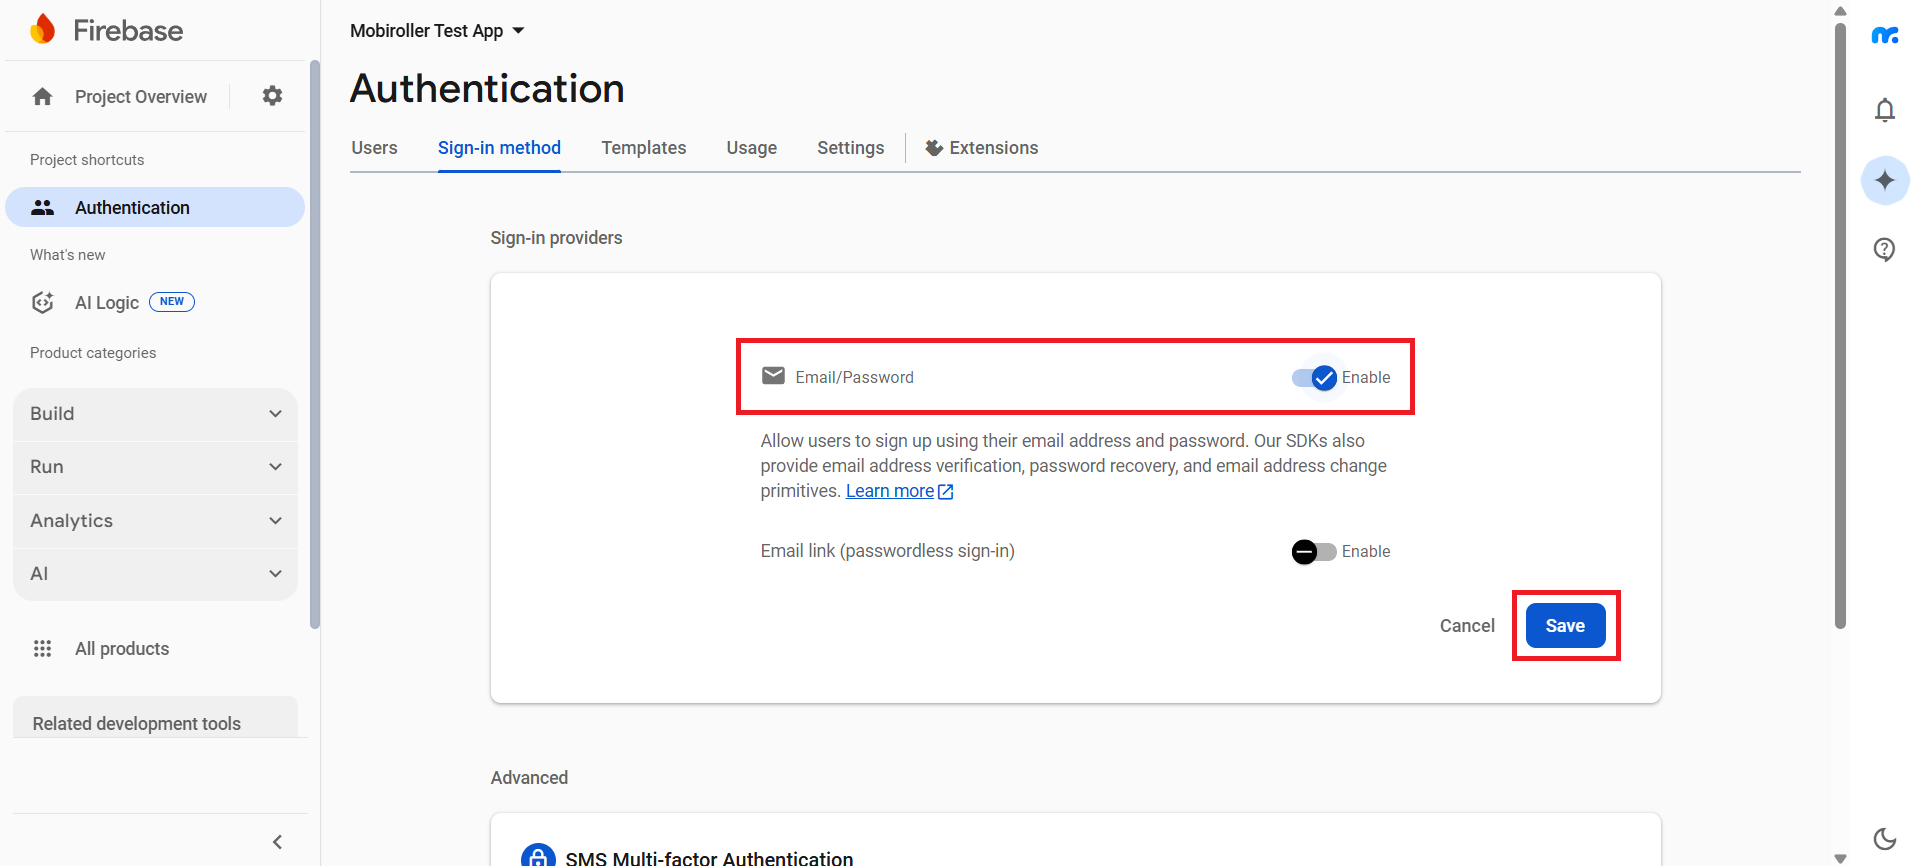
On the screen that appears, click the Sign-in method tab. Then, from the list of sign-in providers, click on Email/Password.
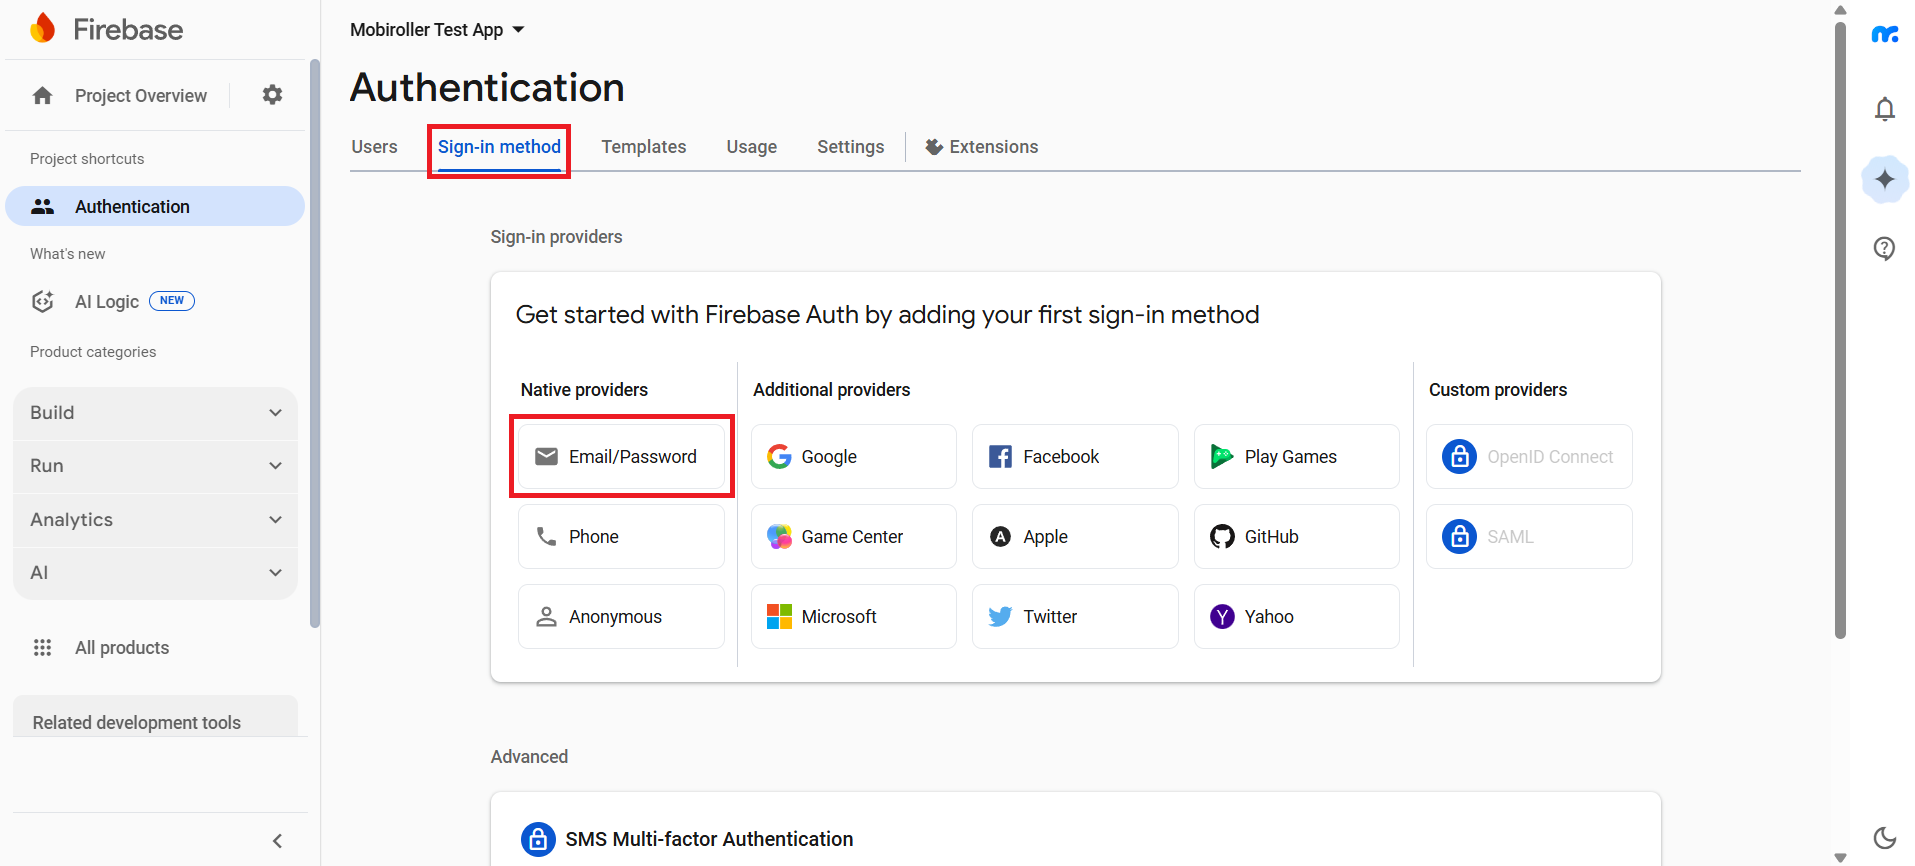
In the Email/Password section, enable the Enable option as shown in the screenshot, then click the Save button.
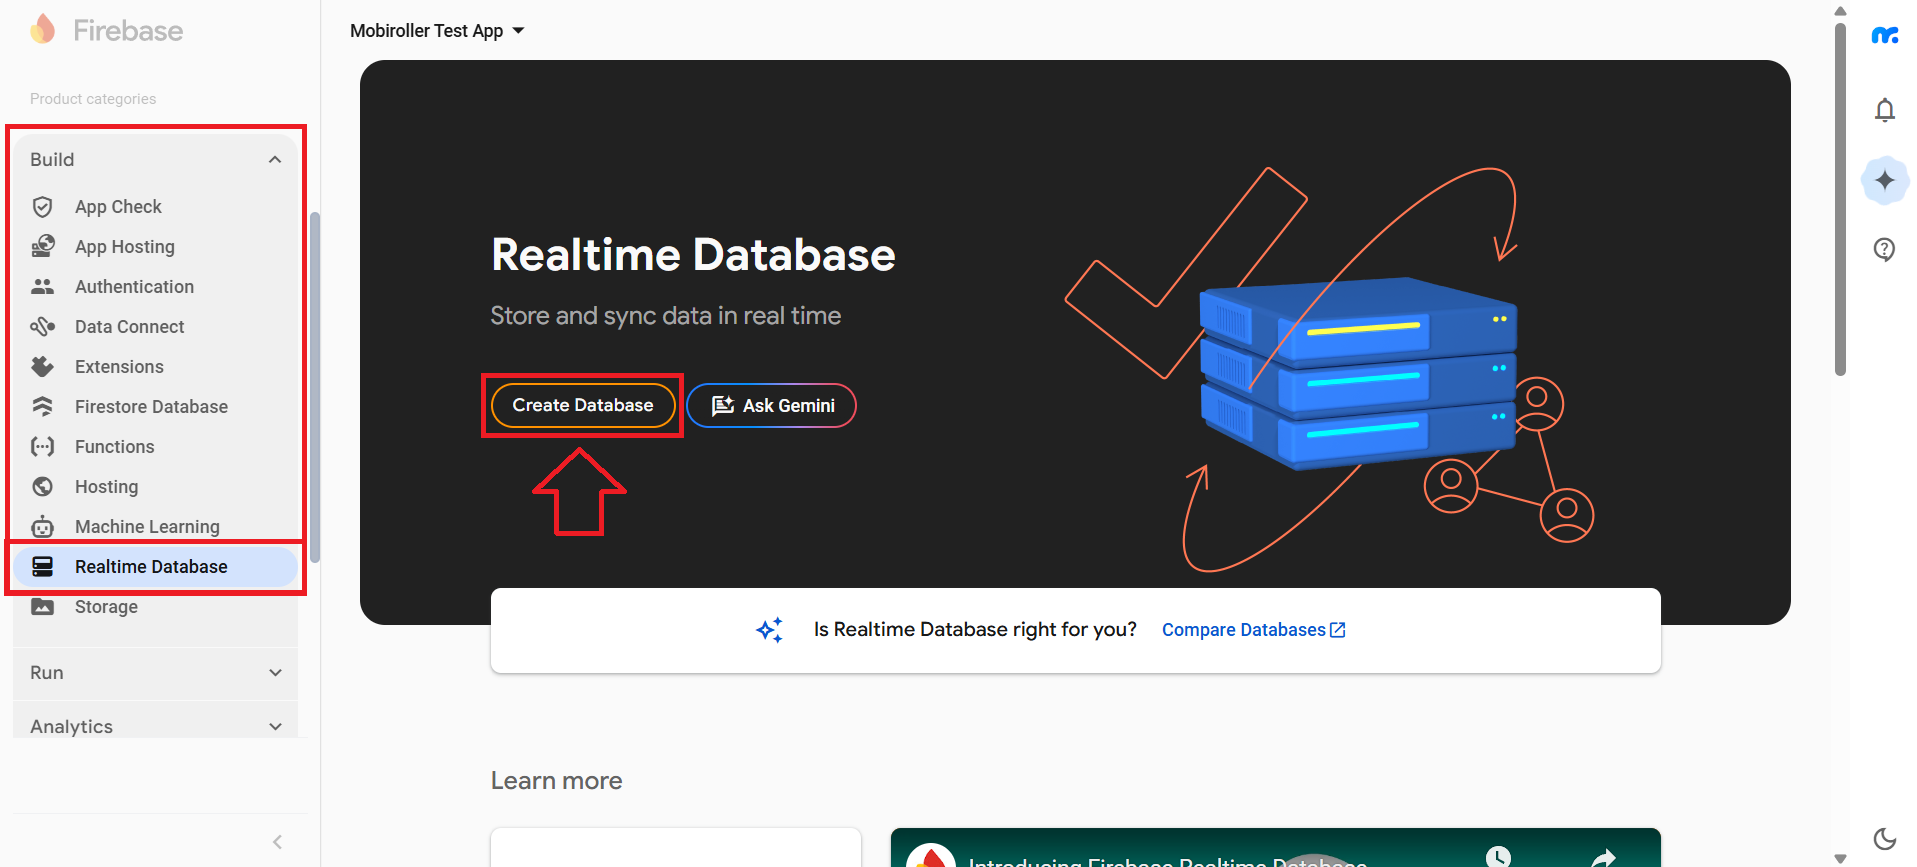
Next, under the Build section on the left, select Realtime Database, and on the main screen, click the Create Database button.
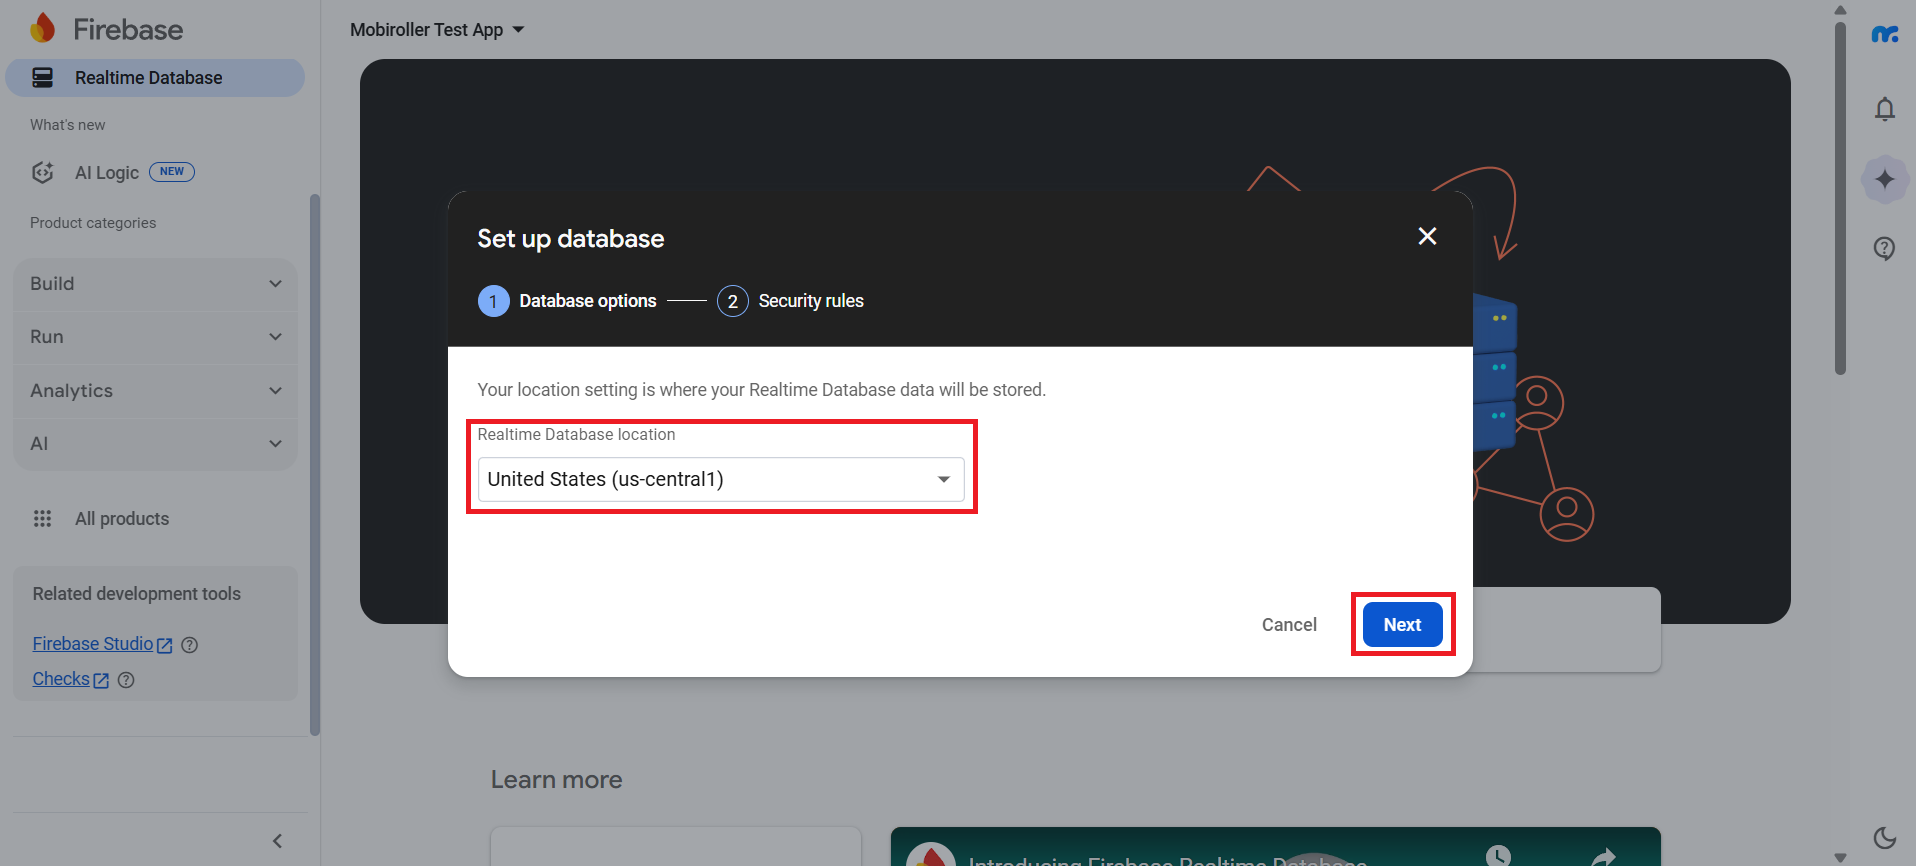
On the screen that appears, leave the United States (us-central1) option as it is, and click the Next button.
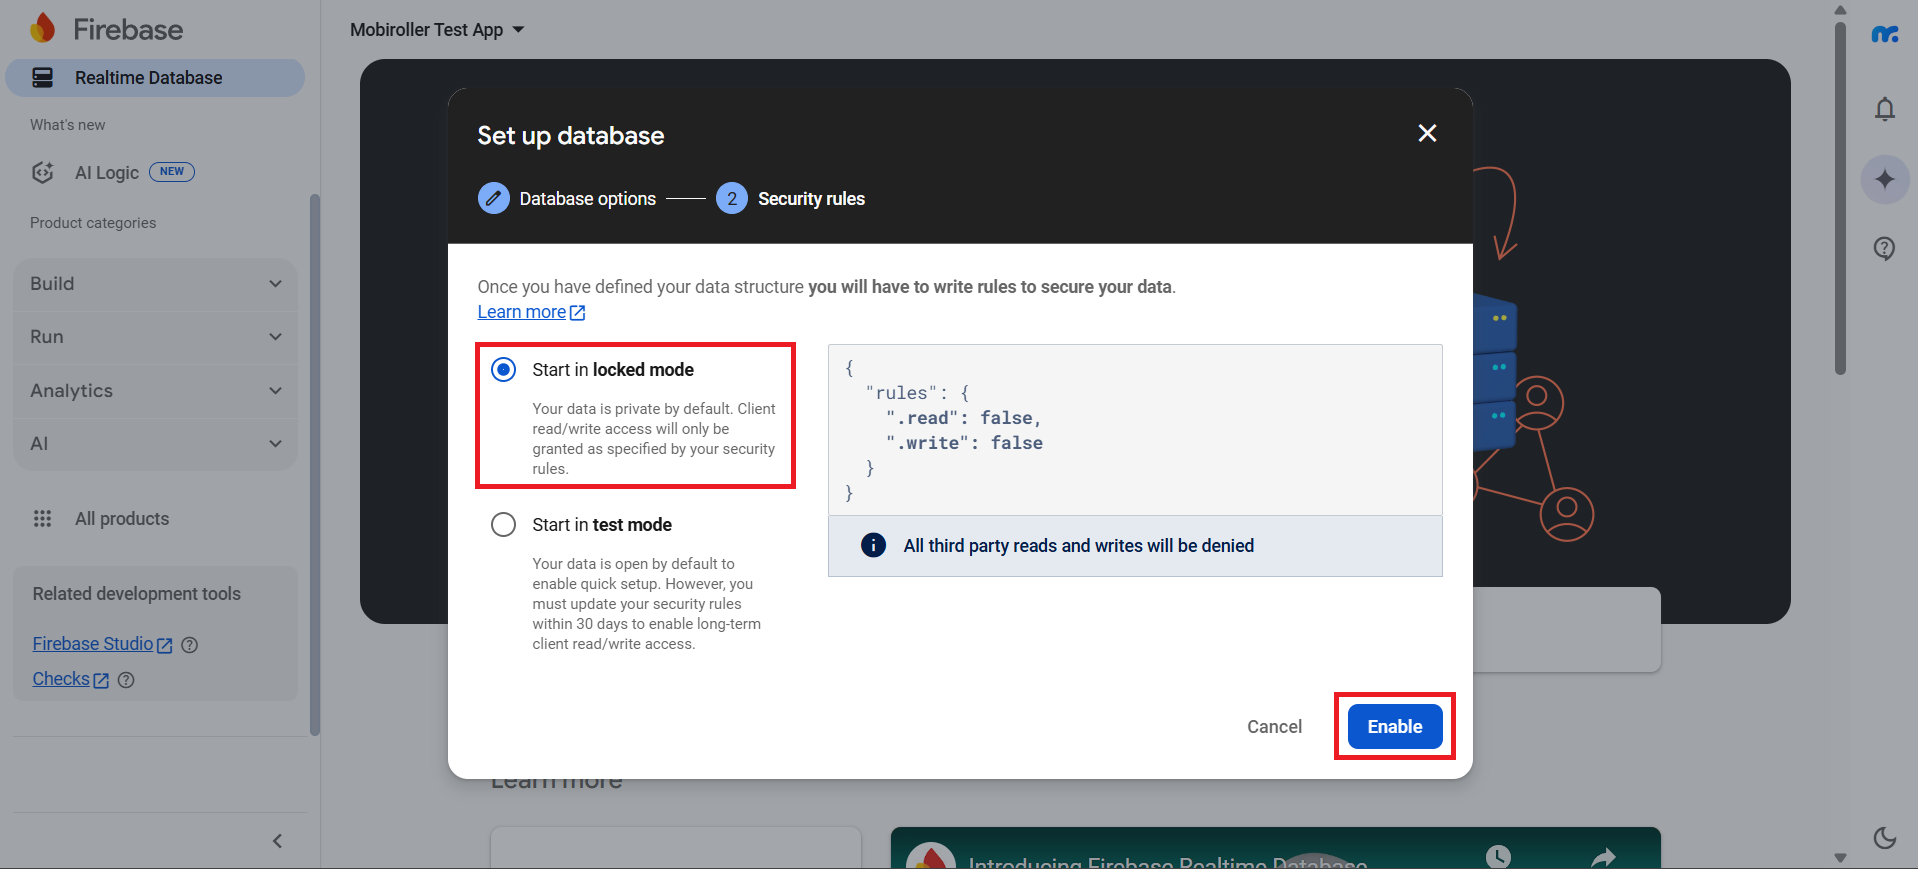
Select the Start in locked mode option and click the Enable button.
Copy the URL displayed on the screen—this is your Firebase Database URL. Paste the copied link into the Firebase Database URL field within the Firebase Settings section of the Mobiroller panel.
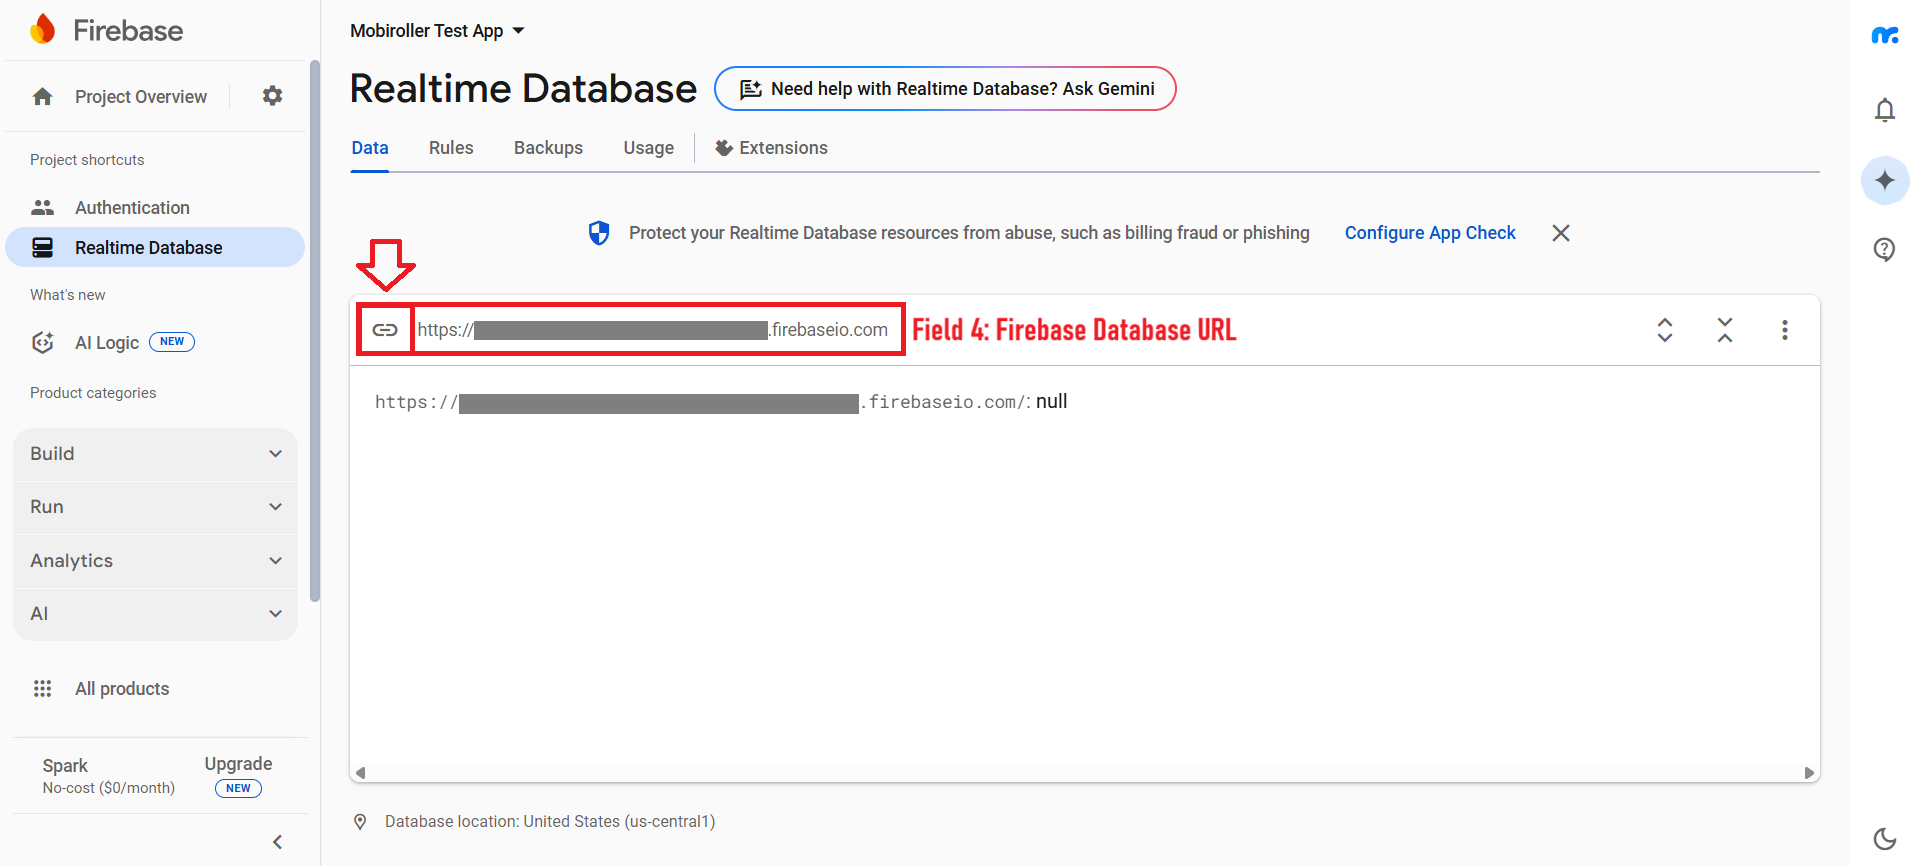
After pasting the link into the relevant field in the Mobiroller panel, click the Rules button.
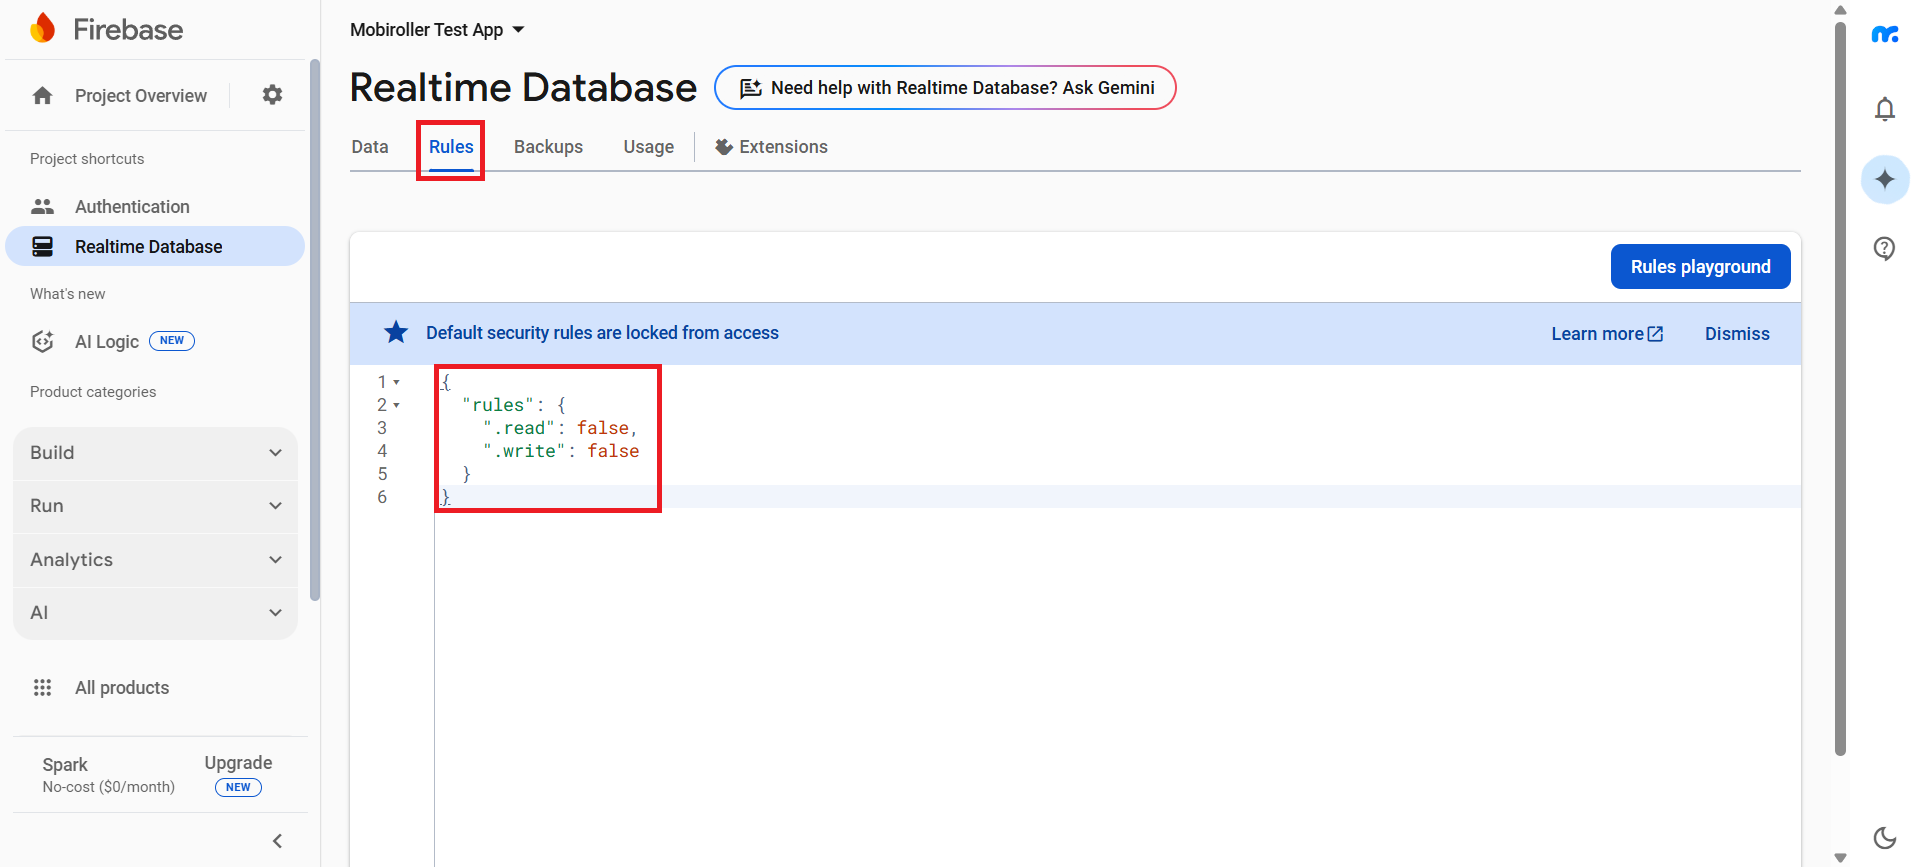
Delete the entire code snippet in this section, then copy and paste the following code snippet into the area.
{
  "rules": {
    ".read": "auth != null",
    ".write": "auth != null",
    "userListV1" : {
      ".indexOn": ["io","n","o"]
    },
    "searchIndexV1" : {
      ".indexOn": ["un","n"]
    }
  }
}
If you have pasted the code correctly, it will look like the example below. After this, click the Publish button.
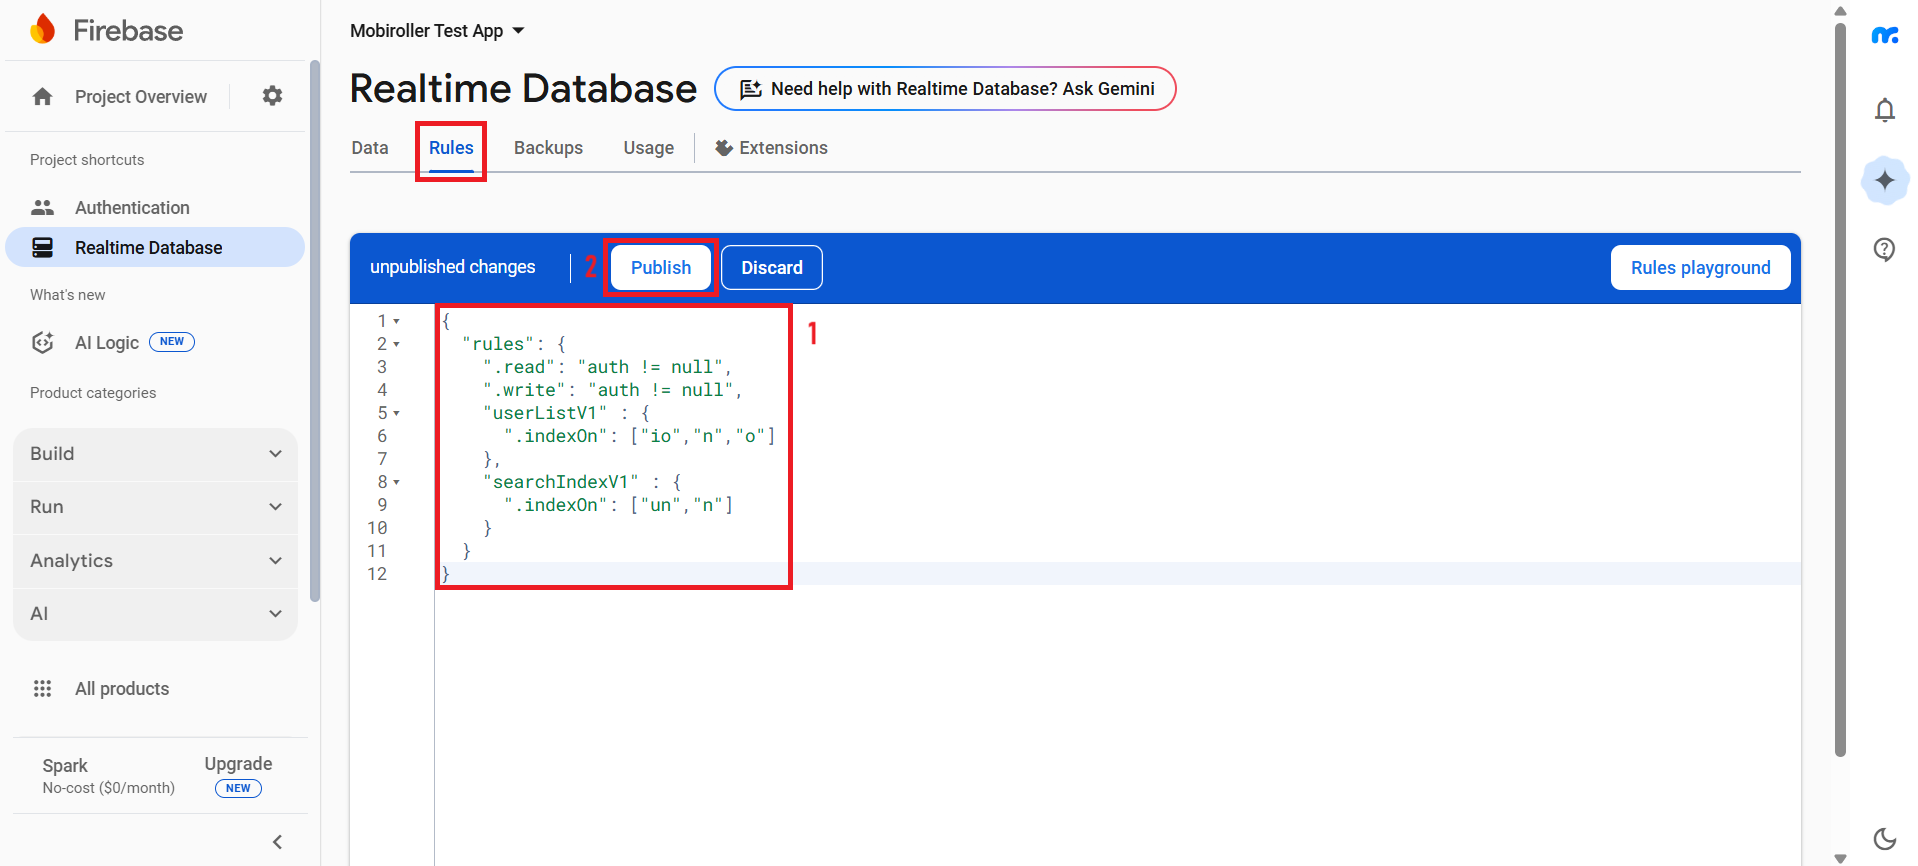
Note: If you return to the Database screen through the panel, the code will reset due to a Firebase error, causing your app to malfunction. Therefore, after pasting and publishing the code, proceed directly to the next step without revisiting the Database screen.
Then, from the left side, click the Settings button located to the right of the Project Overview section, and select Project settings.
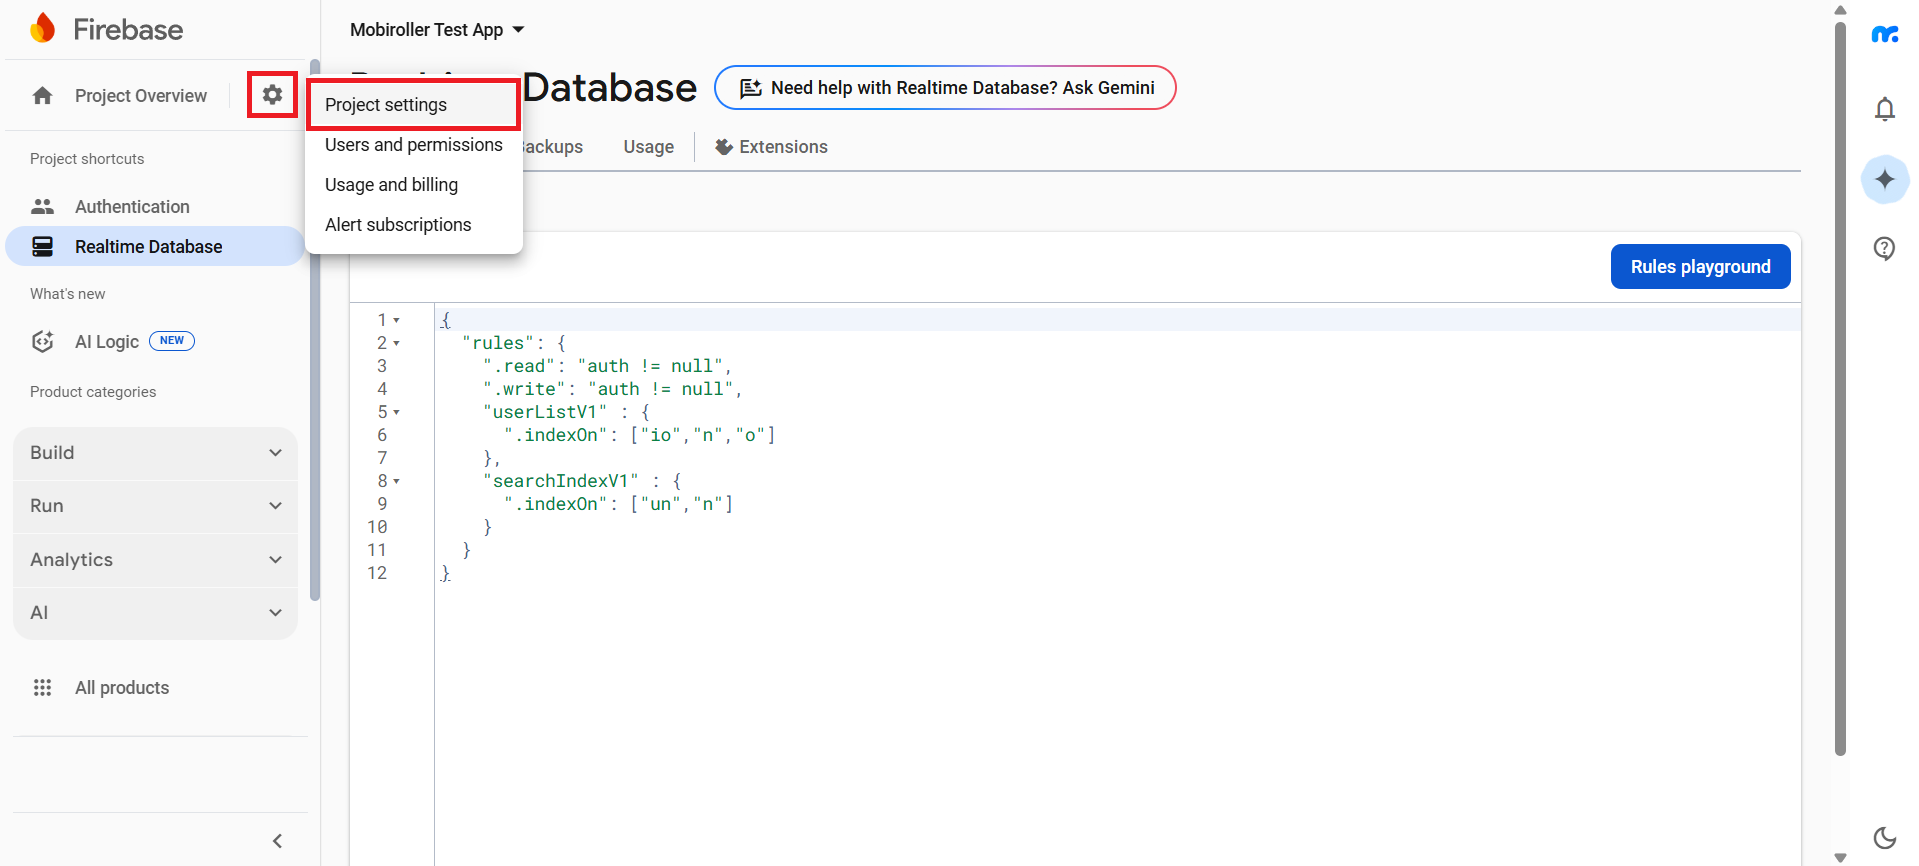
Copy the Project ID from the screen that appears and paste it into the Firebase Project Id field in the Firebase settings of the Mobiroller panel.
Then, copy the Web API Key and paste it into the Firebase Web Api Key field.
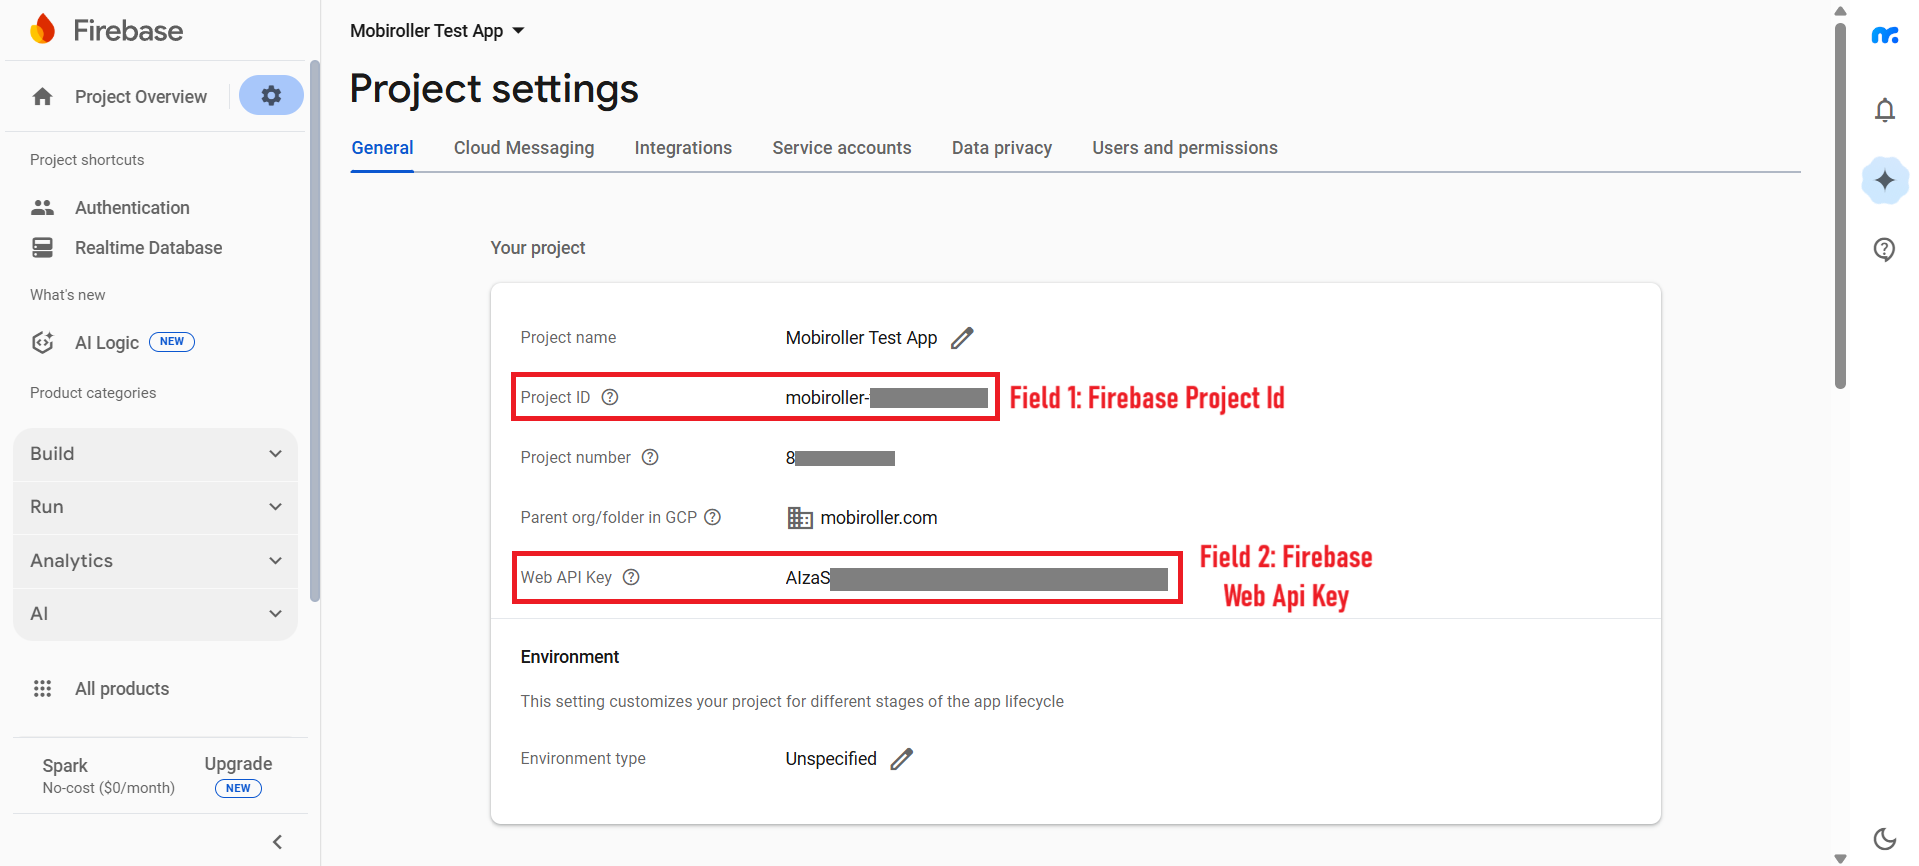
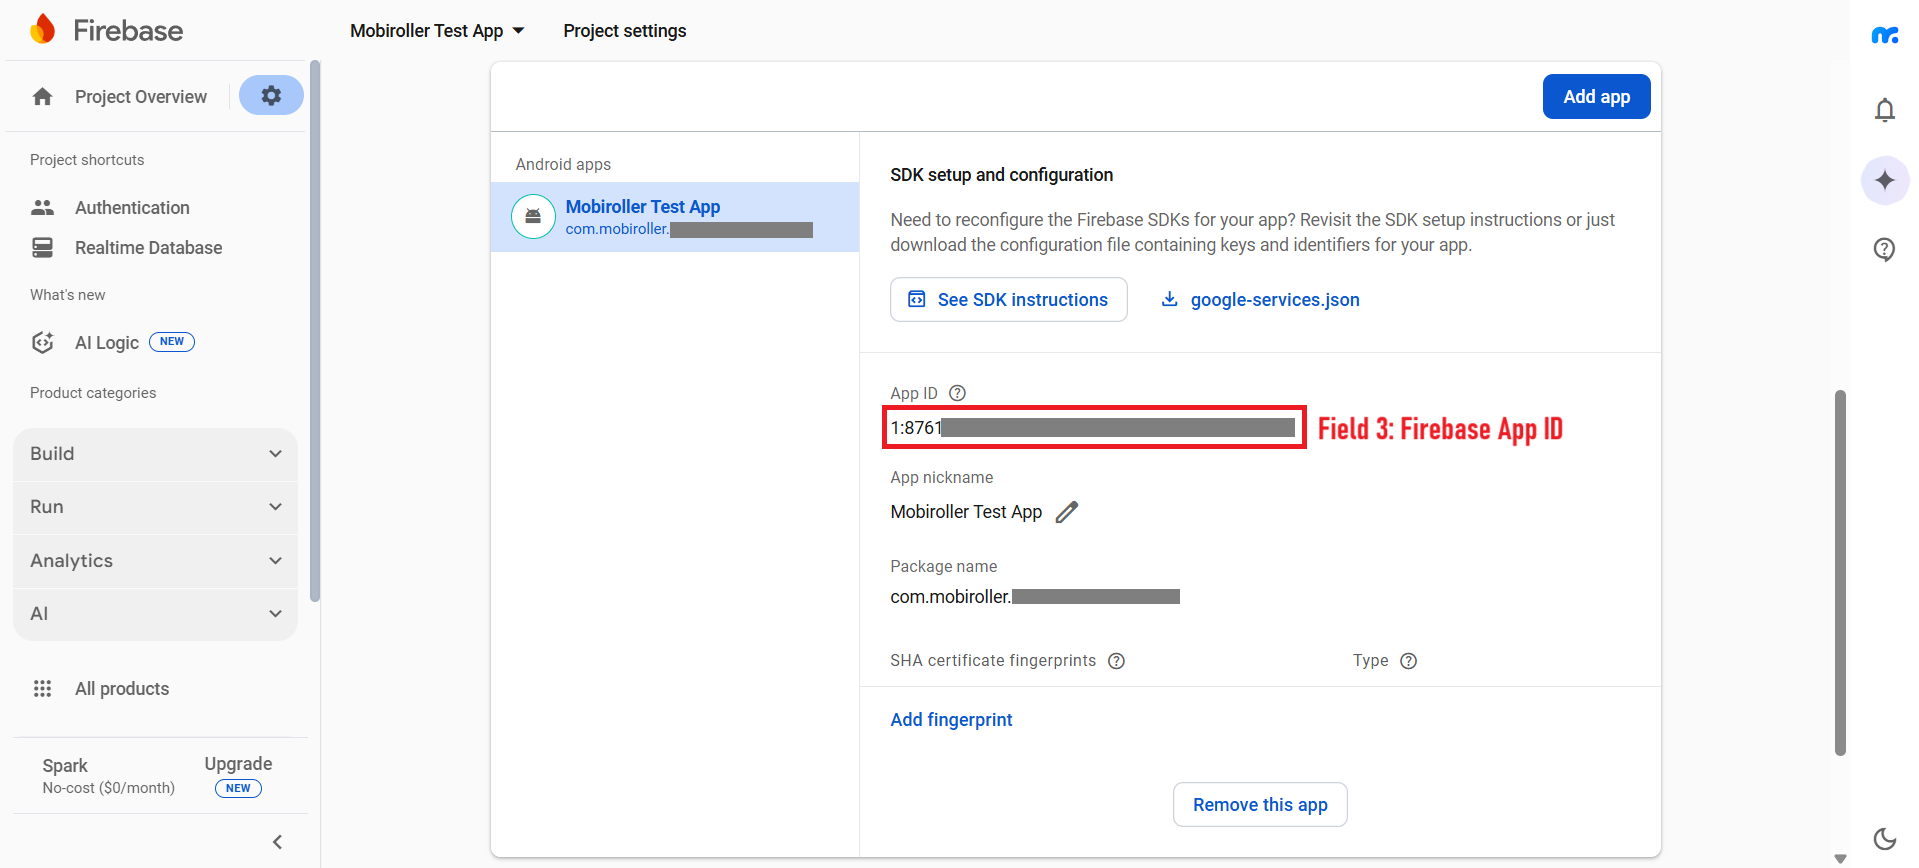
On the same screen, copy the App ID located at the bottom section of the page and paste it into the Firebase App ID field in the Firebase settings of the Mobiroller panel.
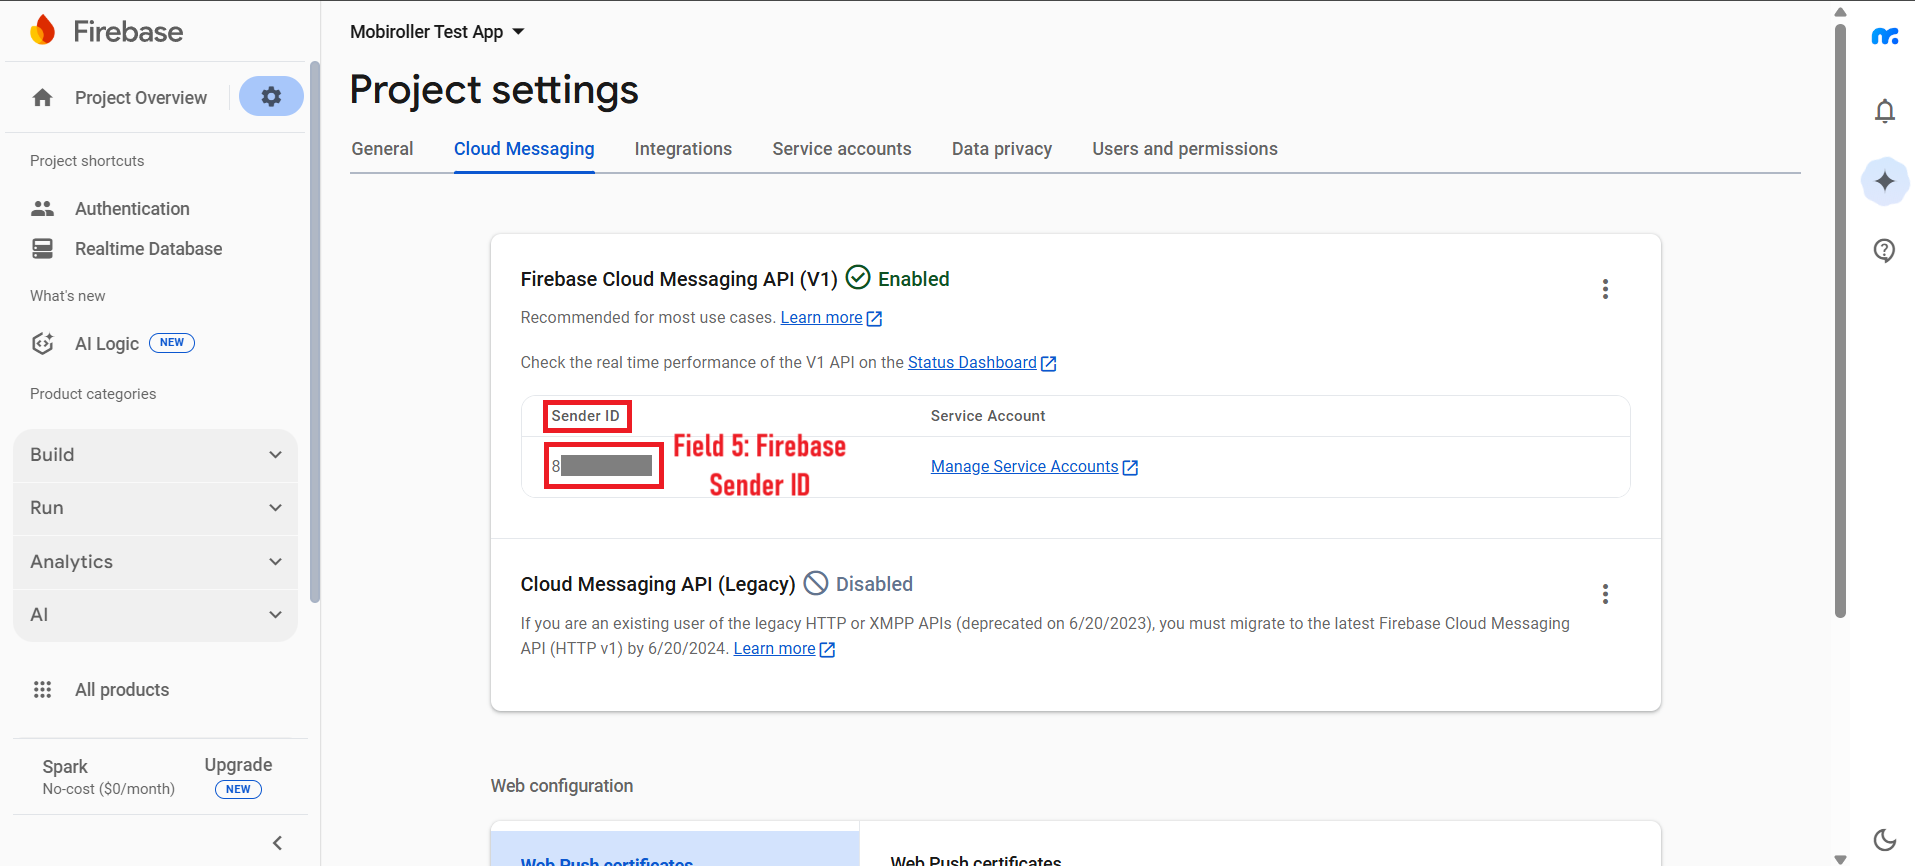
Next, click the Cloud Messaging tab at the top. On the screen that appears, copy the Sender ID and paste it into the Firebase Sender ID field in the Firebase settings of the Mobiroller panel.
After filling in the relevant fields, you can complete the Firebase configuration required for the Chat/Messaging module by clicking the Save button. However, in order for it to be activated, you need to generate a new APK and update it if your app is live in any app market.
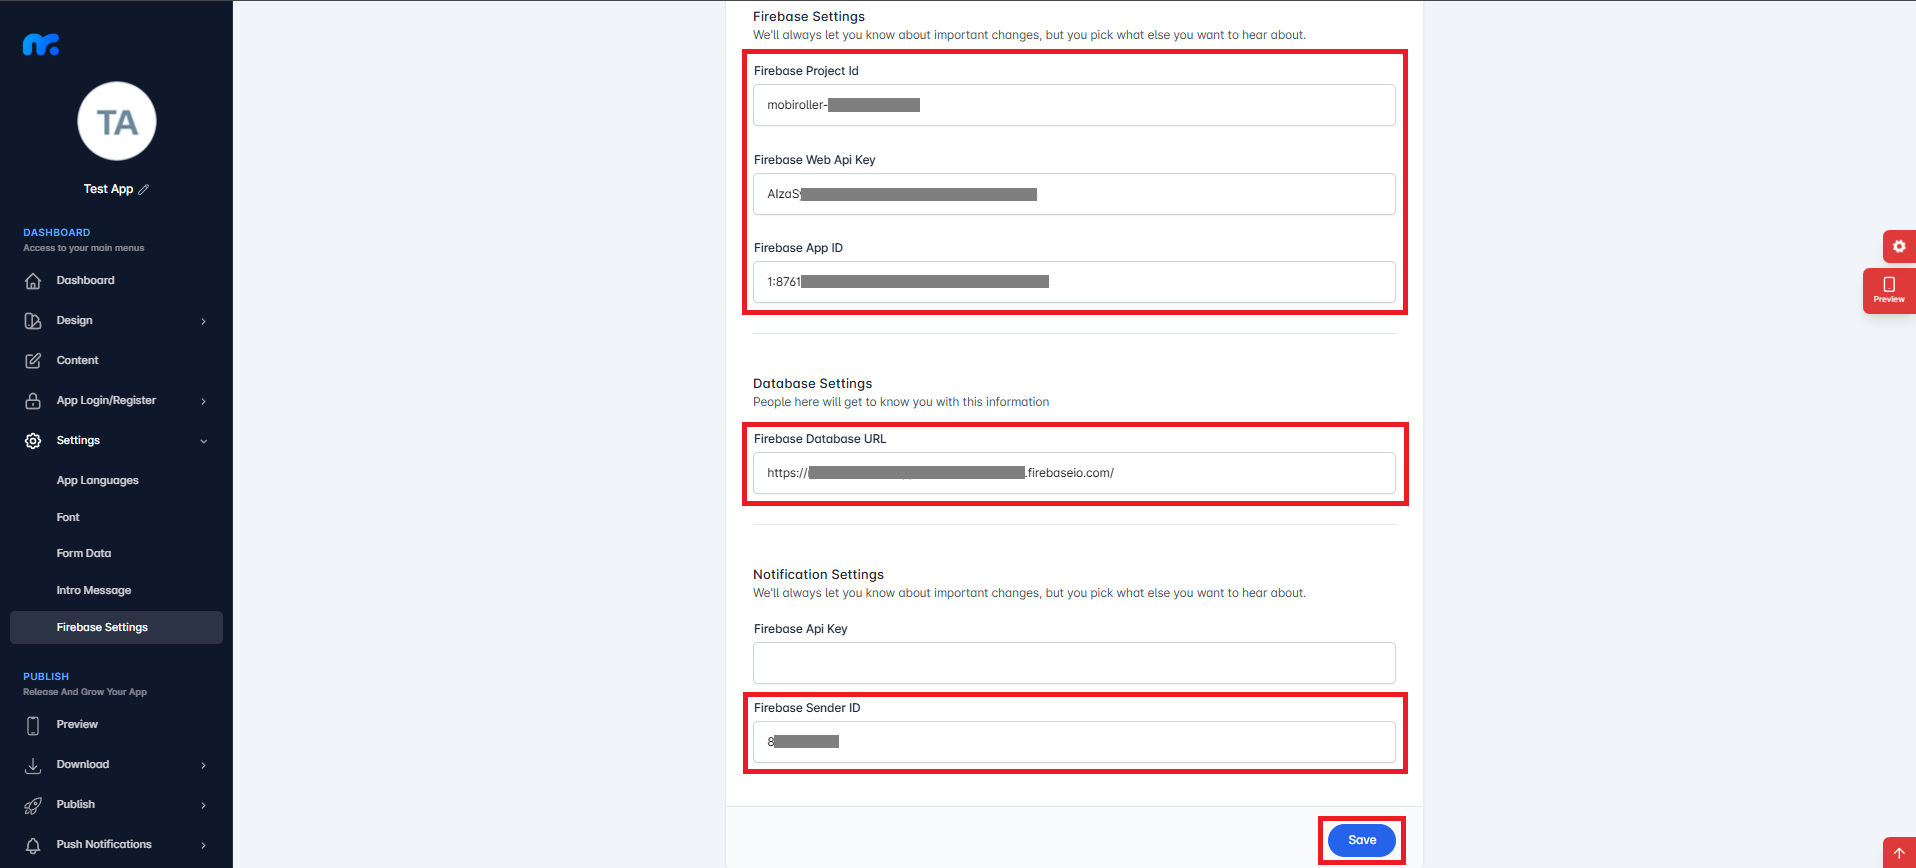
The Firebase Api Key field in the Firebase Settings section of the Mobiroller panel is not used in the current configuration. It is perfectly fine to leave this field empty.
The changes you make in the Chat/Messaging settings will become active with the production of a new APK. After completing your changes, go to the Download tab, generate a new APK, and verify your application using the new APK.
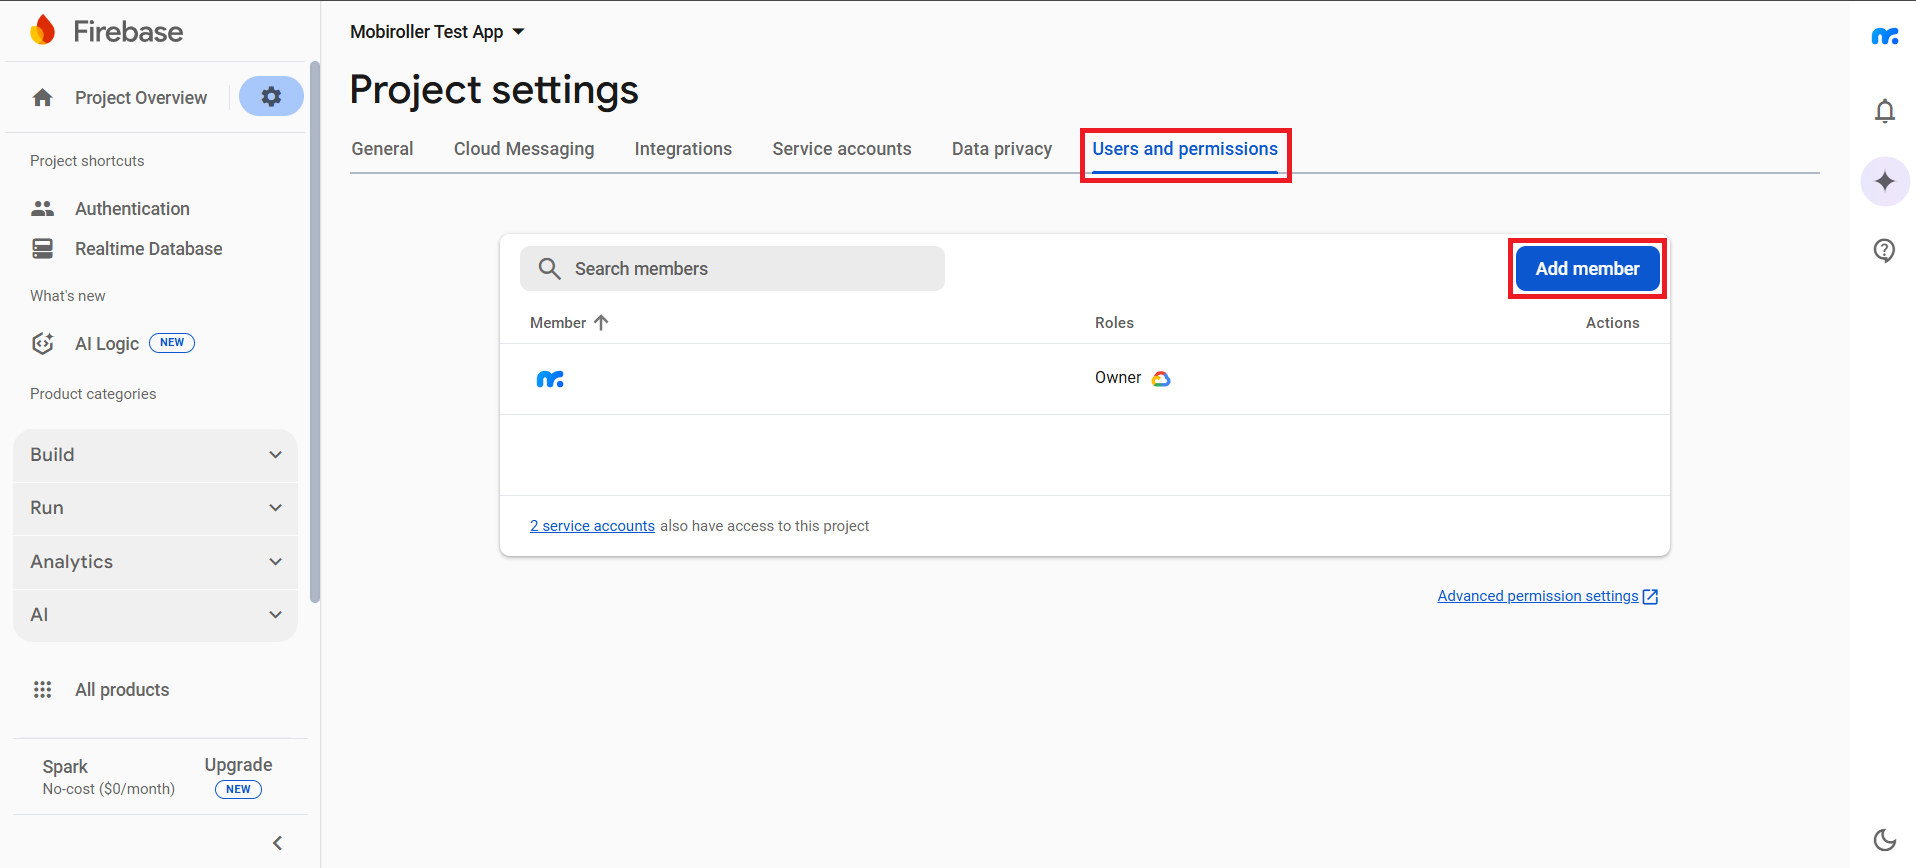
If you continue to experience errors despite having completed all steps correctly; click the Users and permissions tab on the same screen. Then, click the Add member button on the screen that appears.
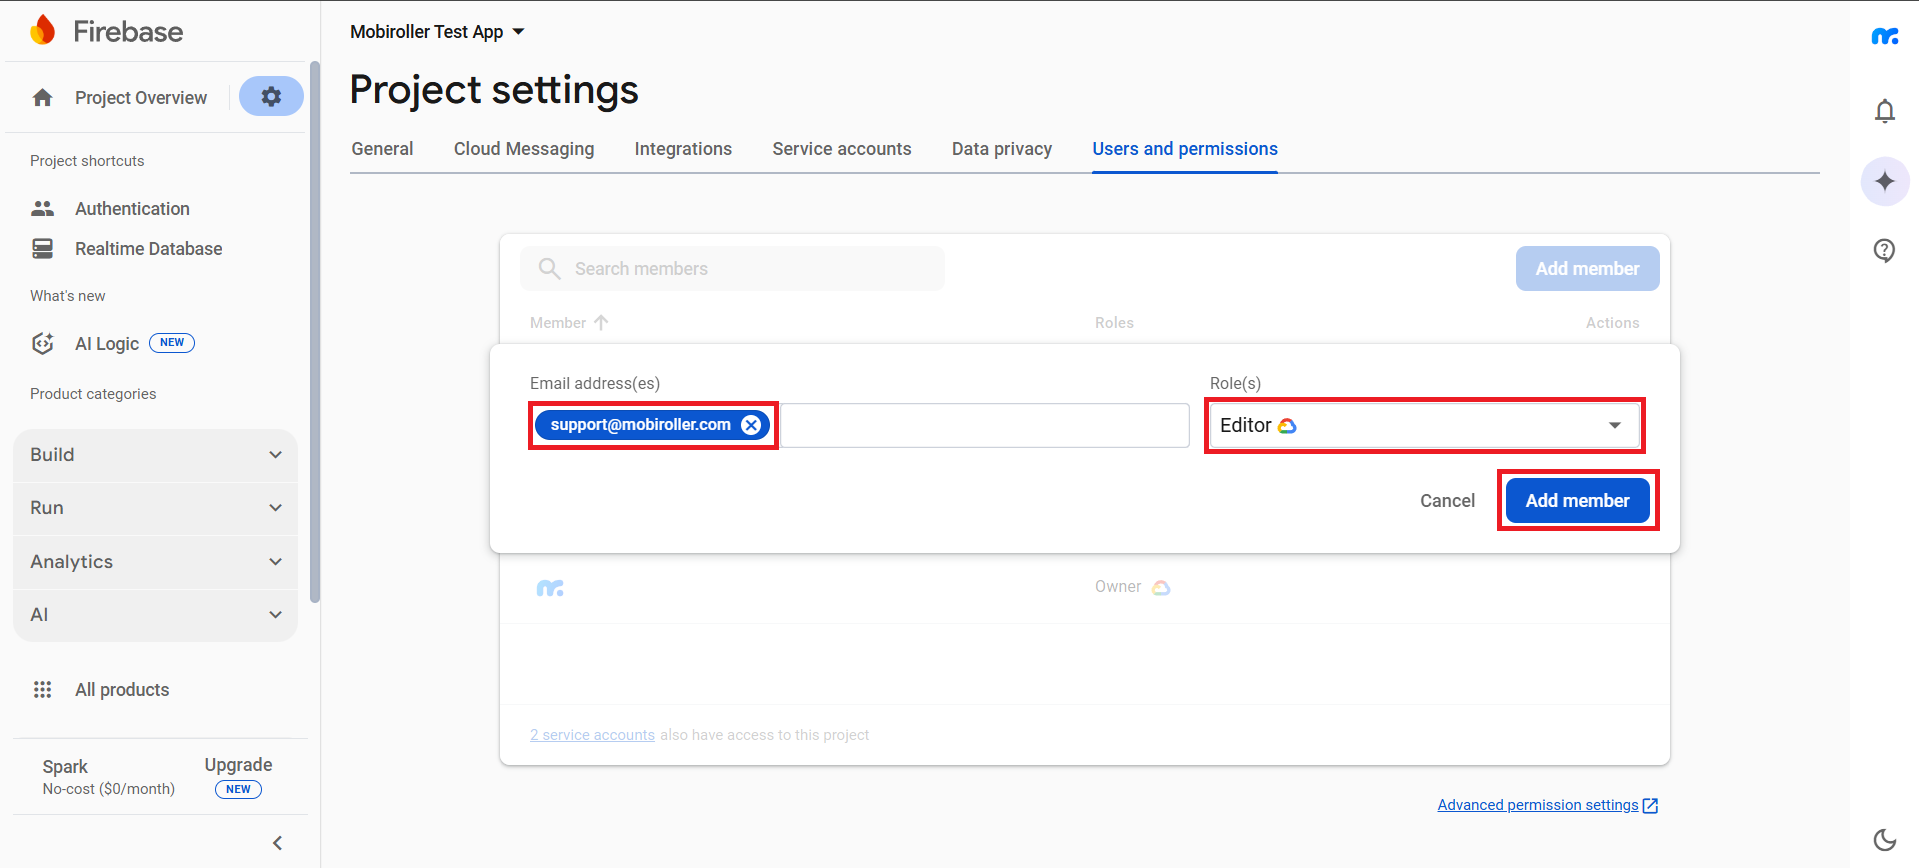
Next, add support@mobiroller.com, select Editor from the Role(s) section, and click the Add member button to grant access. Then, send an email to support@mobiroller.com including a screenshot of the error you are encountering.
We will review your issue as soon as possible and work on resolving it.