The Form module allows you to create forms such as surveys, feedback, orders, newsletters, and more once you add it to your app. This way, you can easily collect information from your users.
How Can I Add the Form Module to My App?
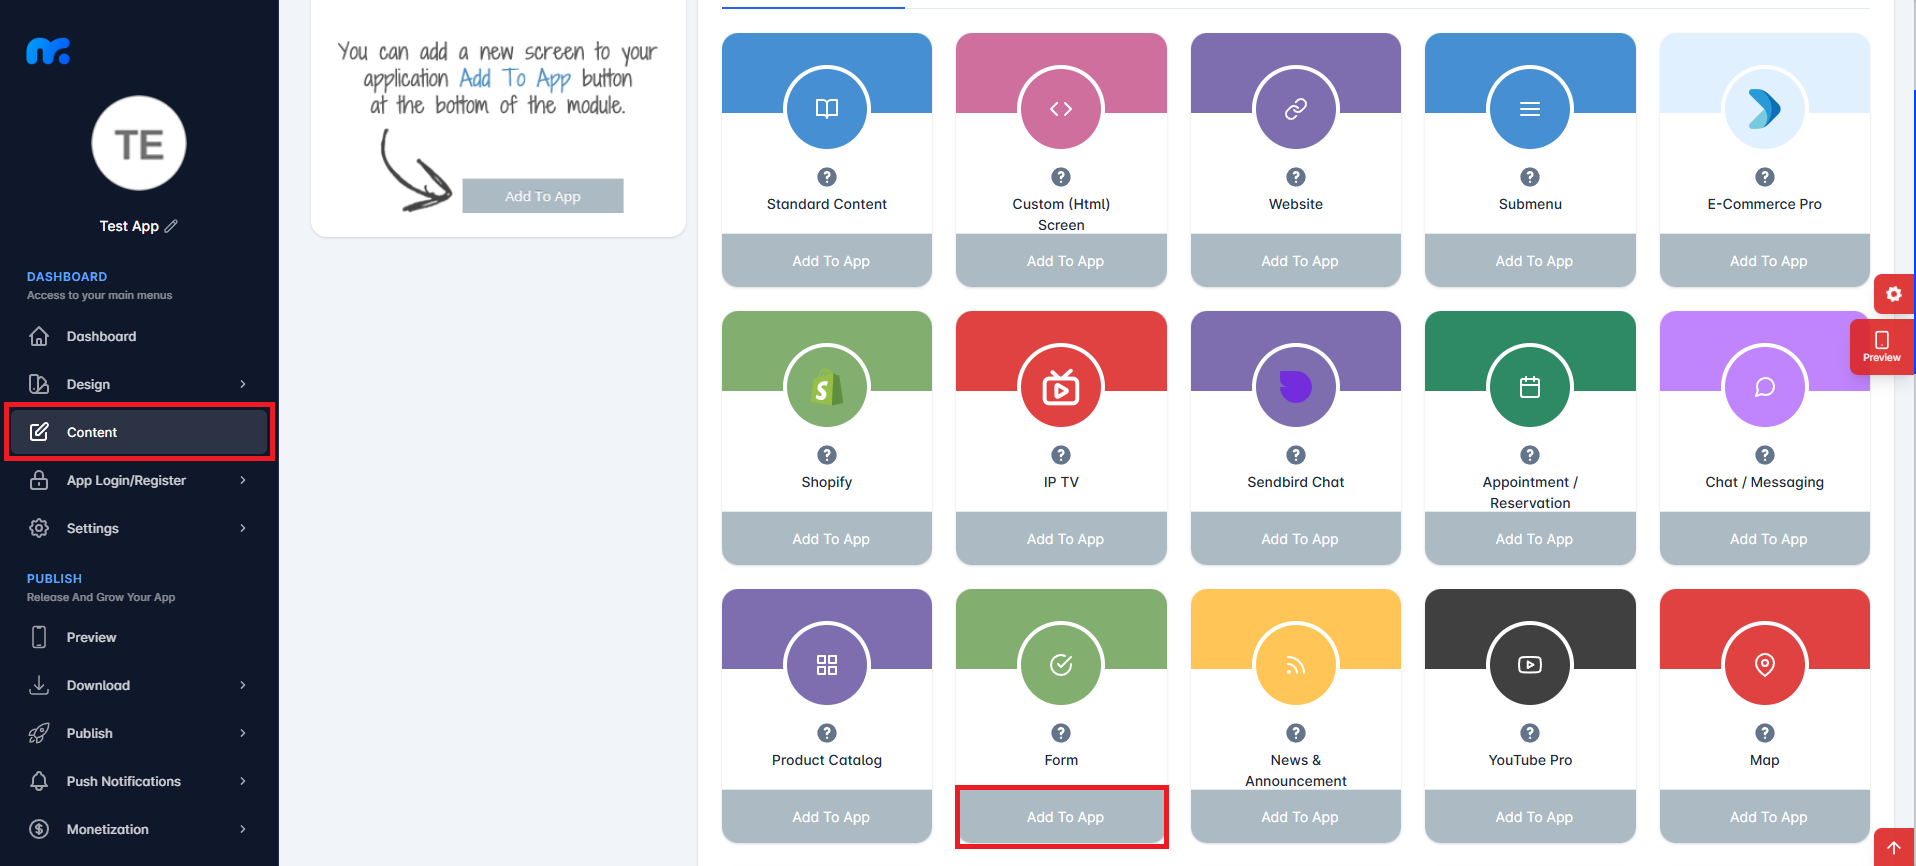
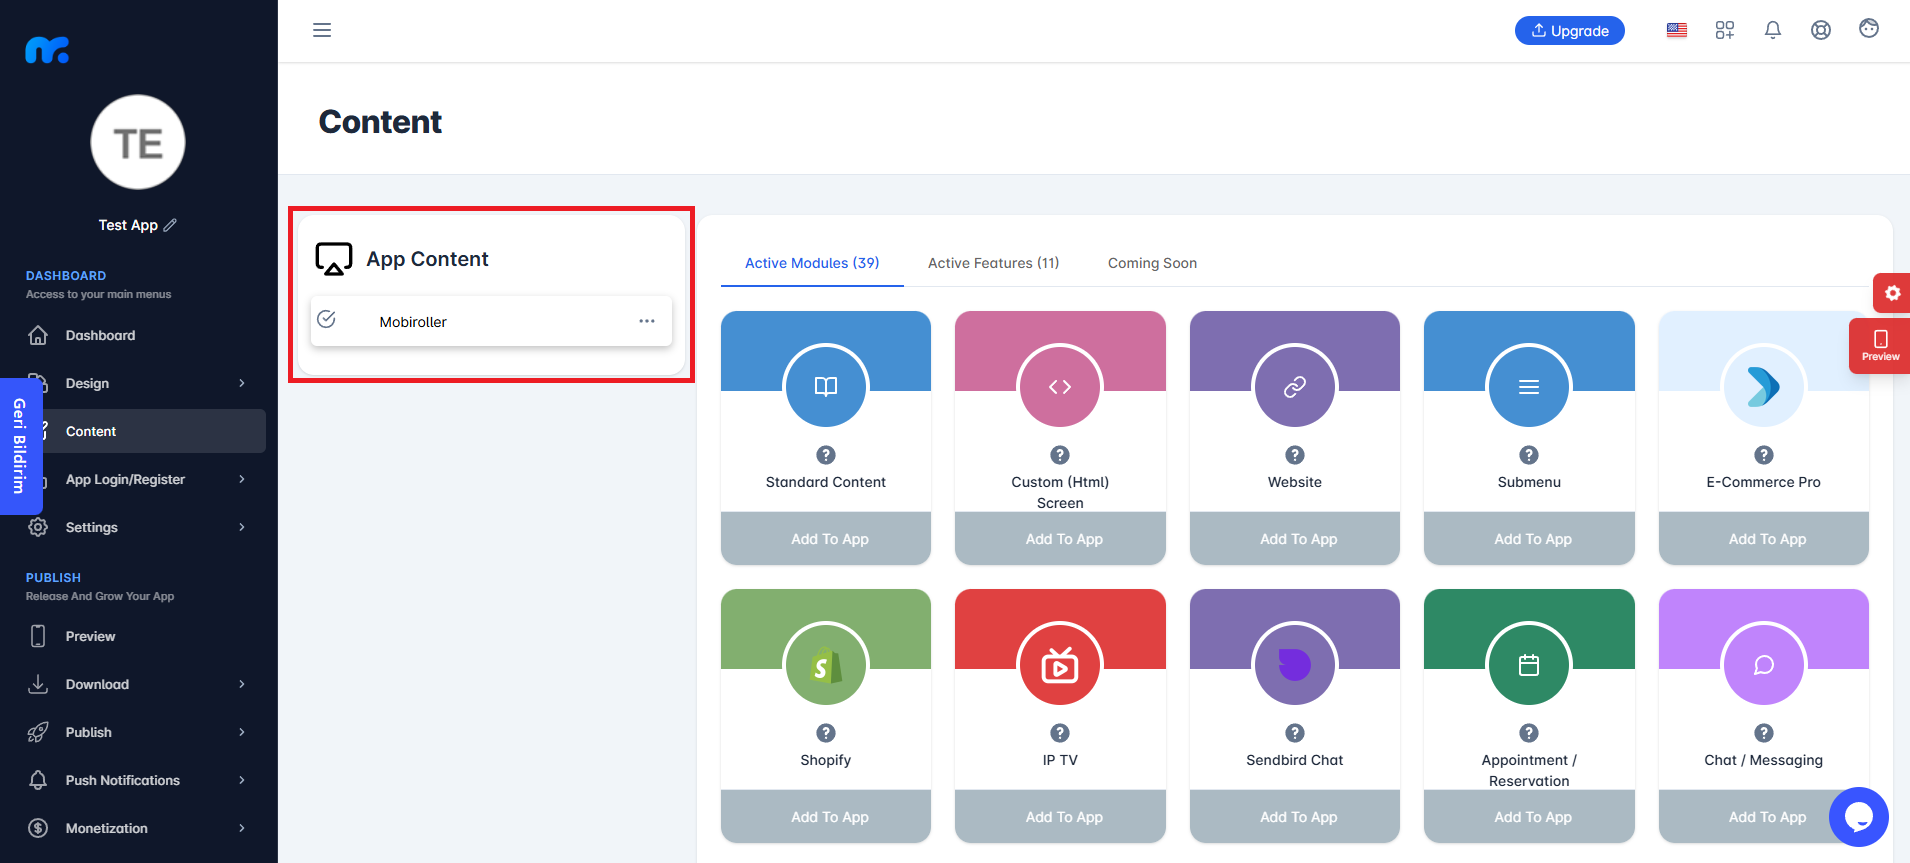
By clicking the Content tab located on the left side of your control panel, you can view the Active Modules. You can add the module to your mobile app’s content by clicking the Add to App button located under the Form module.
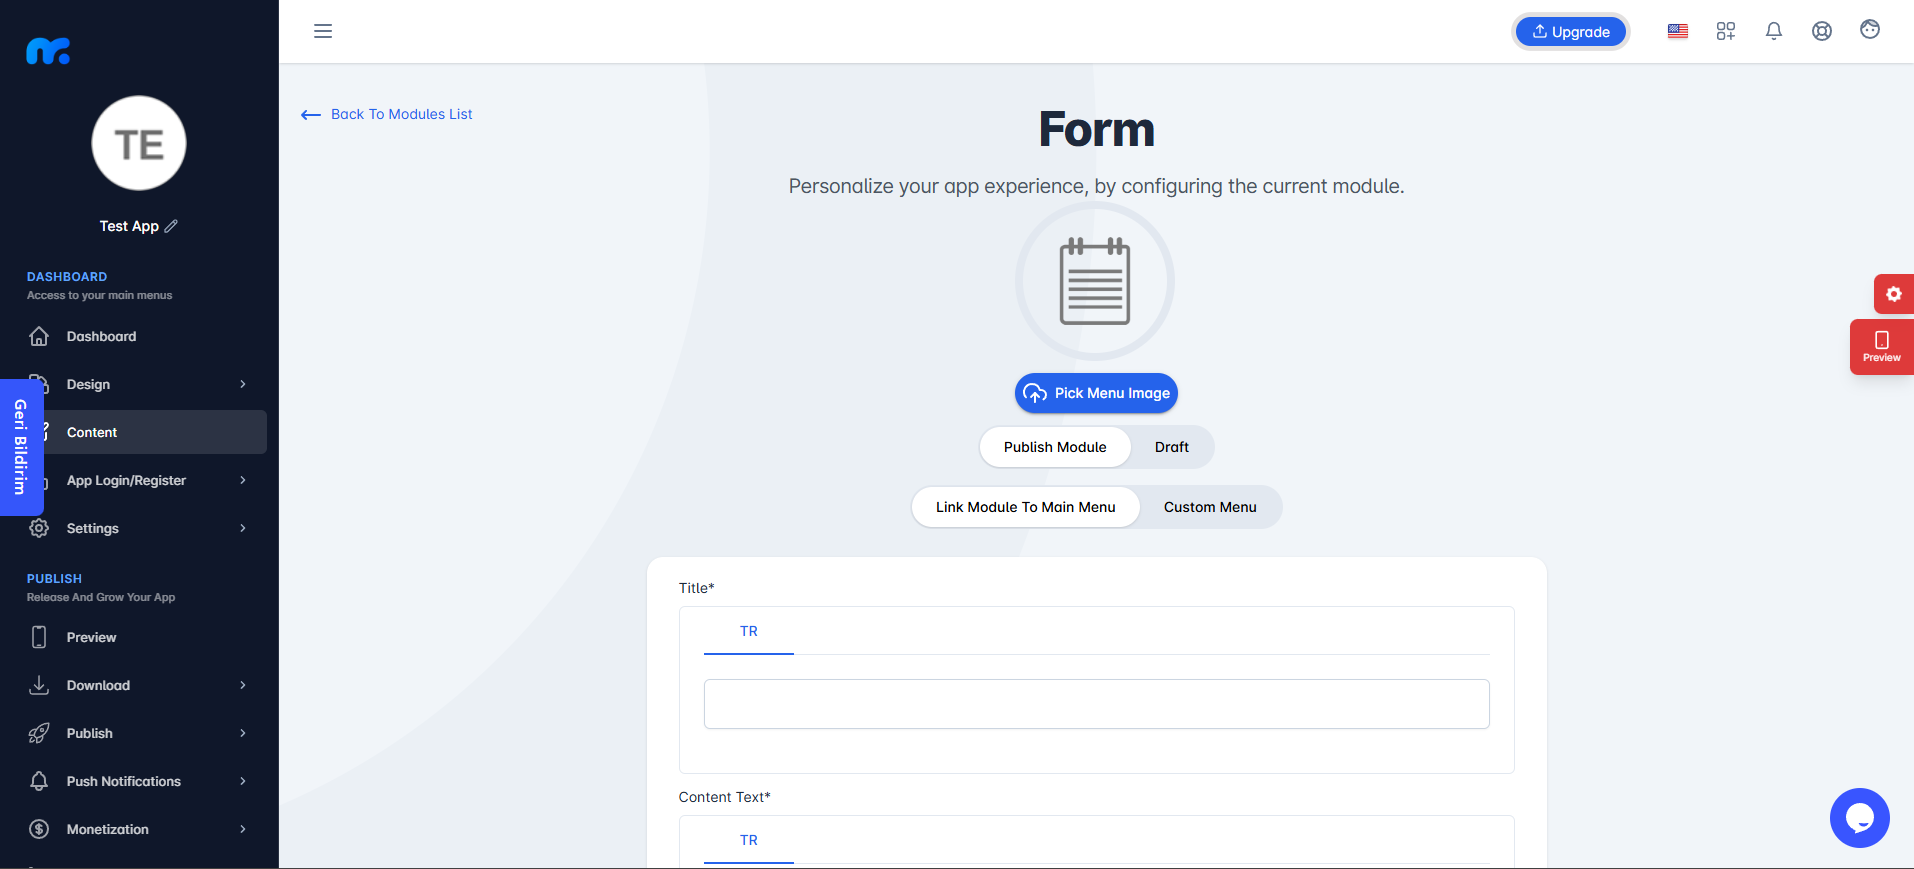
On the screen that appears,
Pick Menu Image: From this section, you can upload the icon that will be displayed for your module within the app. When you click this button, a new screen will appear. You can either choose Custom Image to upload any icon from your computer, or select the Library option to use one of the pre-designed icons provided by Mobiroller.
Publish Module/Draft: In this section, you can decide whether the module will be included in your app. Select Publish Module to make it active in your app. Alternatively, choose Draft to keep the module as a draft. If you select this option, the module will not be visible in your app.
Link Module To Main Menu / Custom Menu: From this section, you can choose where the module will be placed within your app. Select Link Module To Main Menu to display the module directly in the main menu. To use the Custom Menu option, you must have previously added a Submenu module to your app.
If you already have a Submenu module, clicking on the Custom Menu option will show a list of available sub menus. Select the desired sub menu to place your module under it.
Click here to learn more about how to use the Submenu module.
Title: You should enter the name that you want the added Form module to display within the app into this field.
Content Text: In this field, you can enter the content of the Form module and explain its purpose to your users.
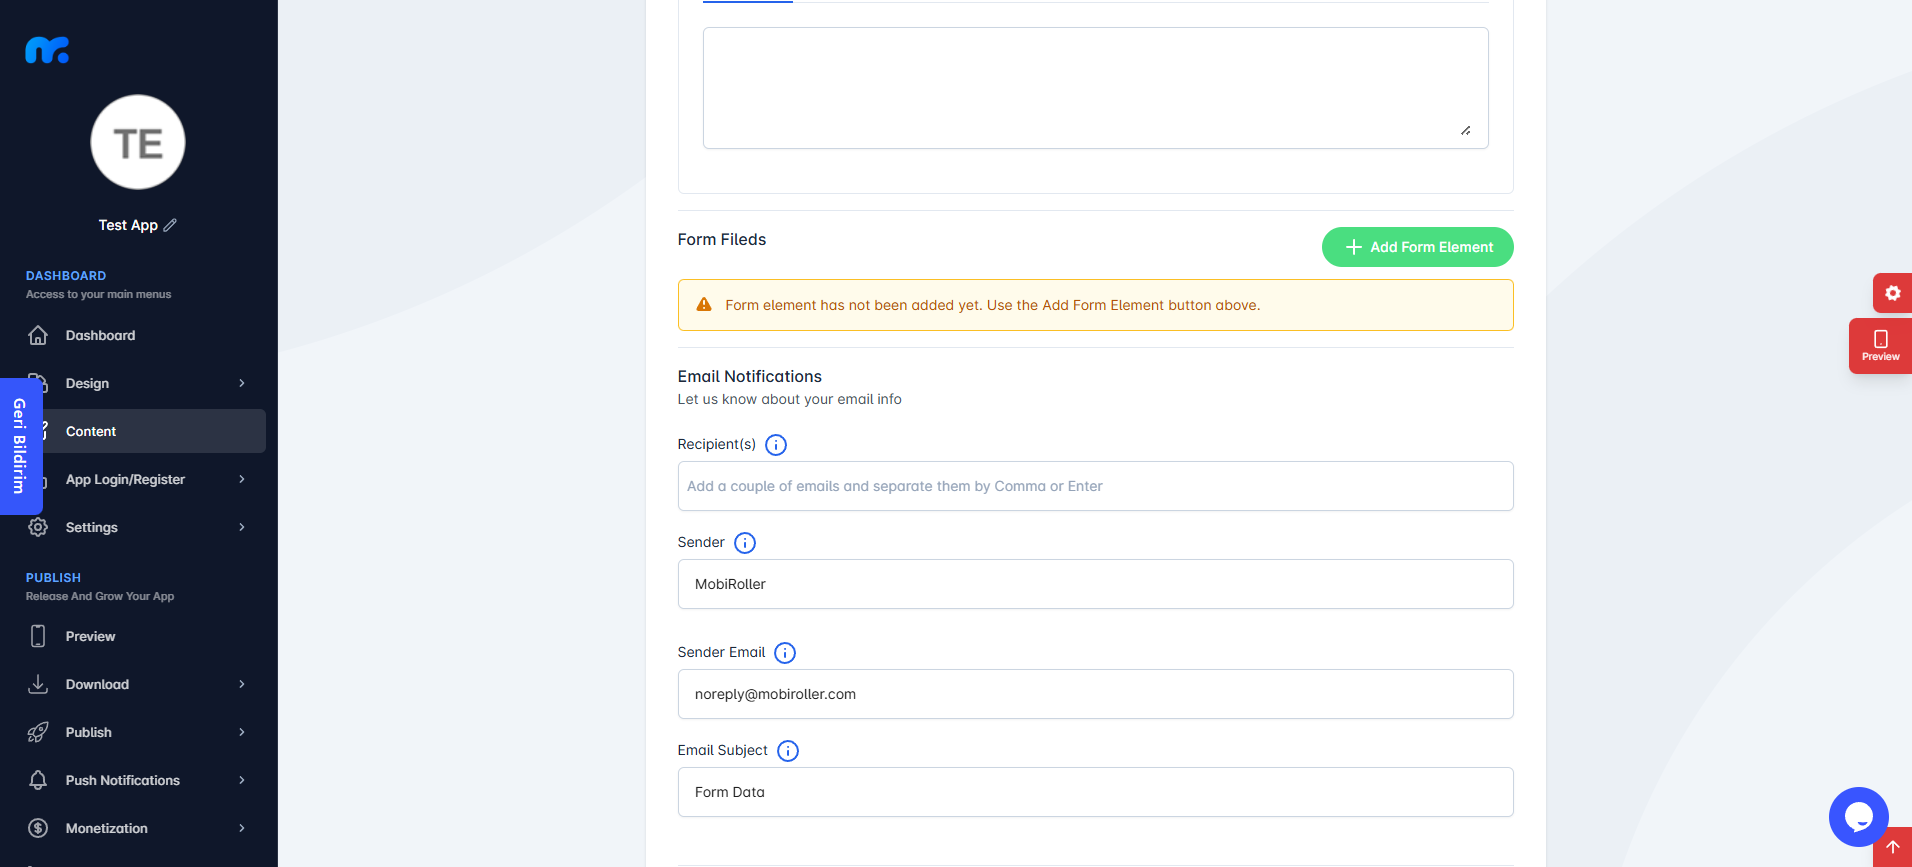
Form Fields: From this section, you can create the questions you want your users to answer and send them to your users.
To add a form element, click the Add Form Element button located on the right side of the Form Fields section.

Form Fields
Form fields are divided into two parts: Title and Type, and the Type options are categorized into seven different types.
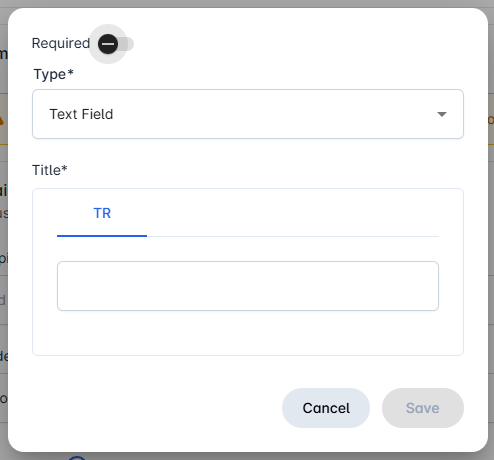
You can make some questions mandatory while leaving others optional. For the questions you want to be answered mandatorily, you can activate the Required option.
Type:
- Text Field: With this option, you can allow your users to respond to your question with text.
- Yes/No: With this option, your users can answer your questions with a yes or no response.
- Dropdown: In this section, you can offer options to your users and allow them to select multiple options.
- Rating: With this option, users can respond to your questions by giving star ratings. You can set the maximum number of stars.
- Date: With this option, you can request users to enter special date information such as their date of birth.
- Time: With this option, you can request users to enter a specific time.
- Photo: With this option, you can allow users to send you a photo, enabling you to collect photo data.
Title: From this field, you can present your question to your users.
Email Notification
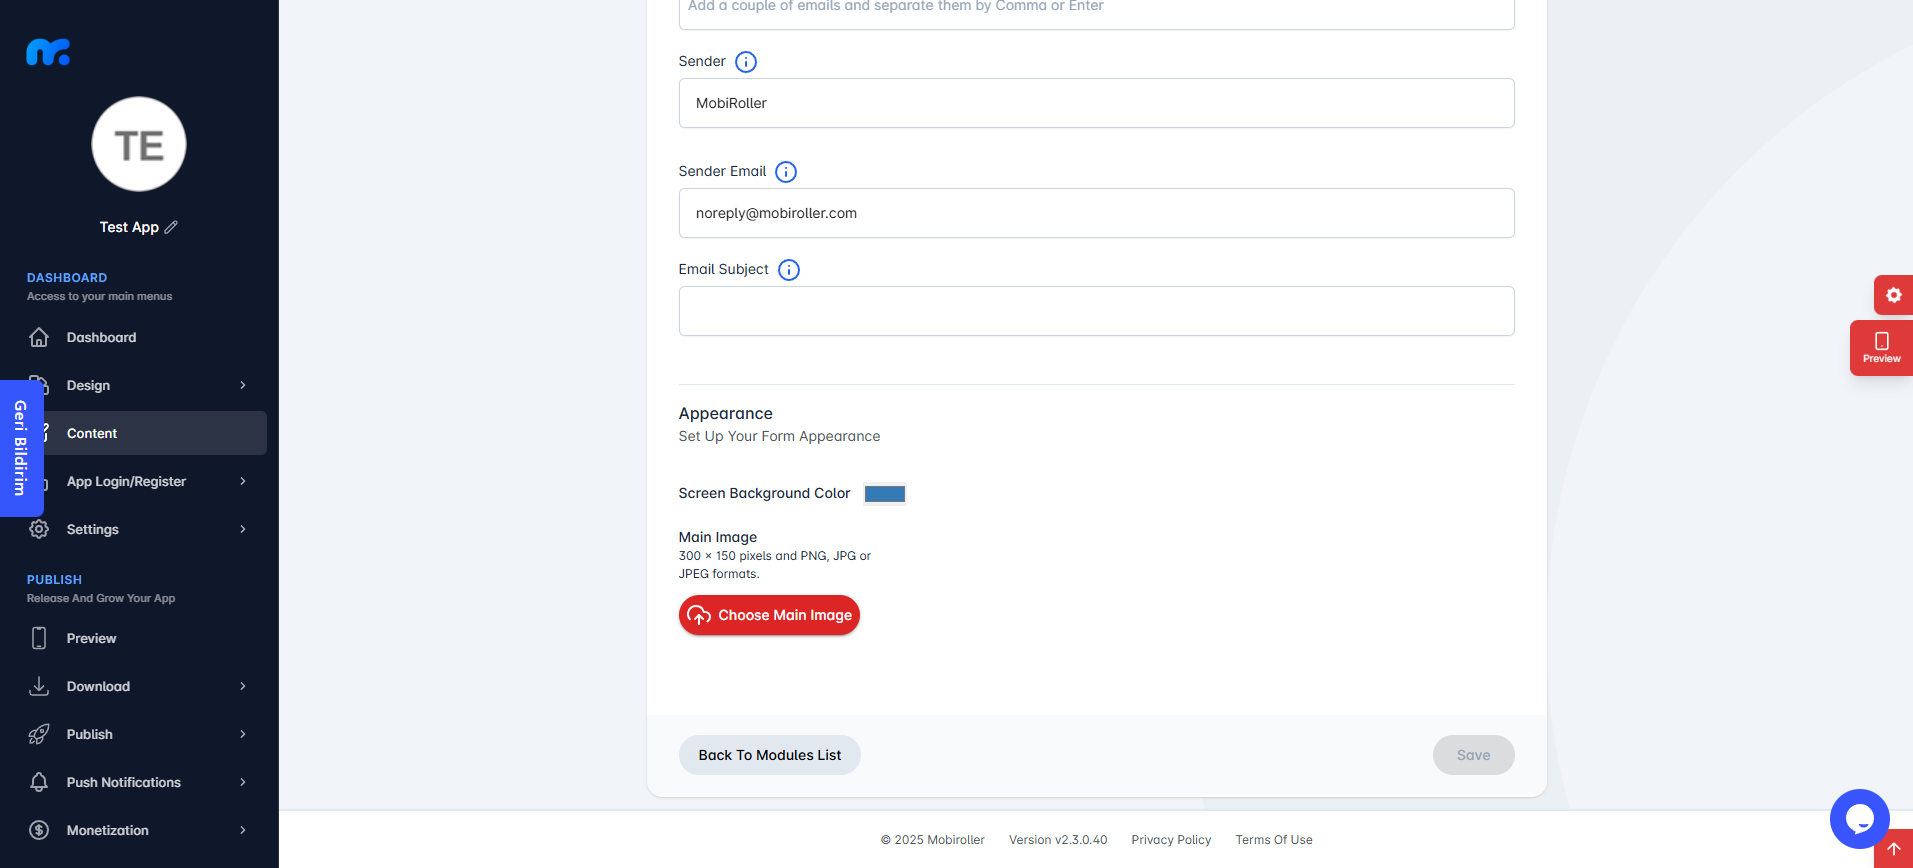
Recipient(s): Through this field, you can forward the information submitted by users via the form to an email address you specify here. If you want to add multiple email addresses, you can separate them using a comma (,) or by pressing Enter.
Sender: This section determines the name that will appear when the submitted form data reaches you via email. You can enter the name you want to be displayed as the sender here.
Sender Email: From this field, you can specify which email address the submitted form emails should appear to come from.
Email Subject: From this field, you can set the subject line under which the form data will be delivered to you.
Appearance
Screen Background Color: You can set the background color of your form screen from this field.
Main Image: If you want to display an image at the top of your module, you can upload the desired image from this field.

After completing the required fields, you can add the Form module to your application by clicking the Save button located at the bottom right.
You can view the Form module you added in the App Content area.
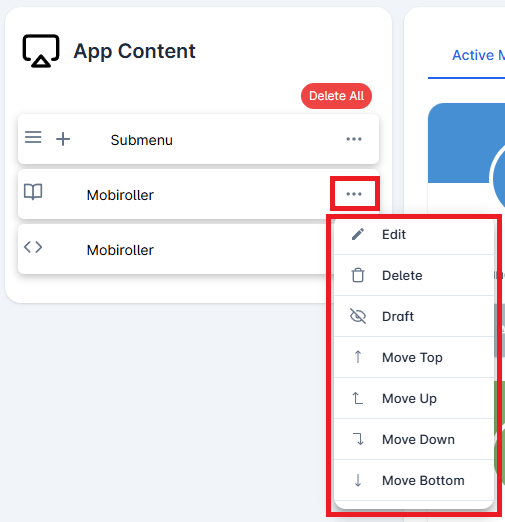
Click on the three-dot icon (…) located on the right side of your module to access options related to your module. In this area, you can perform actions such as editing, deleting, saving the module as a draft, and adjusting the module’s position.