In this article, we explained how to open a Developer Account before Huawei App Gallery publishes apps. You can open your developer account by following the steps in this article.
All developers must have a Huawei ID in order to operate in the Huawei App Gallery. In order to have a Huawei ID, the following membership procedures must be done.
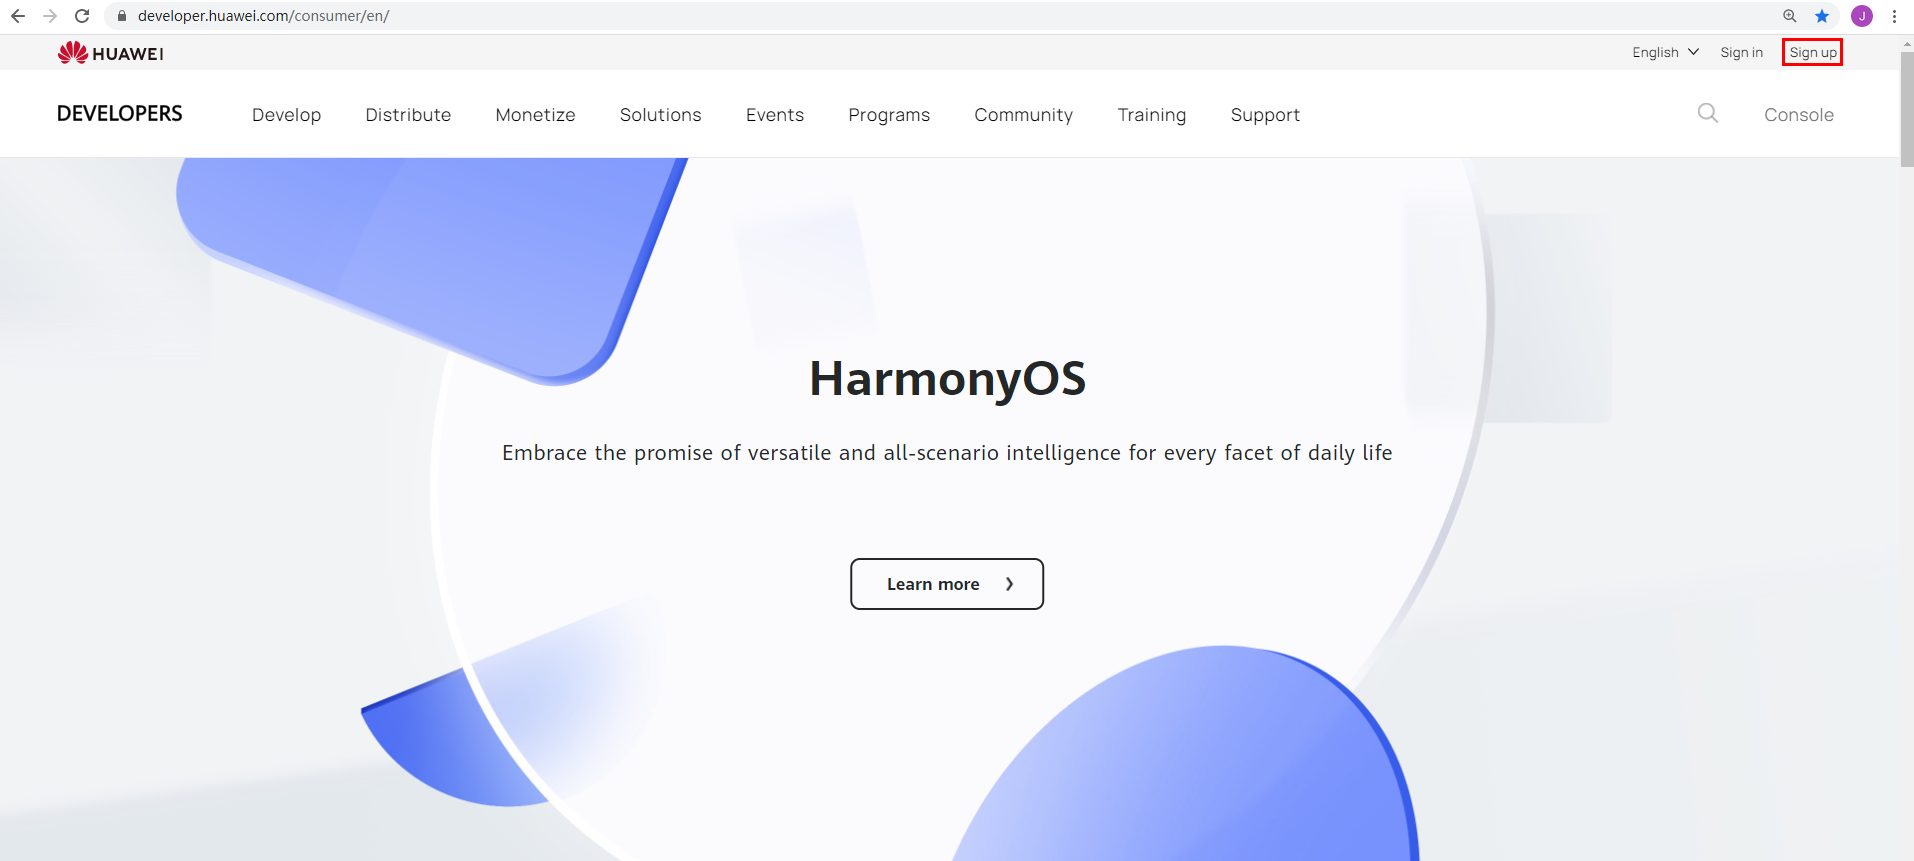
If you have a HUAWEI ID, you can click Sign In to login to HUAWEI Developers.
Step-1: Enter the page here to complete the membership process. Click on the Sign up button in the upper right corner of the page that opens.
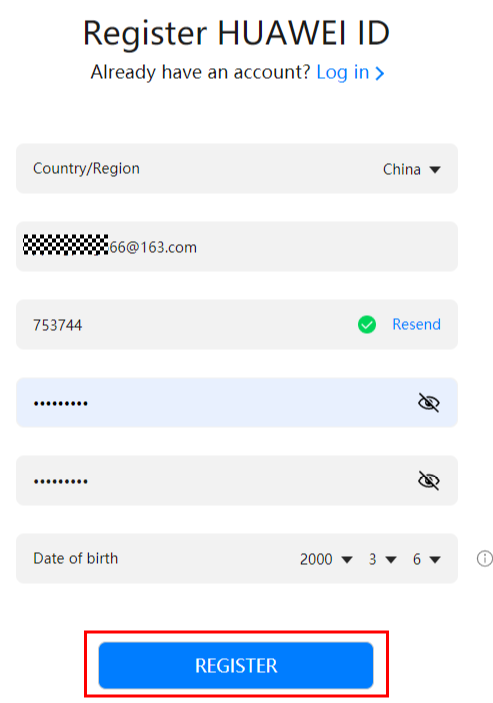
Step-2: You can sign up with your phone number or e-mail address and have a Huawei ID. The screen that opens is the registration screen with your e-mail address.
If you are registering with your e-mail address;
-
Select your country in the Country / Region option,
- Write a valid e-mail address in the mail field,
- Click on the Obtain code button to fill in the email code field. Enter the code from the e-mail address you wrote above here,
- Enter your password to login to the Password field,
- Re-enter your password in the Confirm Password field,
- You must enter your birthday in the Date of Birth field,
After filling in this information, click the Register button to complete the membership step.
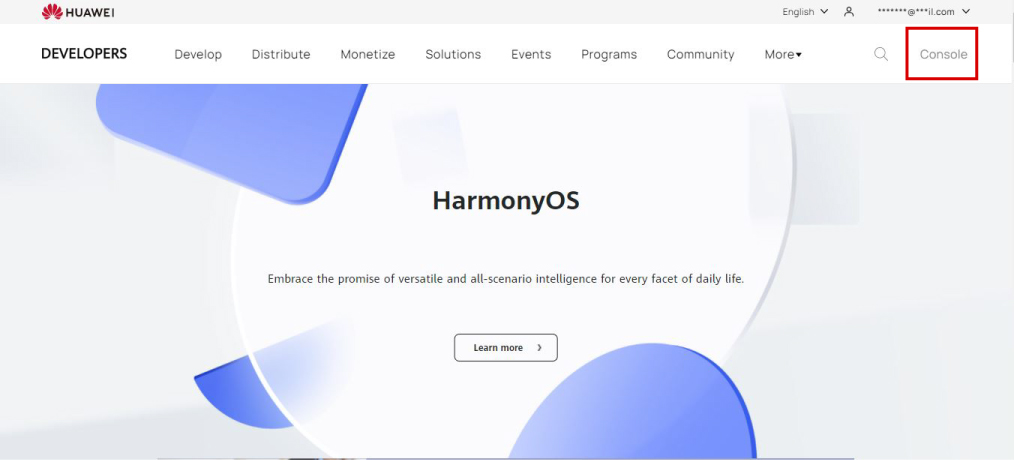
At this step, we have completed the membership procedures. Now we will do the developer account opening process.
Step-3: Click the Console button on the top right of the screen that opens after clicking the Register button.
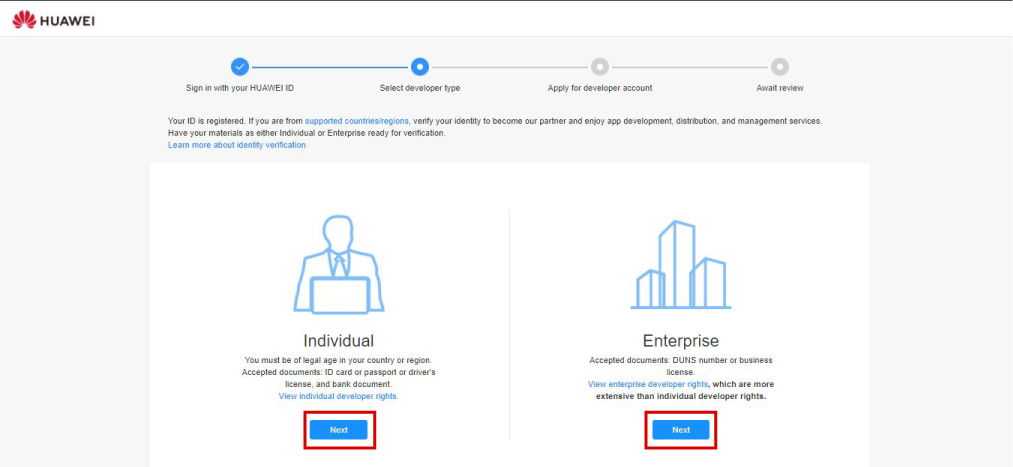
Step-4: You will be presented with two different options on the screen that will open. There are two different types of developer accounts, namely Individual and Enterprise. Here you can choose the option you want and follow the steps.
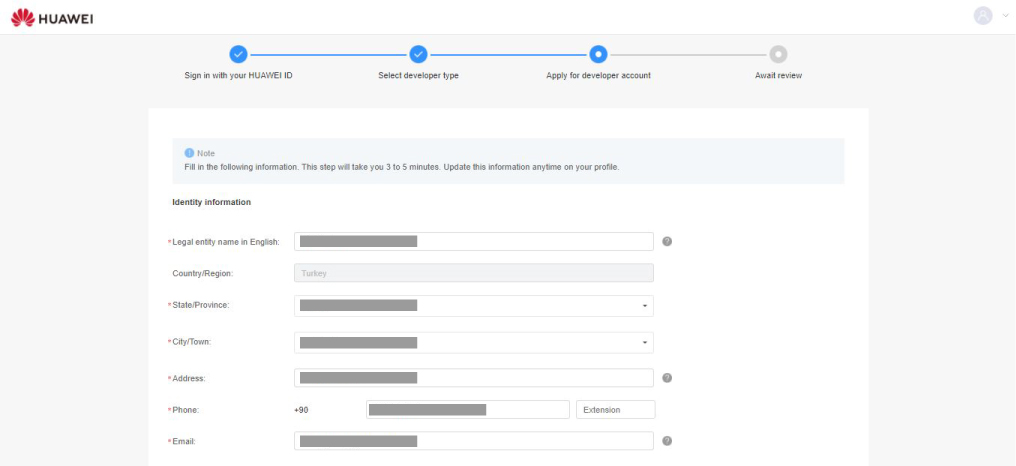
Step-5: When you select the Individual option, you should follow the steps below.
On this screen;
- Legal entity name in English: Name Surname is the field you need to write. You have been asked to write your name in English characters.
- State/Province: This is the field where you must enter your province.
- City/Town: It is the field where you need to enter your county.
- Address: You must enter your full address.
- Phone: You must enter a valid phone number.
- Email: You must enter a valid e-mail address.
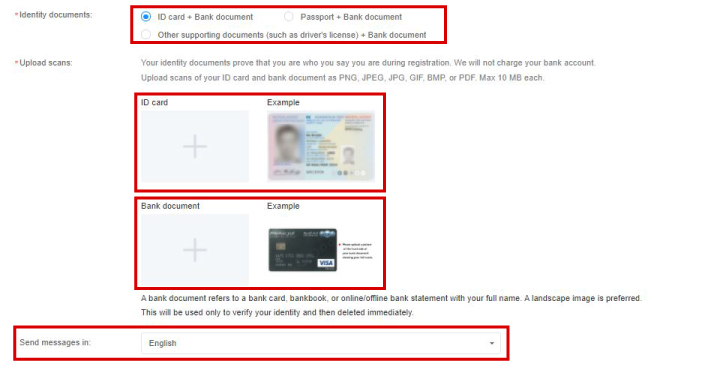
- Identity Documents: In this section, you are given more than one option.
ID Cart + Bank Document: It refers to your ID Card and Bank Document.
Passport + Bank Document: It refers to your Passport and Bank Document.
Other supporting documents + Bank Document: It refers to a legal document representing you and your Bank Document. Here you need to upload the images of the cards you have selected to the loading screen below. - Upload Scans: This is where you need to upload the documents you have selected above. Here you have to upload the photos you took.
Not: Your name and surname must be written on your bank card.
Not: The image you upload can be in PNG, JEPG, JPG, GIF, BMP or PDF format. Its size should not exceed 10 MB.On this screen, it has been stated that your identity card and bank document will be used to verify your identity, and it has been stated that no money will be charged from your bank account.
- Send messages in: From here, you must select the mail language option that will be sent to you. There is no Turkish language option.
Step-6: After uploading the photos, the agreements you have to accept are listed at the bottom. You have to confirm the first two of these steps. The bottom Send me promotions option means that you can be contacted for advertising. If you don’t confirm, you cancel this option.
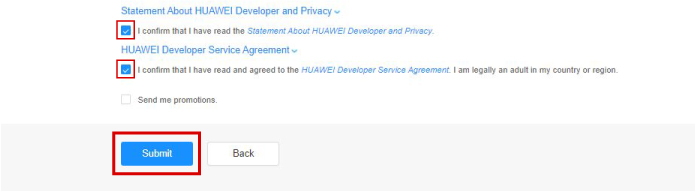
After these operations, click on the Submit button at the bottom.
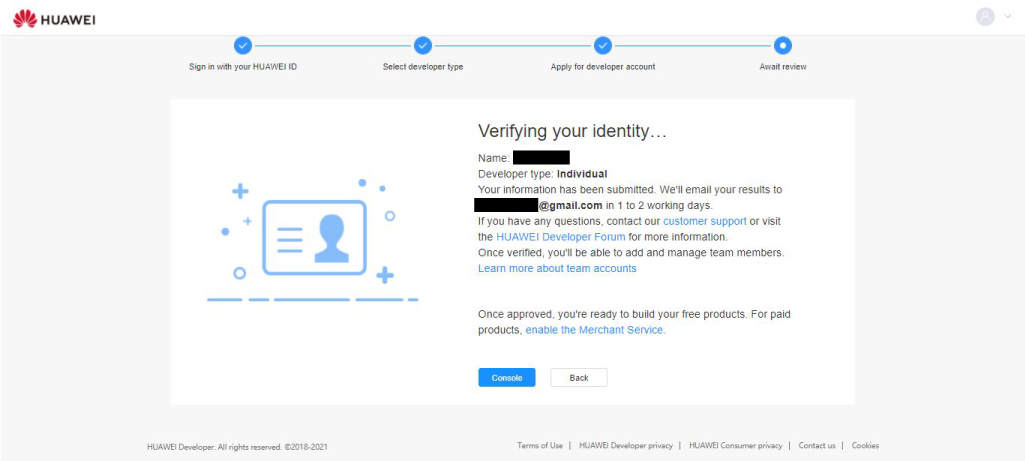
Congratulations 🙂
If you have done all these steps in order, your authentication screen will appear. As indicated on the screen, the evaluation result will be sent to you by e-mail within 1 or 2 business days.
For our support document explaining how to install your application from App Gallery, you can download the 2. How to Upload to App Gallery? you can check our page.