To send push notifications, you need to generate your APK and install it on your Android device. If you haven’t generated the APK yet, you can refer to Step 5: Generate Your Android File (APK) for guidance. Once you’ve generated the APK and installed it on your Android device, you can start sending push notifications.
What is a Push Notification?
Push notifications are messages that you can send to users who have installed your mobile app.
When you send a push notification, your message will be delivered to your users as long as they have an internet connection, or when they activate their internet connection.
In addition, with the MobiRoller platform, you can direct your users to a specific screen within the app with the push notification you send, and show them the screen you want them to see at that moment. This allows you to deliver your activities, campaigns, last-minute news, or many other types of content directly to your users. Moreover, if your app supports multiple languages, you can send messages tailored to the language used by your users.
How to Send a Push Notification?
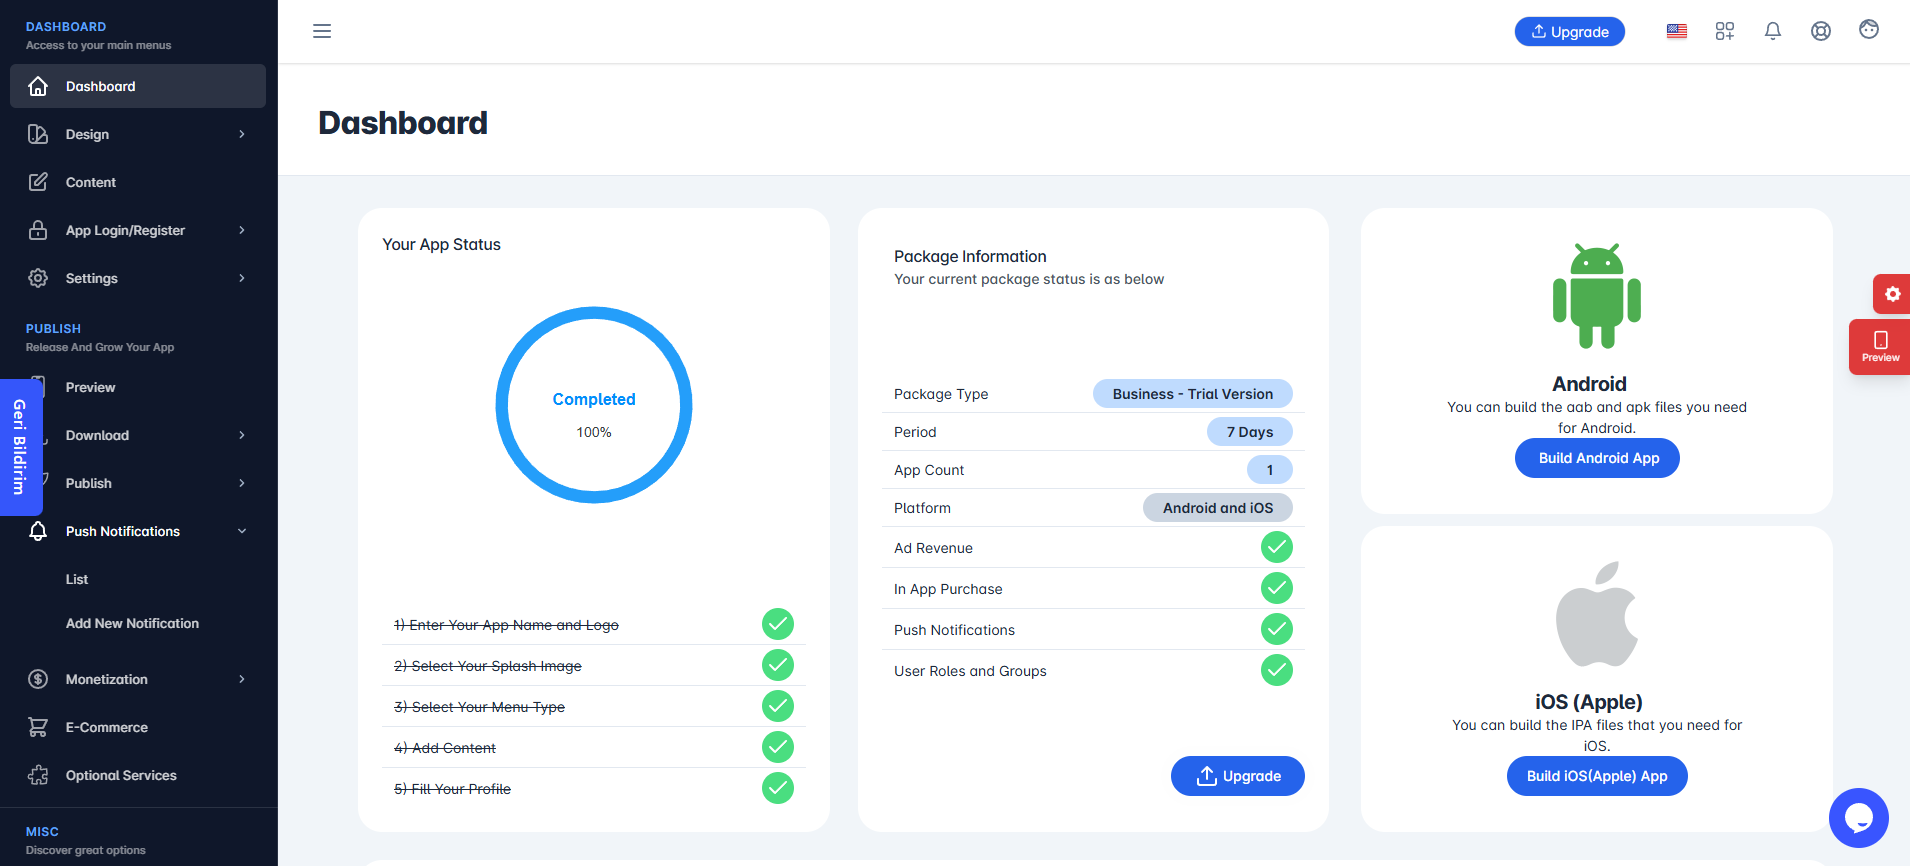
To send a push notification, click on the Push Notifications section in the left menu of your panel. In the opened section, click on the Add New Notification area.
Additionally, by clicking on the List section in this tab, you can access the details of the notifications you have previously sent.
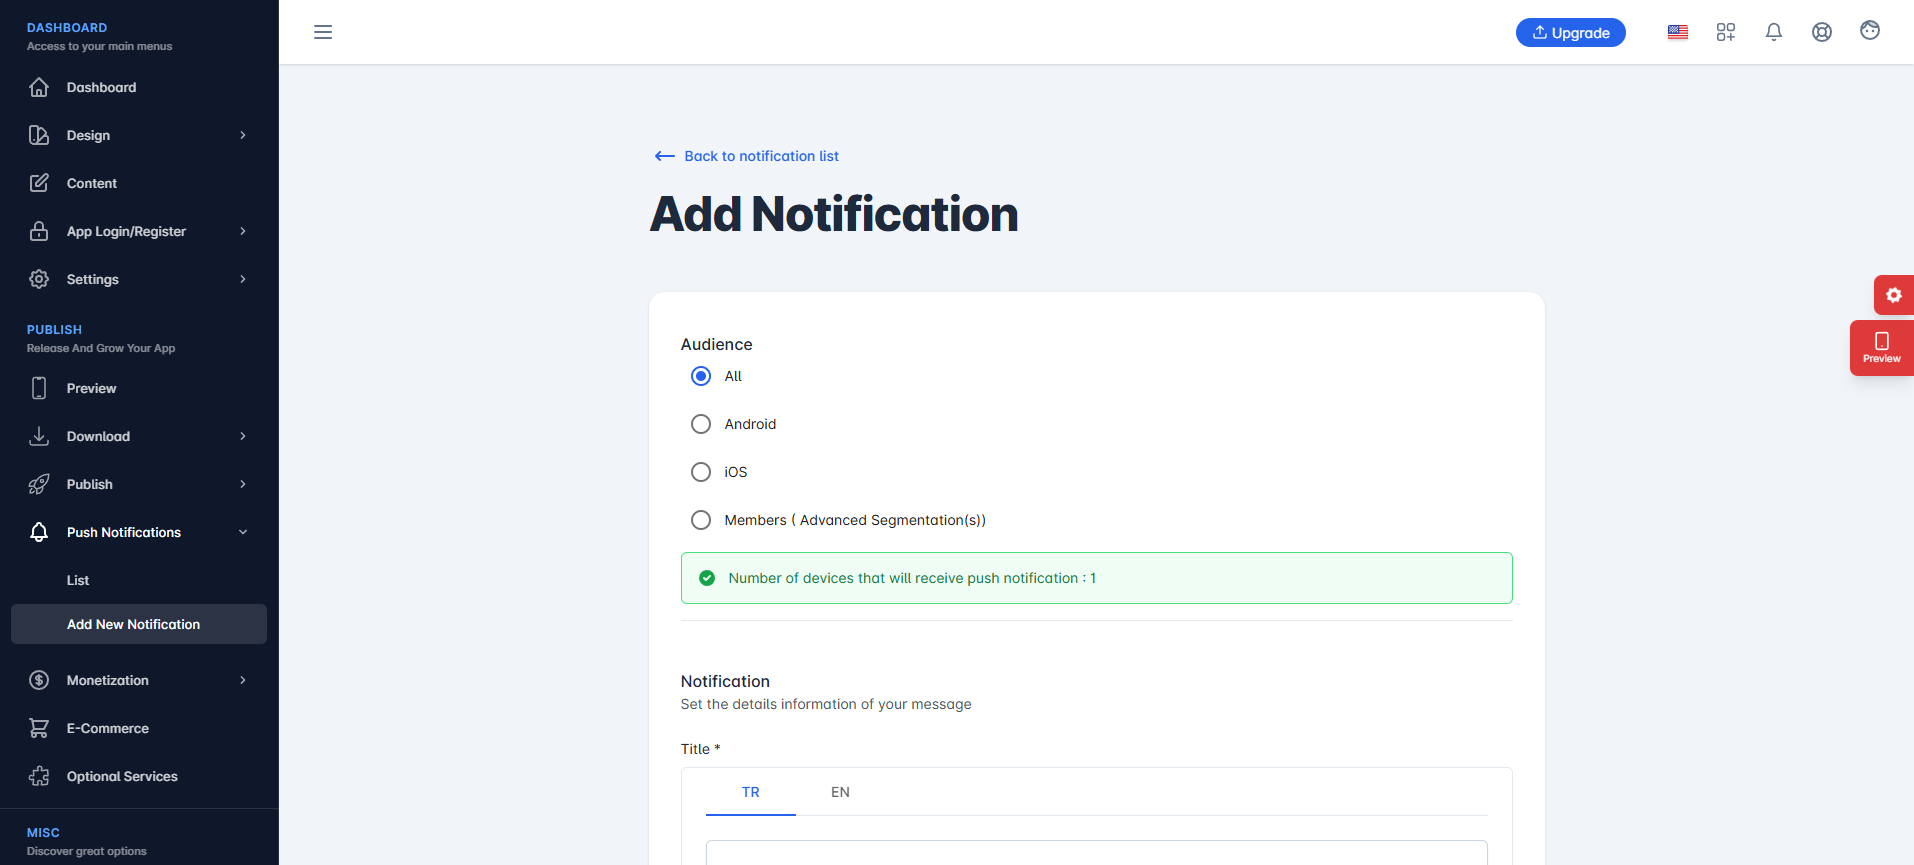
When you click the Add New Notification button, if the message Number of devices that will receive push notification: 0 appears, it means your app is not installed on any device. Therefore, your notification will not reach any users. Once your app is installed on at least one device, the background of the message will turn green. As your app is installed on more devices, this number will increase. However, if it is uninstalled from a device, the number will not decrease.
Audience

Who Should Receive It: From this screen, you can choose to send your message to All Users, only Android users, only iOS users, or your registered Members.
By selecting the Members option, you can segment your audience and target specific user groups when sending notifications.
Notification
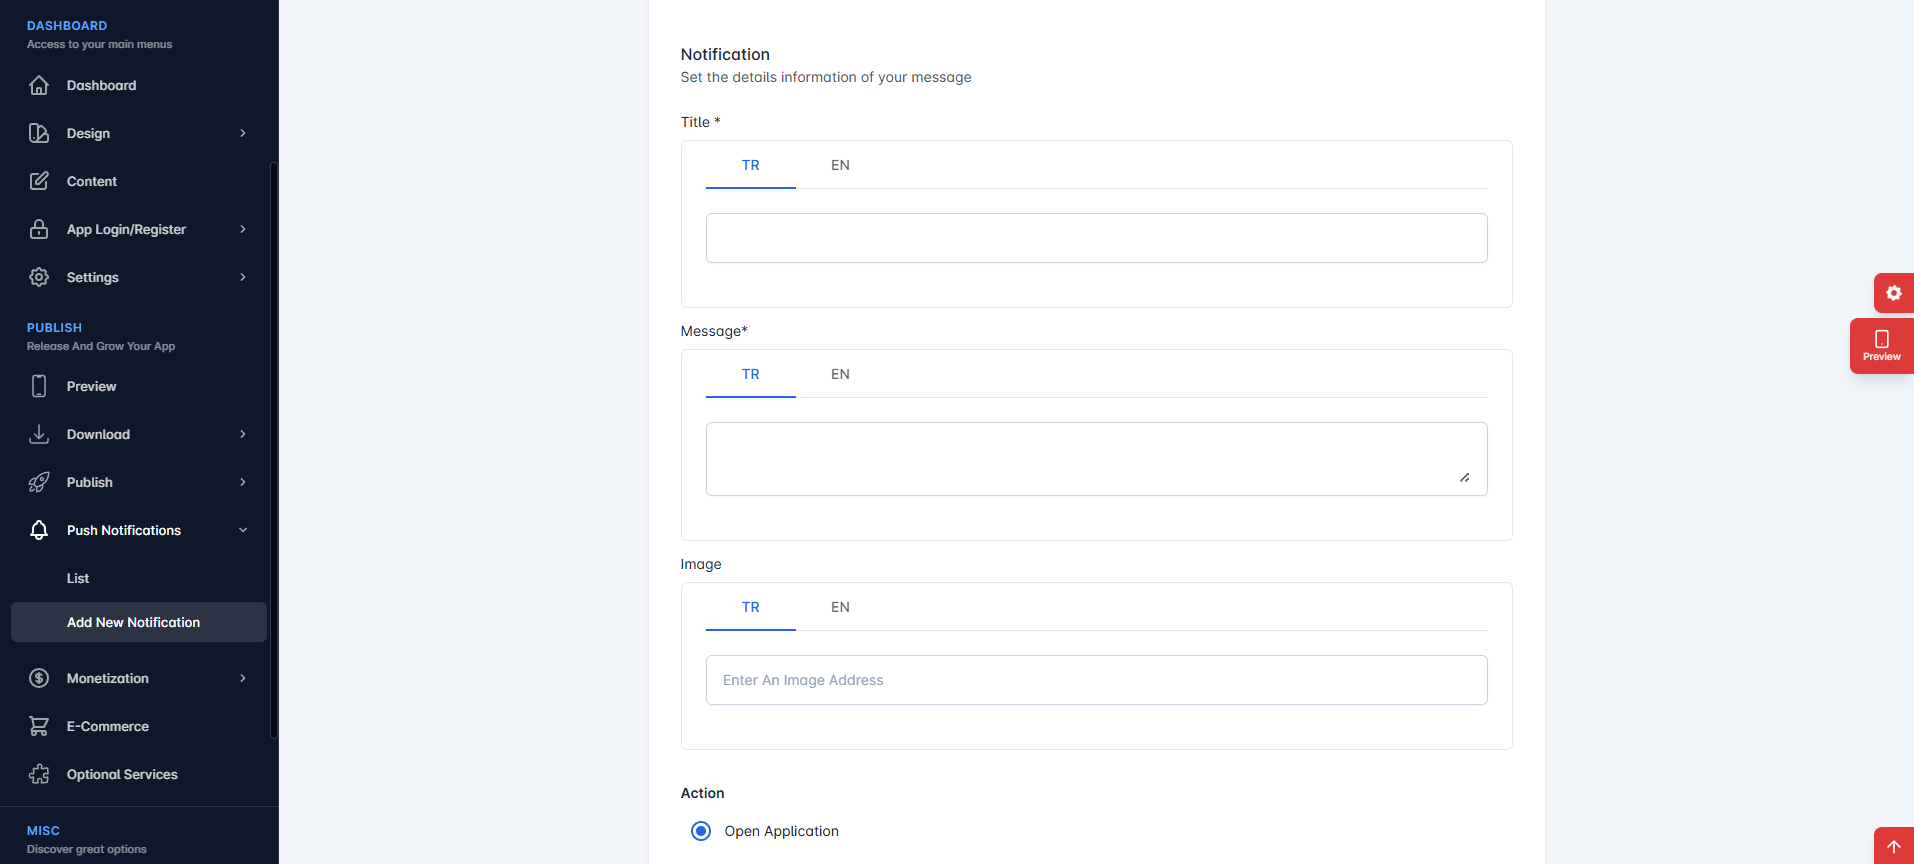
Title: This feature is currently supported only on Android.
You can enter a title for your push notification here.
Example: 30% Off!
Message: Write the message you want to send to your users in this field.
Example: “Enjoy 30% off all t-shirts, exclusively on our mobile app!”
If your app supports a second language, you must enter the text in both fields accordingly.
Image: This feature is currently supported only on Android and requires at least a Pro Package. You can attach an image to your notification. The image must be provided as a link. You can use image hosting platforms (e.g.,imgbb.com) or copy the image URL directly from your website. Separate links can be added for each supported language if your app is multilingual.
Action
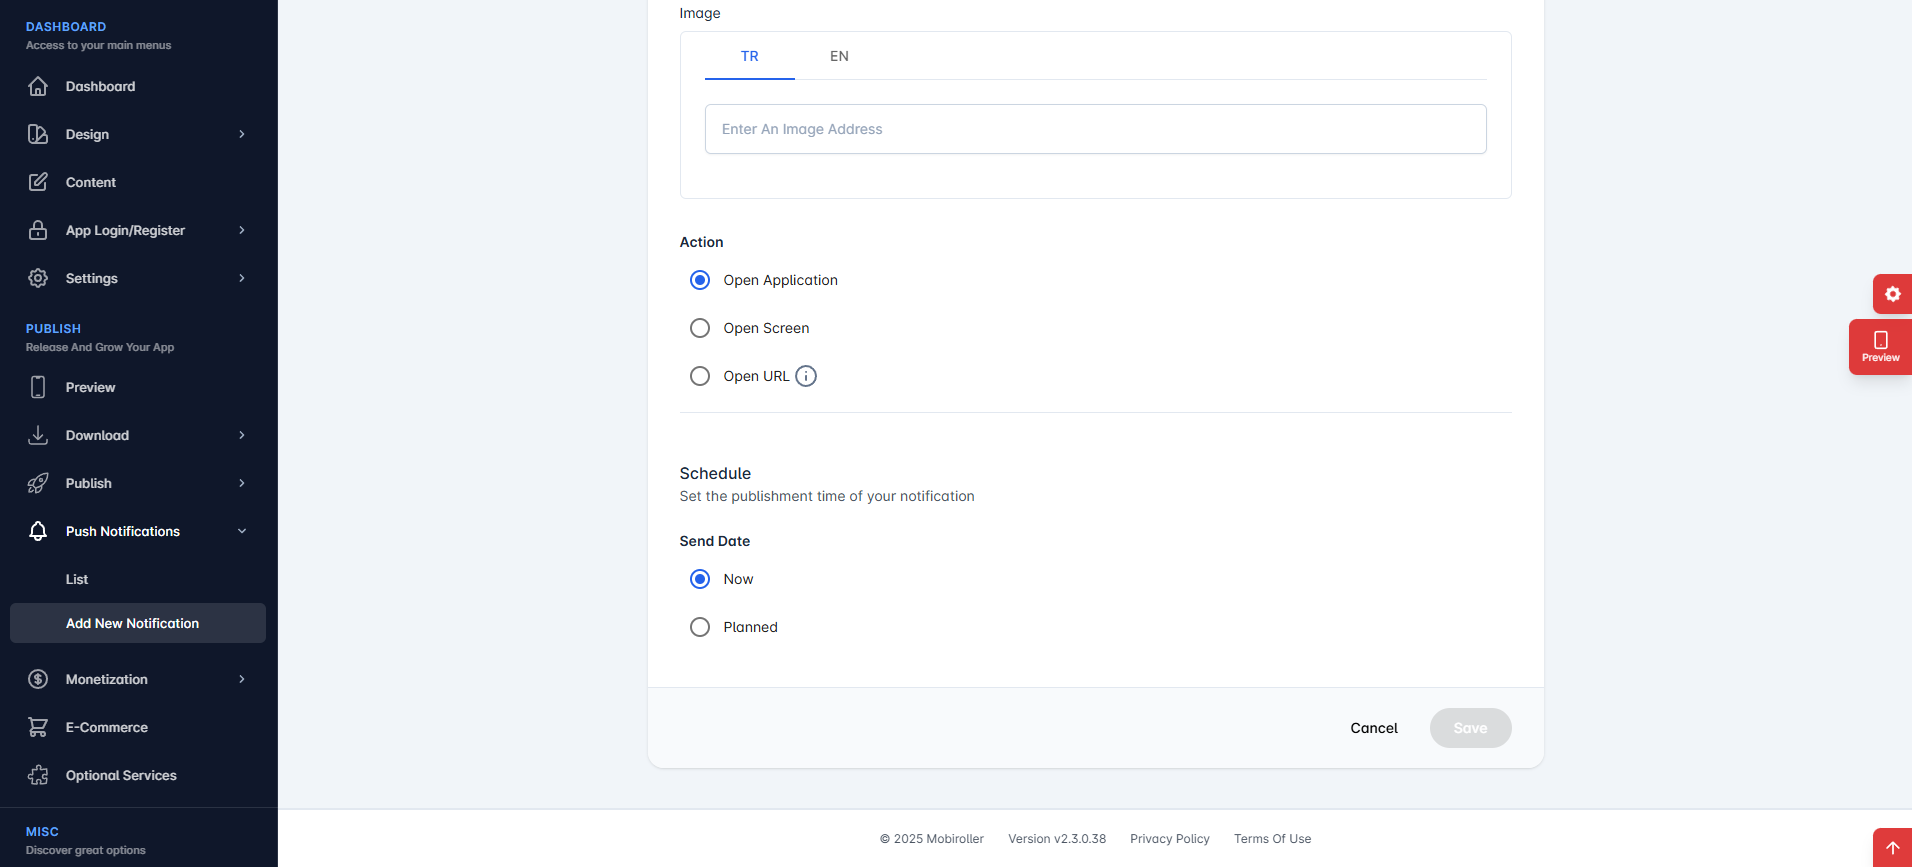
Open Application: If you select this option, your app’s home screen will open directly when users tap on the push notification.
Open Screen: If you select this option, a specific screen within your app (which you choose) will open directly when the user taps the notification.
Open URL: This feature is currently supported only on Android and requires at least a Pro Package. If selected, the specified web address will open in the browser when users tap the notification. You can also provide separate URLs for each supported language.
Schedule

From Send Date section, you can schedule when your push notification will be sent.
Now: You can instantly send your notification as soon as you write it.
Scheduled: You can schedule your notification for a future date and time. Scheduling is only allowed until your monthly or yearly subscription ends. You cannot select a date beyond your package expiry.
When setting the time for your notification, you can also choose the appropriate time zone to ensure your message reaches users at the right moment. (Example: Turkey is in the GMT+3 time zone.)
Once all the required fields are filled in, click the Save button to proceed.
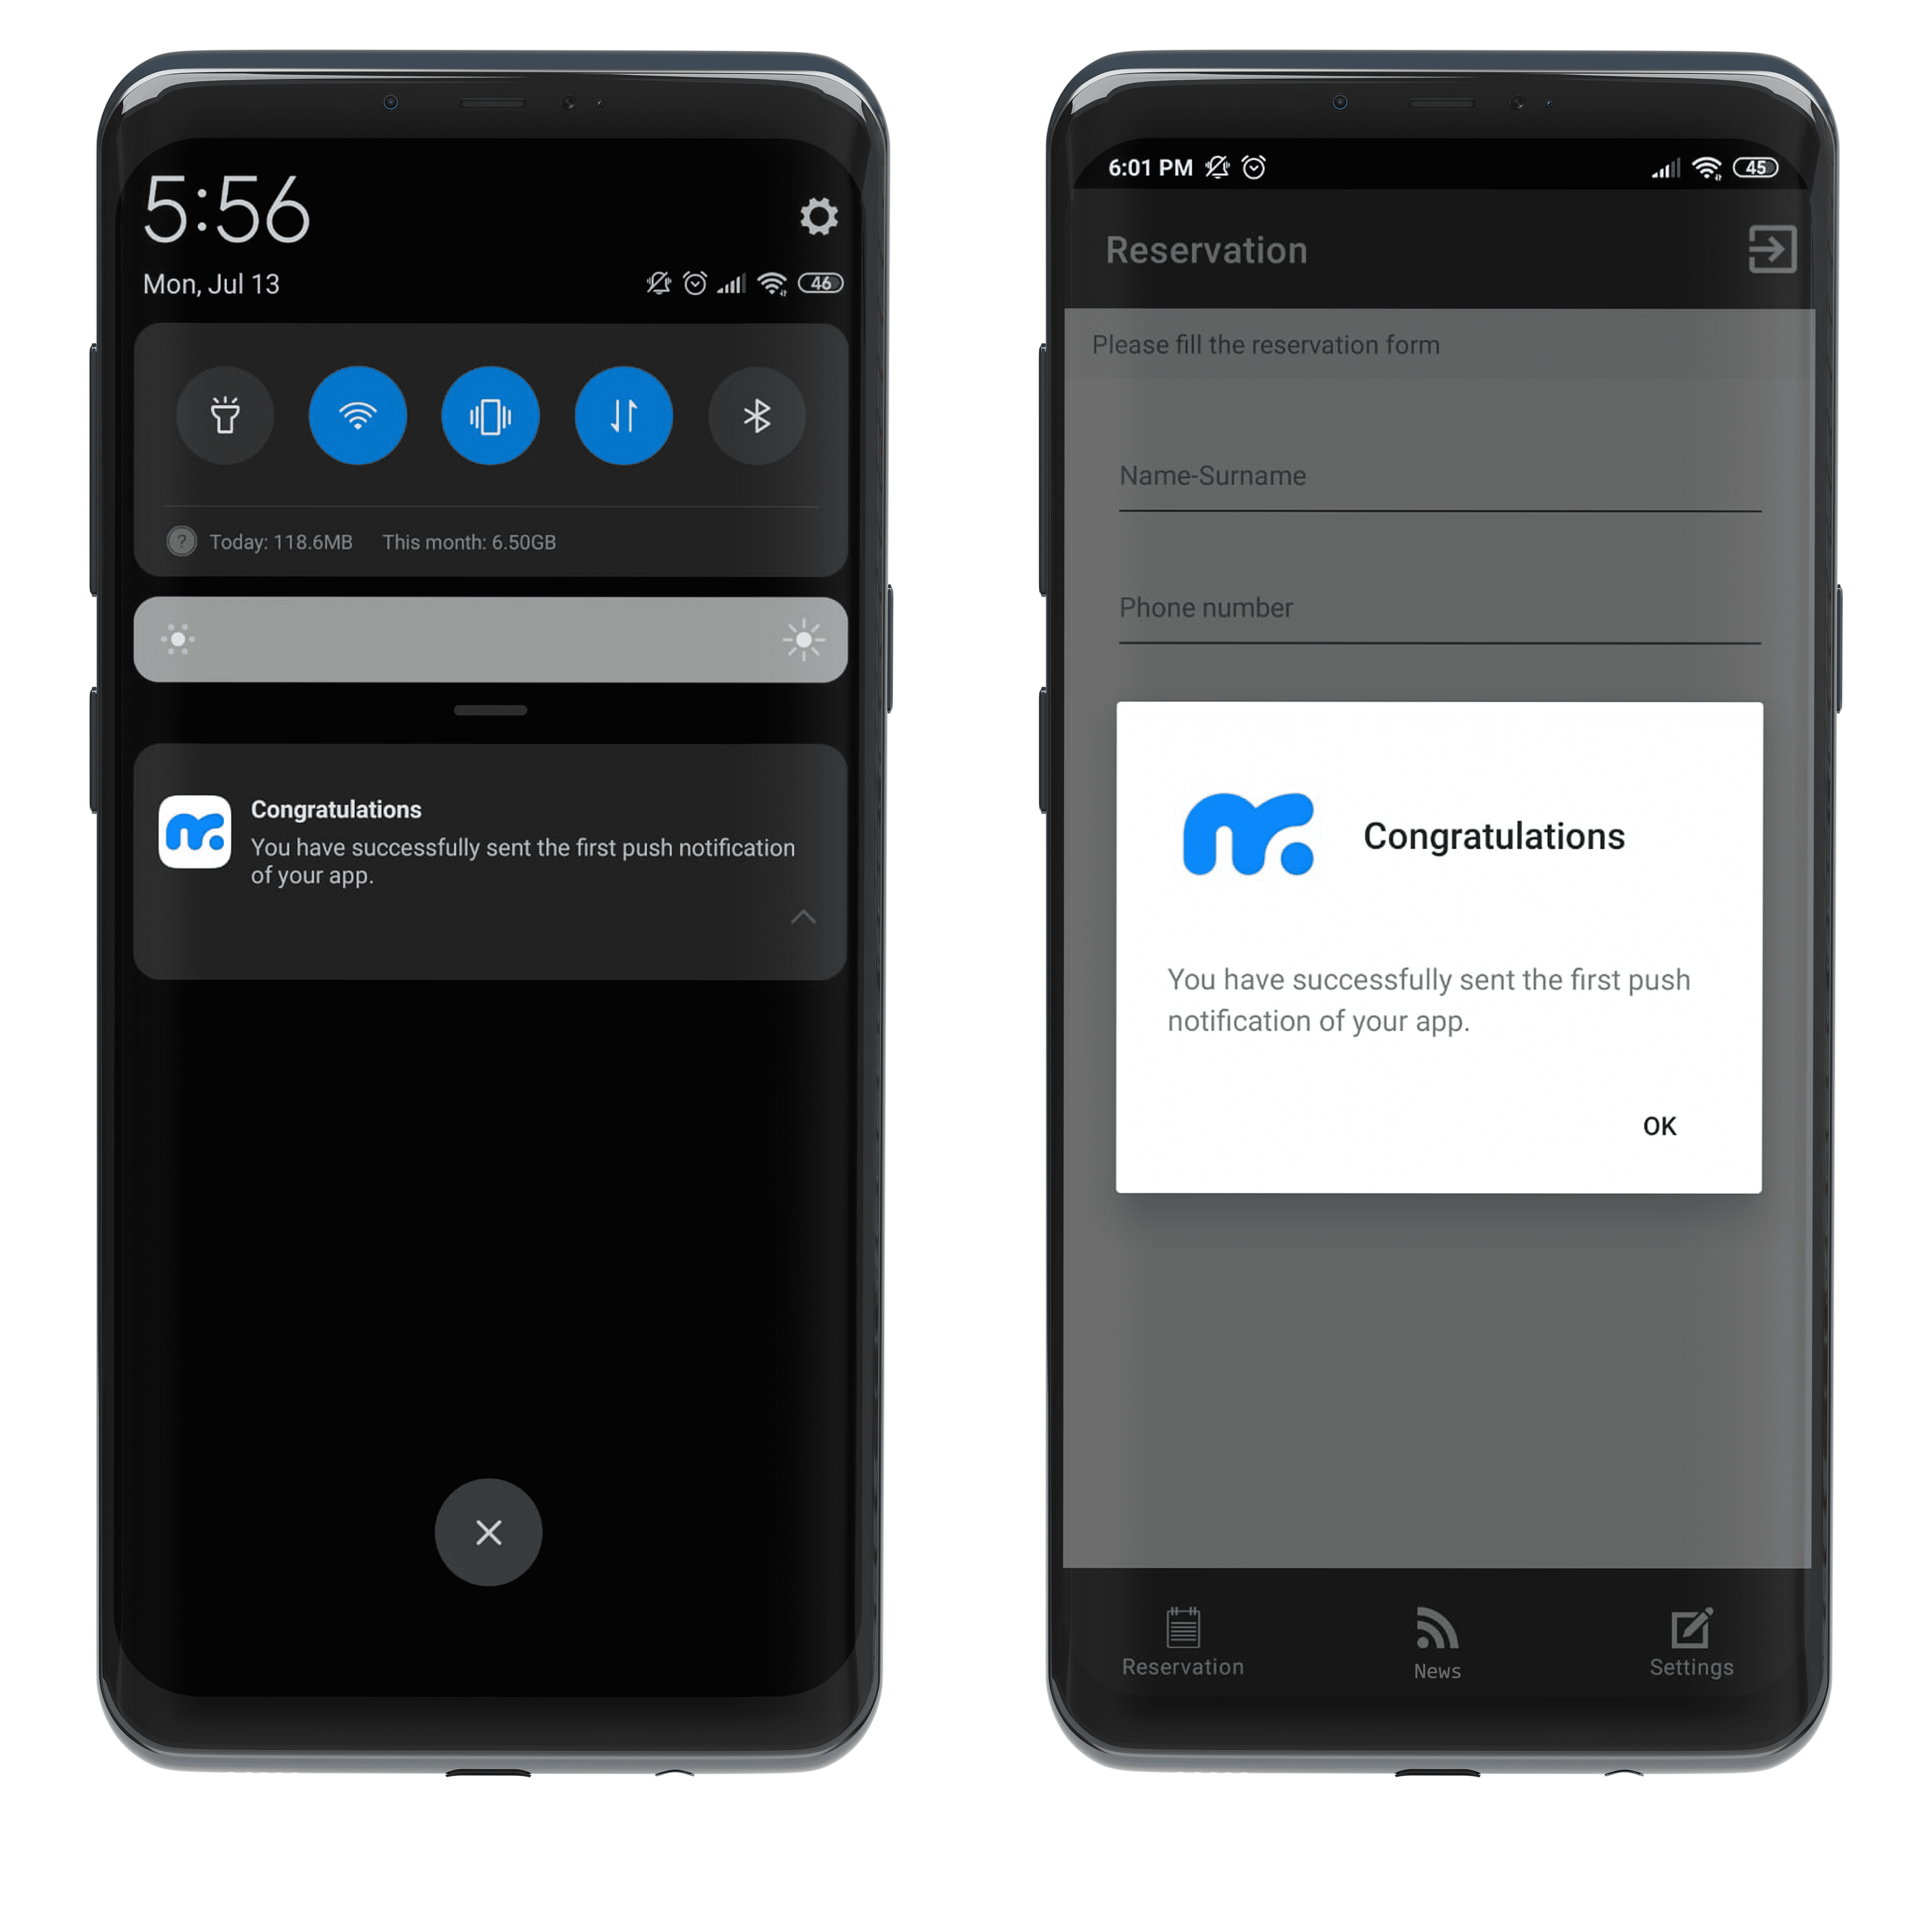
This way, the push notification reaches your device. When you tap on it, the app opens directly. If a specific screen was set for redirection, you’ll be taken there instantly.
Now that you’ve completed the push notification step, you can move on to Step 7: Publish Your App On Markets. Check out the guide to start publishing your app on app stores.